How to – S-sleeve / Hur man gör en S-ärm

It is sooooo complicated to do a S-sleeve!
I have heard that several times. And well… It is easier to do a t-shirt kind of sleeve, just straight edges and then a small gusset (or dart) in the armpit.
That is why I do recommend that for beginners.

But then we have the ones that can draft a modern sleeve in their sleep, but can’t get their head around doing an S-sleeve.
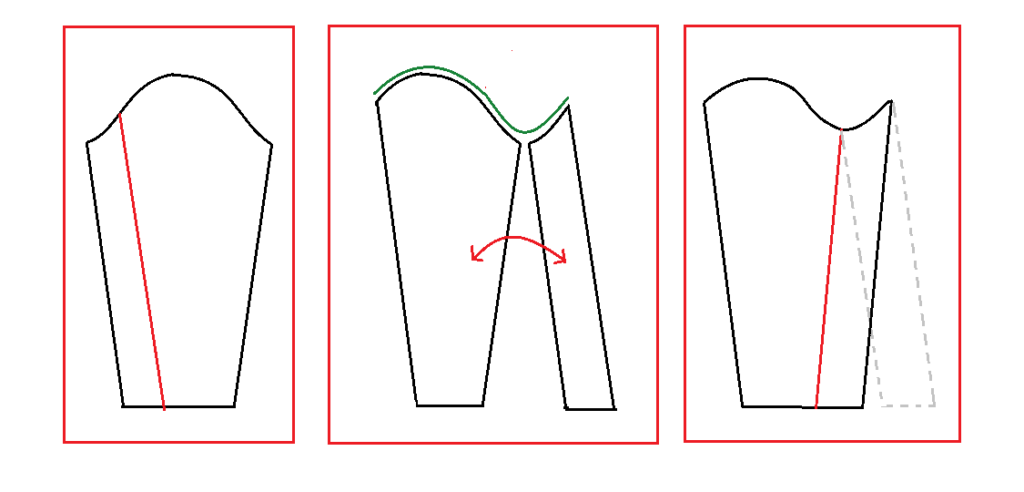
How will you get around that problem? Well, you can start by taking a modern sleeve pattern, taping the edges together and then cutting it where you want the seam.

But then you are left with a modern problem. The modern armhole where the seam for the sleeve is out on your shoulder and not inside of the shoulder joint. And it is also much bigger of a hole then the medieval one.

* * * * * * * * * * * * * * * * * * * * * * * * * * * * * * *

Det är sååååå svårt att göra en S-ärm!
Det har jag hört många många gånger. Och ja, det enklaste är ju en vanlig t-shirtärm, bara raka kanter och sen en liten kil (ärmspjäll) i armhålan.

Men sen har vi ju de som kan rita upp ett modernt ärmmönster i sömnen. Men som inte kan förstå principen med en S-ärm.
Hur kommer man runt det problemet? Tja, man kan ju börja med att ta ett vanligt modernt ärmmönster, tejpa ihop kanterna och klippa upp där man vill ha sömmen.

Men, då sitter du fortfarande med lite moderna problem. Ett modernt ärmhål har ärmsömmen ute på kanten av axeln och inte innanför axelleden. Och du har också ett mycket större ärmhål än vad som var vanligt på medeltiden.
Start with creating the bodice of your garment. Keep the armhole tight around the arm all the way up in your armpit, but you should be able to rotate your arm without it moving the fabric around it (so the shoulder seam should stop right before your shoulder joint).
I don’t have any pictures of this but it is well described at cottesimple.com in: A curved front seam.

Börja med att få till den övre delen av din kjortel och håll ärmhålet tight runt armen.
Du ska ha tyg ända upp till armhålan, men inte ut på axelleden utan du vill att sömmen där ärmen sitter fast ska hamna på insidan av axelleden. Om du roterar armen så ska du liksom inte hindras av tyget någonstans runt axeln.
Jag har tyvärr ingen bild på detta, men det finns bra beskrivet på cottesimple.com under A curved front seam.

* * * * * * * * * * * * * * * * * * * * * * * * * * * * * * *

After fitting the bodice, I take 2 pieces of A4 paper and taping them together, long edges together (or you can us an A3, but almost everyone have some form of A4 at home).
Fold the edges in towards the taped middle just to create guidelines. Open it and fold down the center taped line.
Put the paper on a flat surface and take your bodice and put the armhole part with the side seam on the guideline and draw exactly how the curve looks, for about 5 cm on both sides of the middle fold.

När du har passat in och sytt överdelen på kjorteln så tar du 2 A4-papper och tejpar ihop dom, långa sidor mot varandra. (Eller så tar du ett A3, men A4 brukar alla ha hemma).
Vik in kanterna mot mitten/tejpade delen för att skapa guidelinjer. Vik upp och vik sen mitt på, vid tejpen alltså.
Lägg pappret på en plan yta och ta din överdel och placera sidosömmen på papprets guidelinje. Släta ut tyget och rita ut kurvan av ärmhålet 5 cm på varje sida av mittlinjen
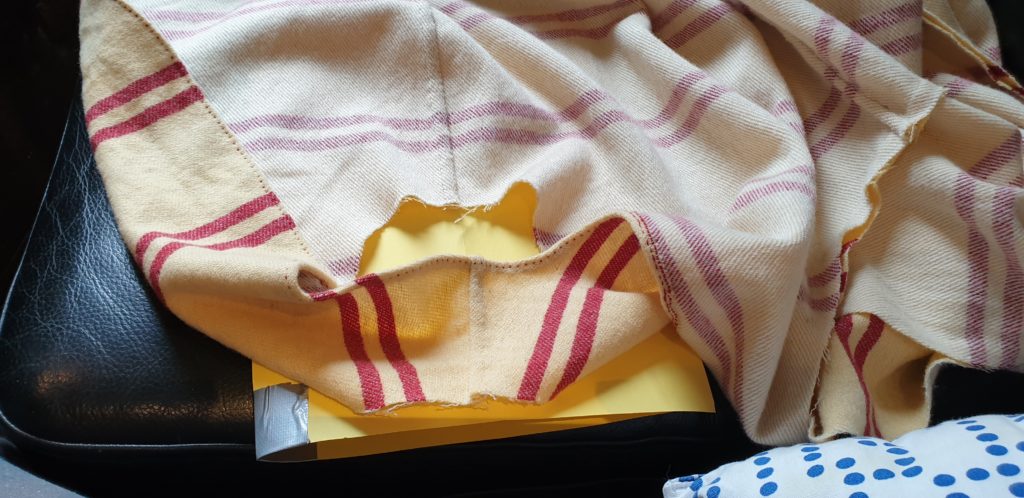
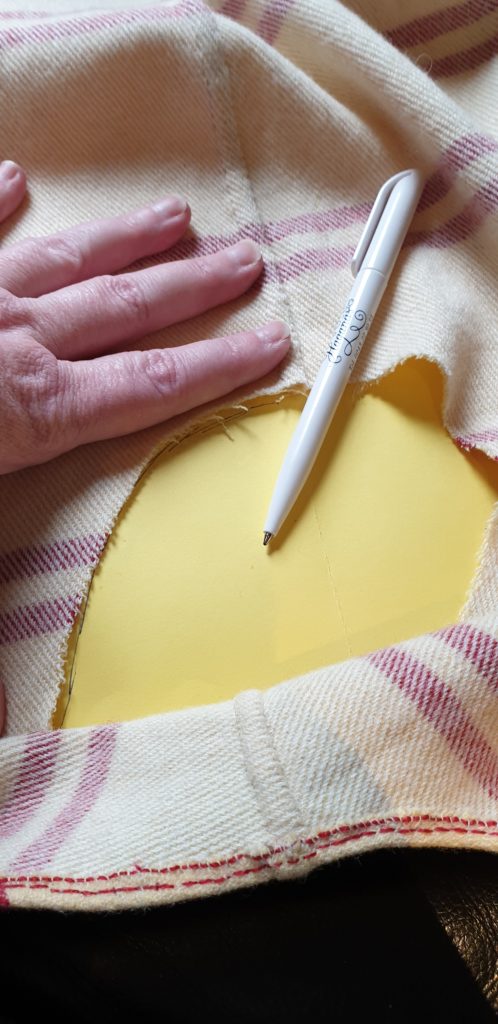
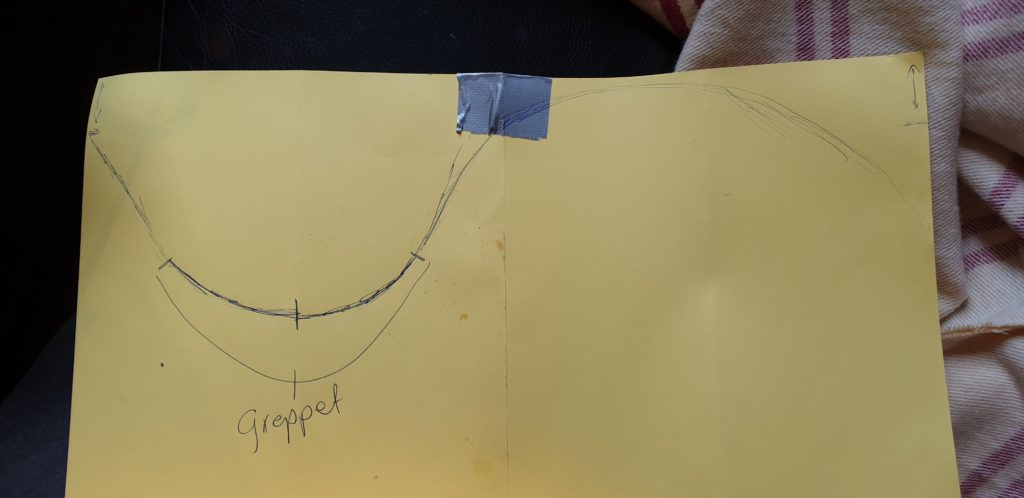
Now you can either draw a curve on freehand or take your bodice and use the shoulder part to use as a guide for the upper curve.
The total length of the S-shape should be as many cm/inches as your armhole is around if you measure it on the seam-line (not where it is cut because it will be shorter if you measure at the edge then it will be if you measure where you will stitch).
I have made a note on the picture ”greppet” (swedish), it is the part that is exactly how the armhole looks on the bodice.

* * * * * * * * * * * * * * * * * * * * * * * * * * * * * * *

Nu kan du antingen rita ut den övre kurvan på frihand eller använda axel-delen på din kjortel som mall.
Totala längden på S-kurvan ska vara lika lång som omkretsen på ditt armhål vid sy-linjen. Inte där du har den råa kanten. Så om du har 1 cm sömsmån så mäter du alltså 1 cm från kanten och runt.
Delen där det står ”greppet” är den del som är exakt likadan som delen i armhålan på ditt plagg.
I then can cut the sleeve part after this curve. The width of my upper arm is the width of the fabric + seam allowence and usually some extra width for movement, but I am getting thinner so I made this skin tight just so it can fit even when I have lost a bit more weight. So this curve is longer then my fabric is wide and therefore I added a gore to.

* * * * * * * * * * * * * * * * * * * * * * * * * * * * * * *

Sen klipper jag ut ärmen efter kurvan jag precis skapat. Normalt sett ska tyget vara ärmens omkrets + sömsmån + några cm rörelsevidd. Men jag gör hela denna kjortel snortight eftersom jag håller på att minska i vikt och inte vill att den är för stor redan efter en månad eller två. Längden på kurvan är därför bredare än ärmen och för att lösa det så lägger jag till en kil.
If you don’t want to use your bodice as a guide, you can use this theoretical constructionmethod instead.

Since the text is in Swedish – I will translate it for you:
S-curves total length (not the straight lines) should be the same length as the armholes circumference and a couple of cm for movement. (But don’t forget to add seam allowance).
You can gather the extra width on the upper part of the sleeve.
The green marking is the part that should have the exact same shape as the bottom of your armhole (about 10 cm in total).
The top line is the measurement between shoulder and wrist.
The middle line is just inbetween the top and the bottom of the curve.
And the bottom line is the length from the armpit to the wrist.
Add a gore (black part) if needed to get the right lenght of the curve without having it to be too steep.

* * * * * * * * * * * * * * * * * * * * * * * * * * * * * * *

Om du nu inte vill använda kjorteln som guide så kan du använda den här teoretiska metoden istället.

This is how the steepnes of the curve effects the movement of the arm.
(Translation)
Square = optimal movement, not so great fit.
Steap = bad movement, great fit.
In between (about 45 degrees angle) Ok fit, OK movement.

Last picture shows how high you can lift your arm before the garment starts to move with different steapnes of the sleeve.

* * * * * * * * * * * * * * * * * * * * * * * * * * * * * * *

Det här är en bild över hur S-kurvans branthet påverkar rörelsen.

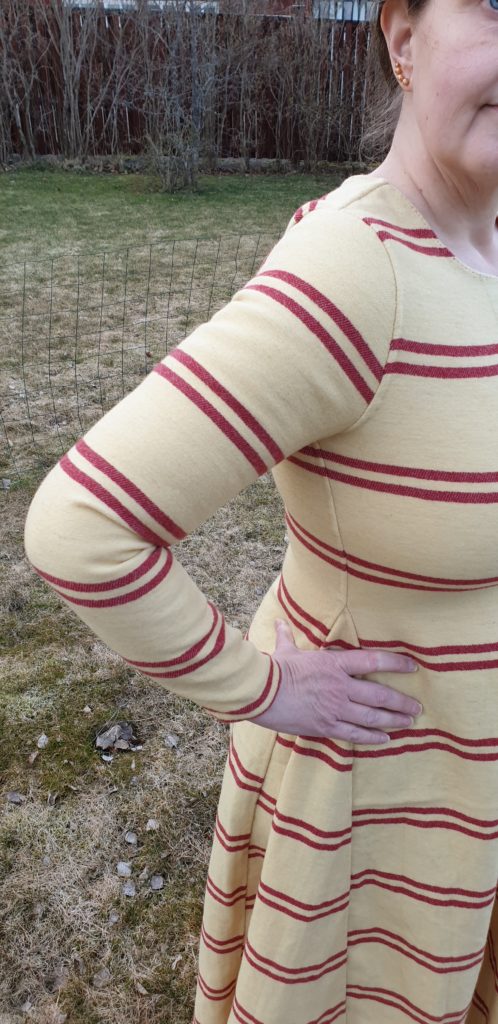
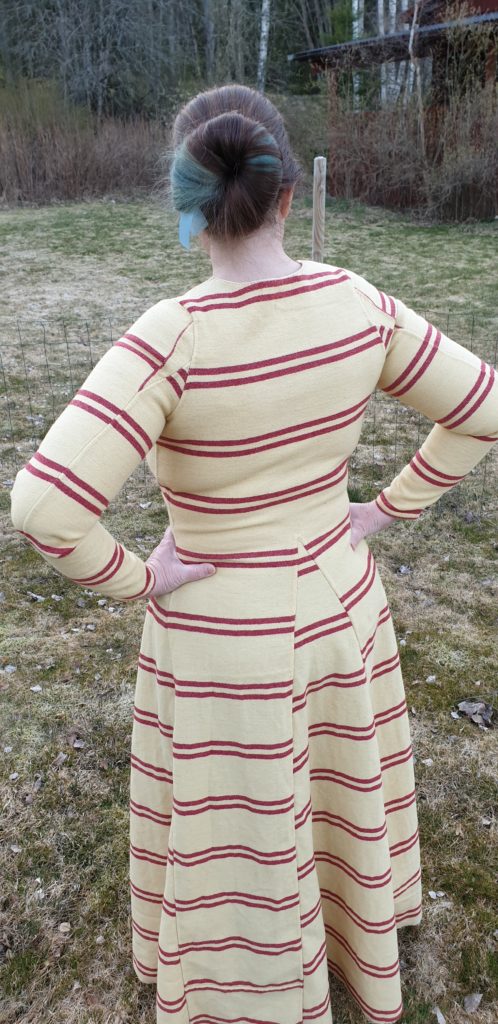
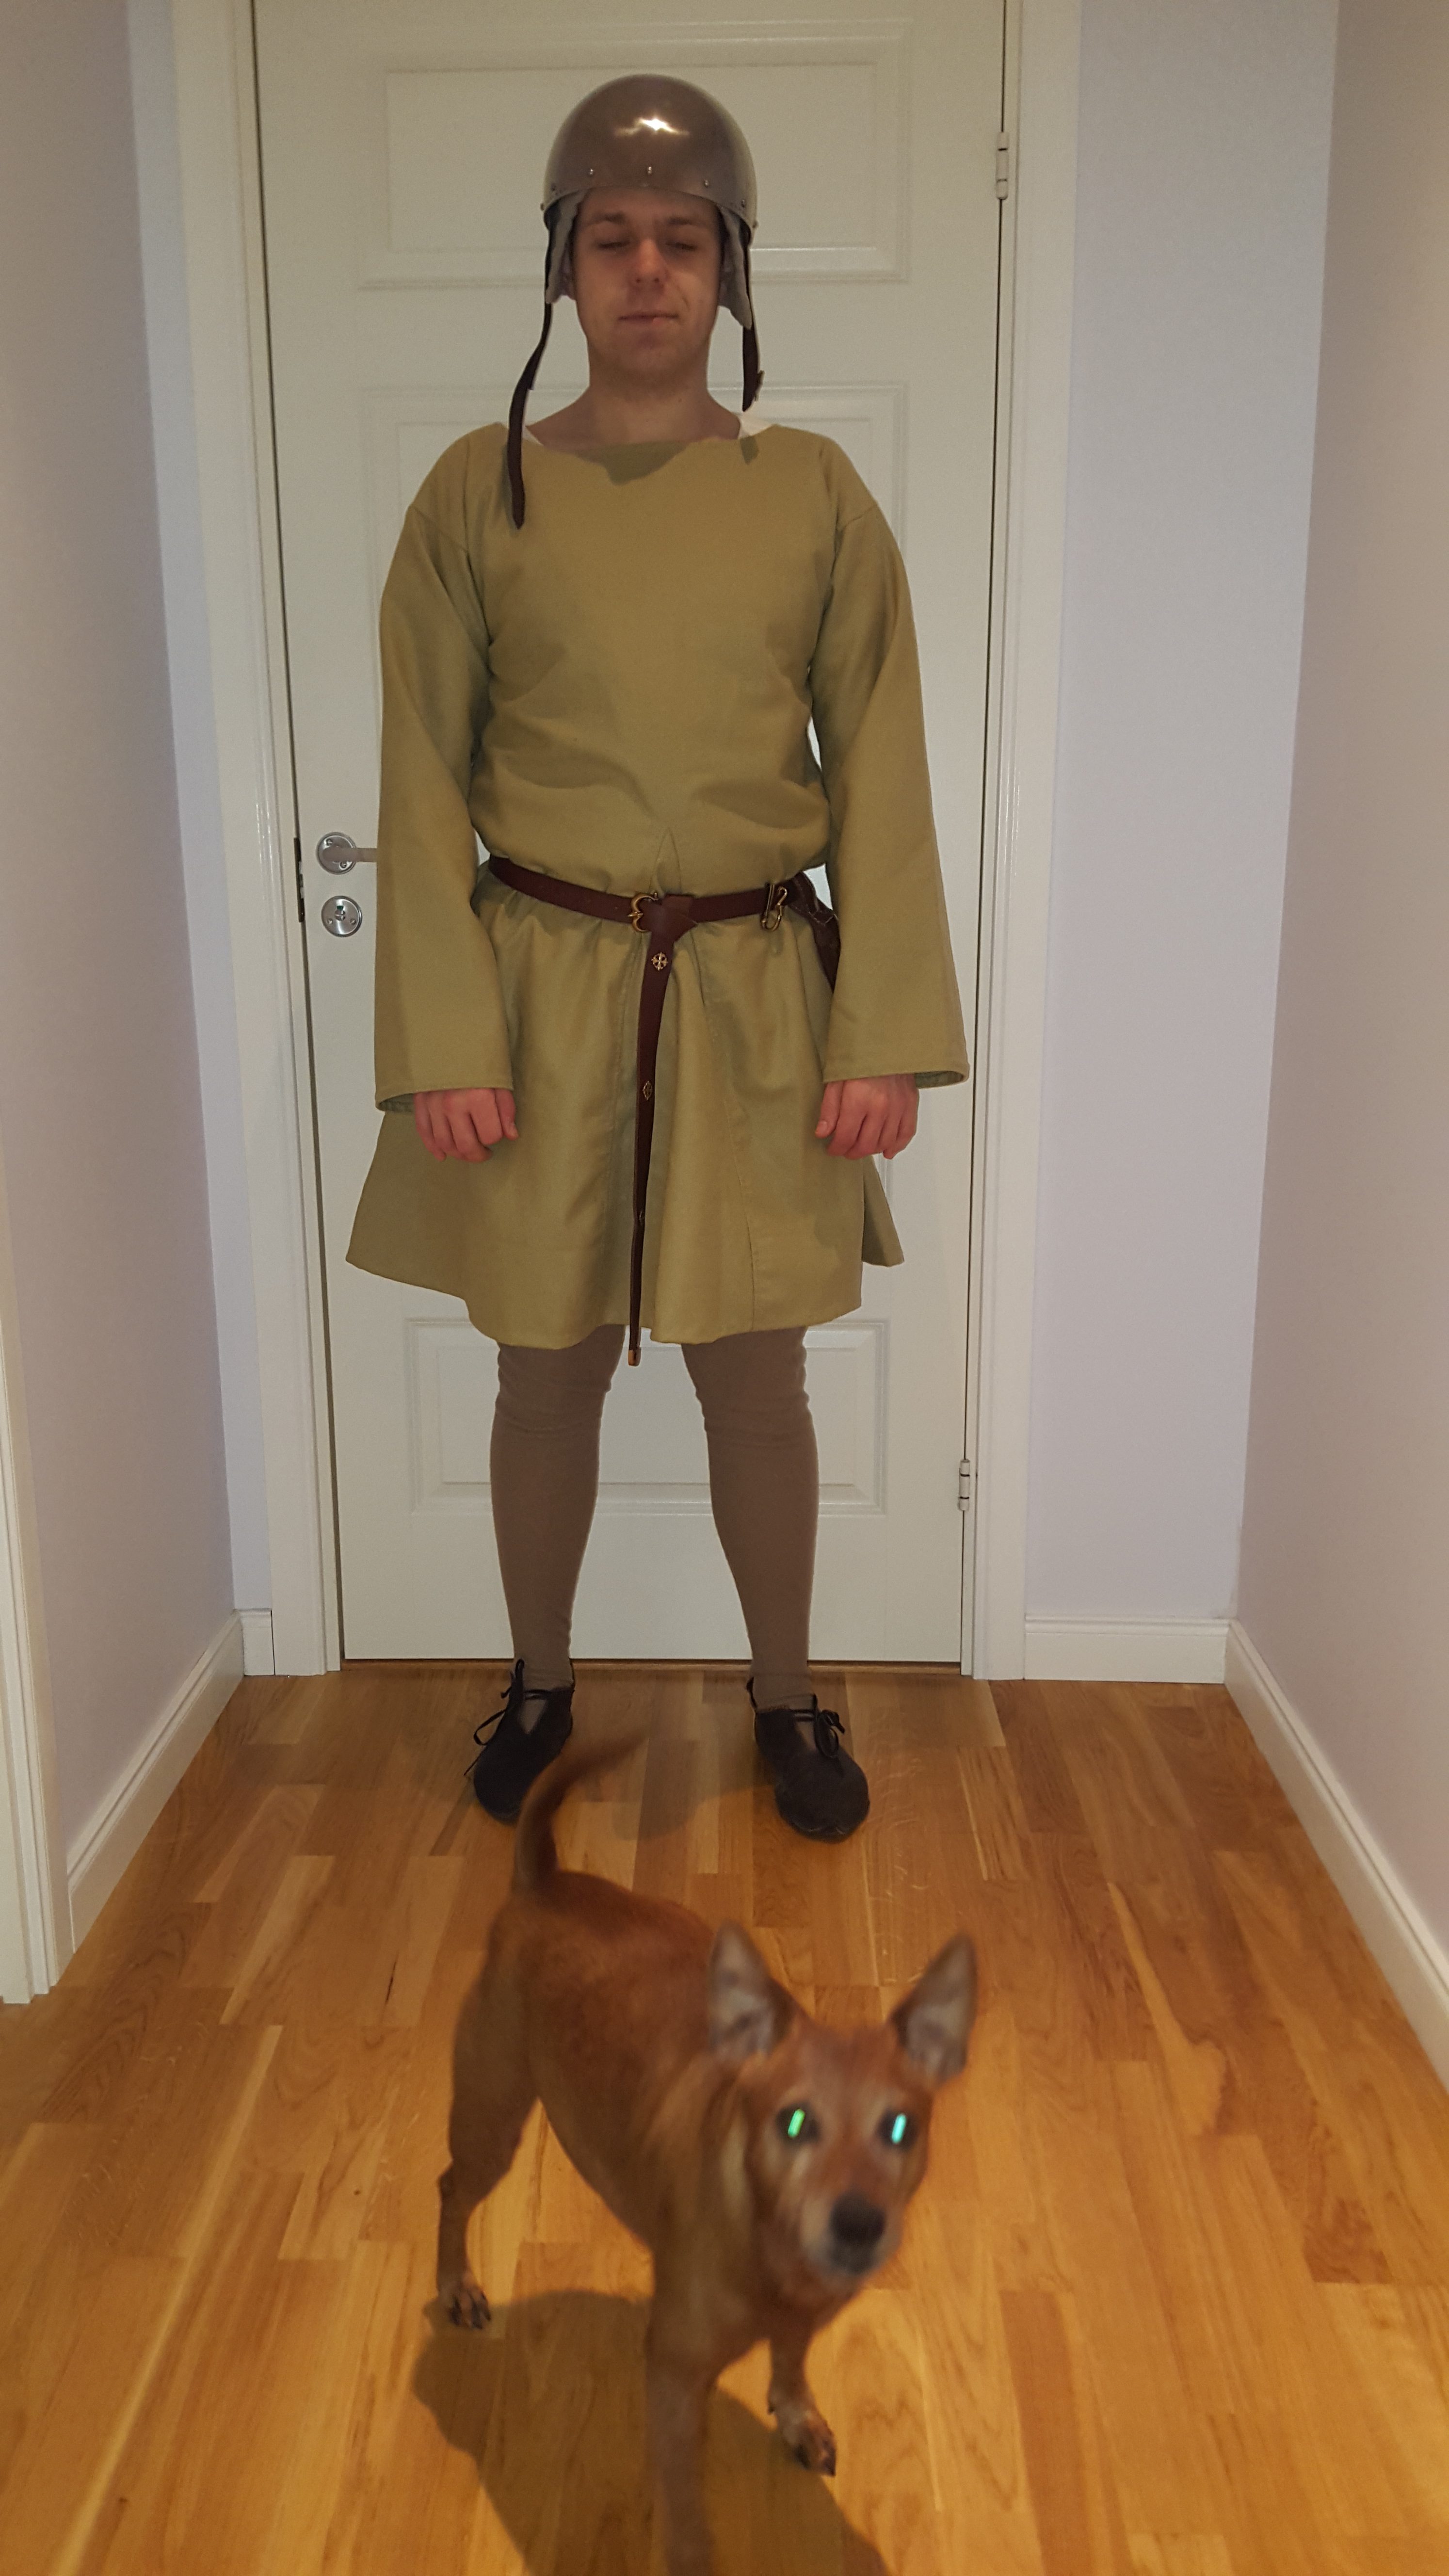
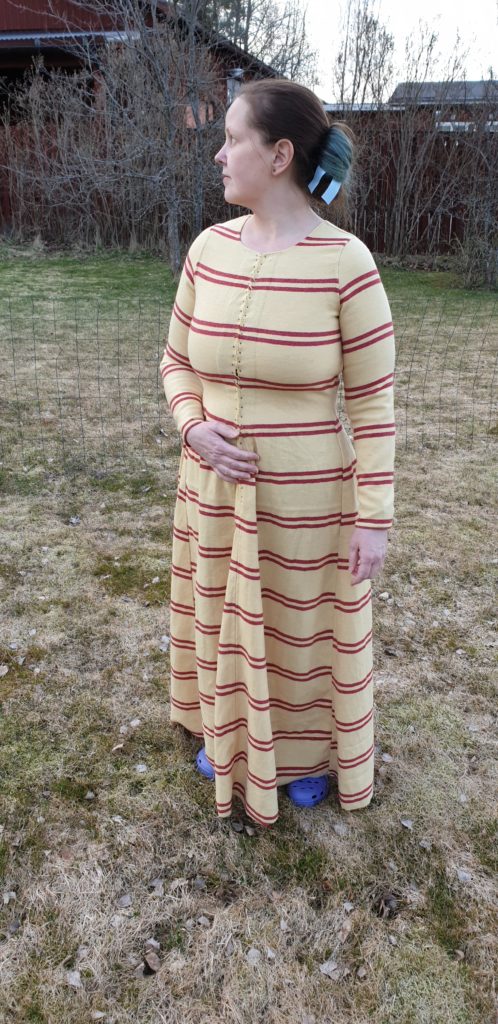
And here is the final result
You have to forgive my moderh hair and shoes though 😉

* * * * * * * * * * * * * * * * * * * * * * * * * * * * * * *

Och slutresultatet…
Ni får ursäkta modernt hår och skor dock 😉
Those bloody calories / Dom jädrans kalorierna

Haven’t we all been there?
You take out your favourite cotehardie and… It is to small. How? Why? You haven’t noticed anything on your regular clothes, or only that your jeans is a bit tighter…

So, how could you fix this?
Well… you can try to make it bigger, either by undoing the seams and redo them, if you have enough seamallowance. Just a smidge more fabric in every seam can go far.
But when you have extended the sides in the seams as much as possible and it still isn’t enough, well you can take a pice of the same fabric an add to the item if you have anything left of it.

Or – you can use your item and make a pattern of it.
This you can do in 2 ways.
Undo the seams and use the item itself as a pattern.
Or, as I prefer. Use a nonwoven pattern-paper and draw a new pattern based of the clothingitem.
This is how I did it for a friend that realized that she was in great need for a new dress.

* * * * * * * * * * * * * * * * * * * * * * * * * * * * * * * * * * * *

Det har väl hänt alla?
Man plockar ut sin favoritcothardie och… den har krympt. Eller? Du har inte märkt något direkt på dina vanliga kläder, eller möjligtvis sitter jeansen lite tightare men så illa kan det väl inte vara?

Så, hur löser vi det här problemet?
Tja du kan ju alltid försöka att utöka plagget genom att sprätta sömmarna och sy nya en liten bit utanför de gamla. Bara några mm i varje söm kan räcka långt.
Men när du inte har så mycket sömsmån eller redan har gjort det och det inte räckte, tja då återstår att skava i mer tyg om du har något kvar.

Eller – använd plagget som mönster.
Du kan antingen sprätta sömmarna och använda plagget som ett mönster direkt som det är, eller så kan du göra som jag föredrar. Använd ett nonwoven mönsterpapper (det finns ett som kallas yellowpaper pga det gula omslaget bland annat) och rita av delarna.
Det är alternativet jag valde när en vän behövde en ny, lite större cotte.

* * * * * * * * * * * * * * * * * * * * * * * * * * * * * * * * * * * *

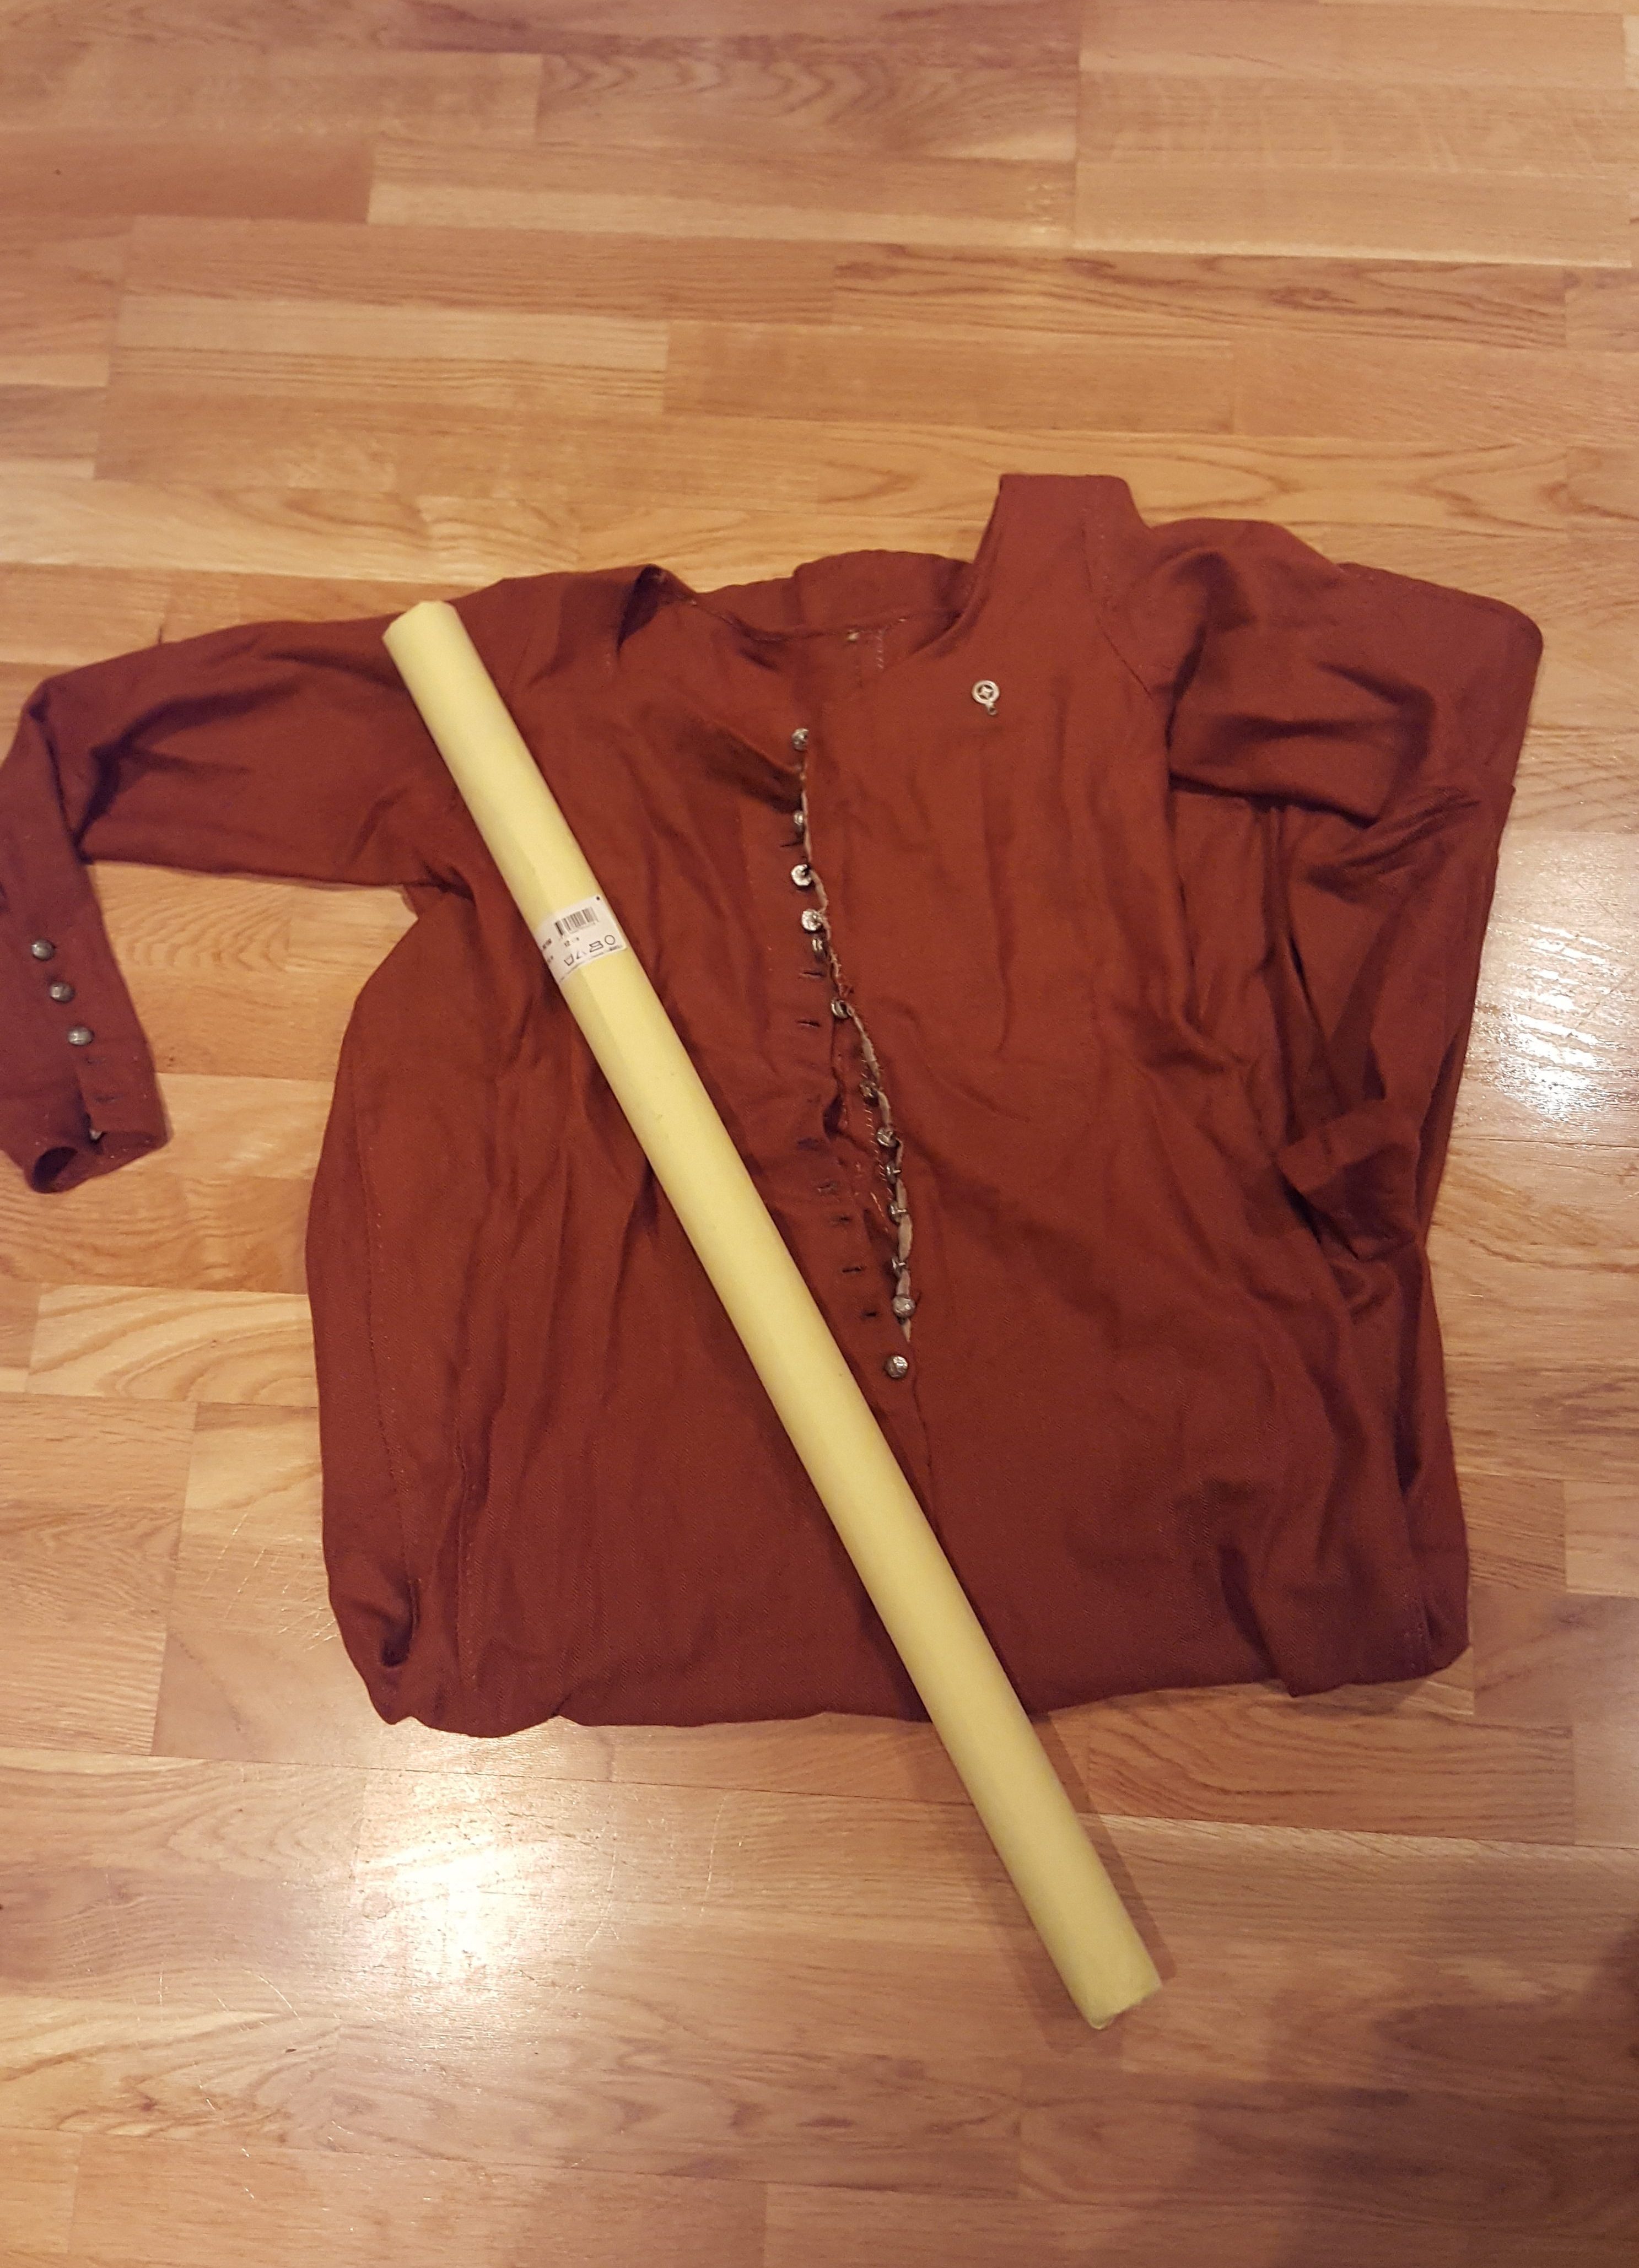
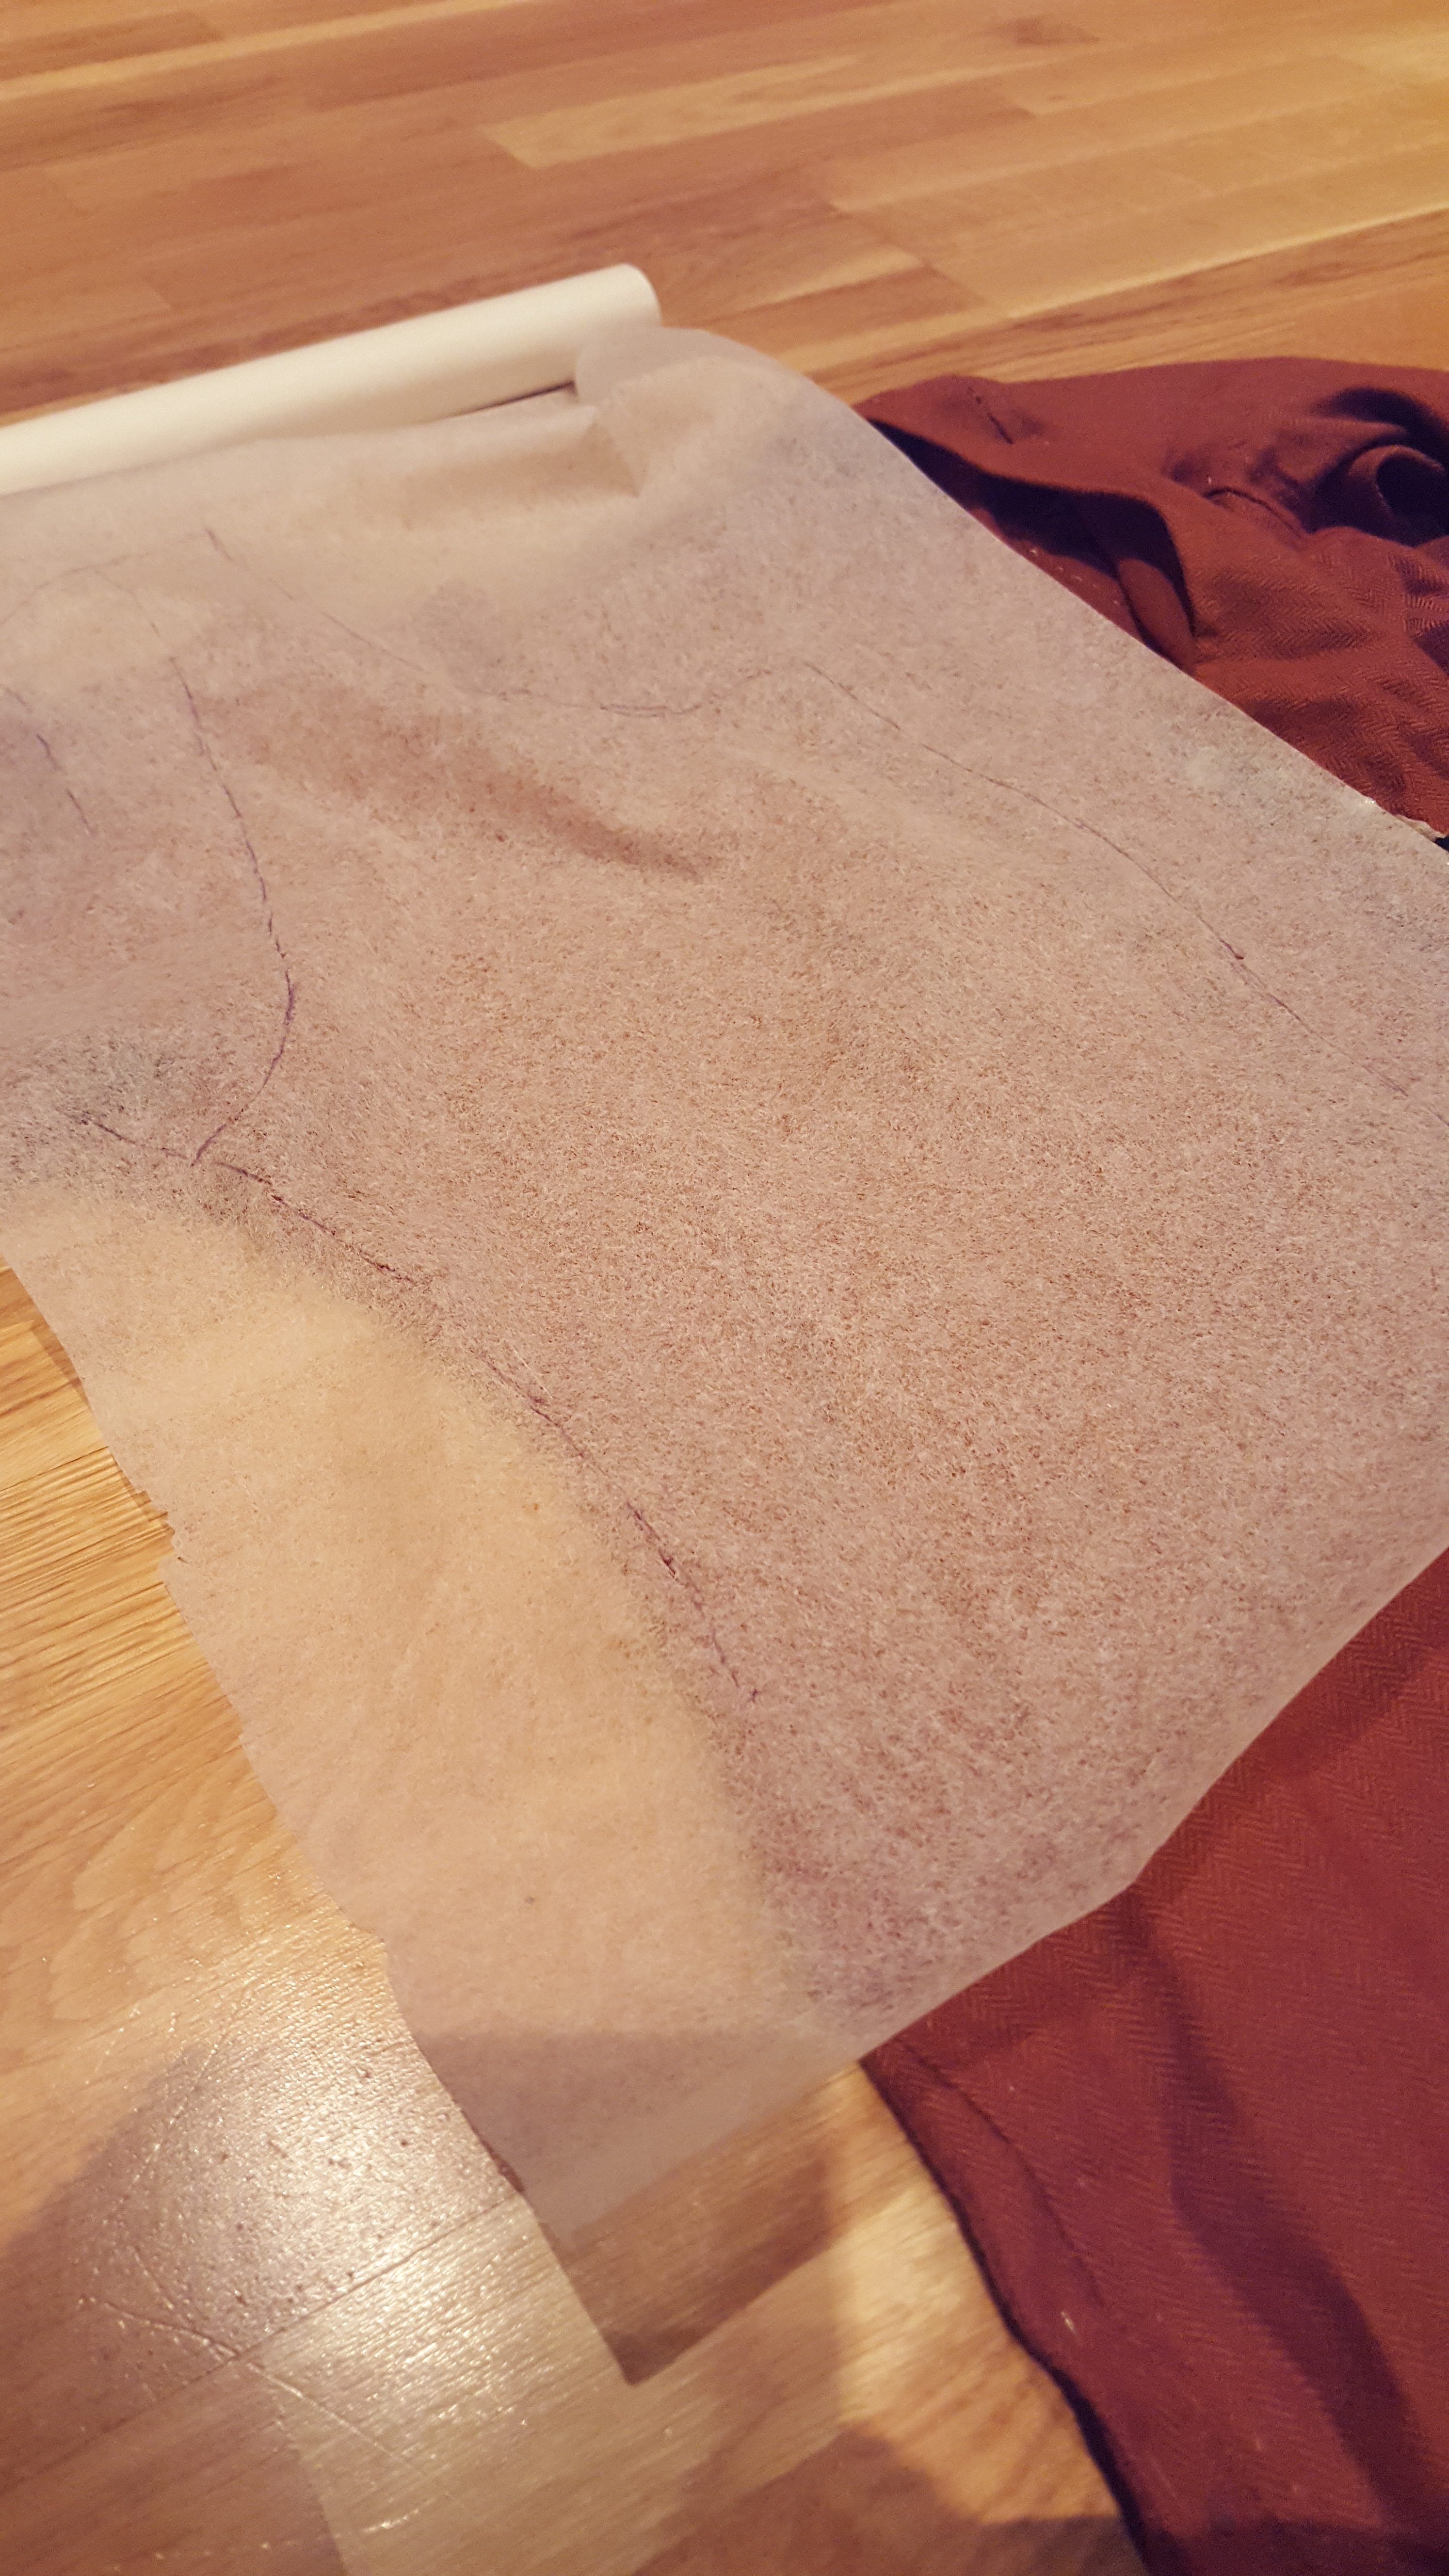
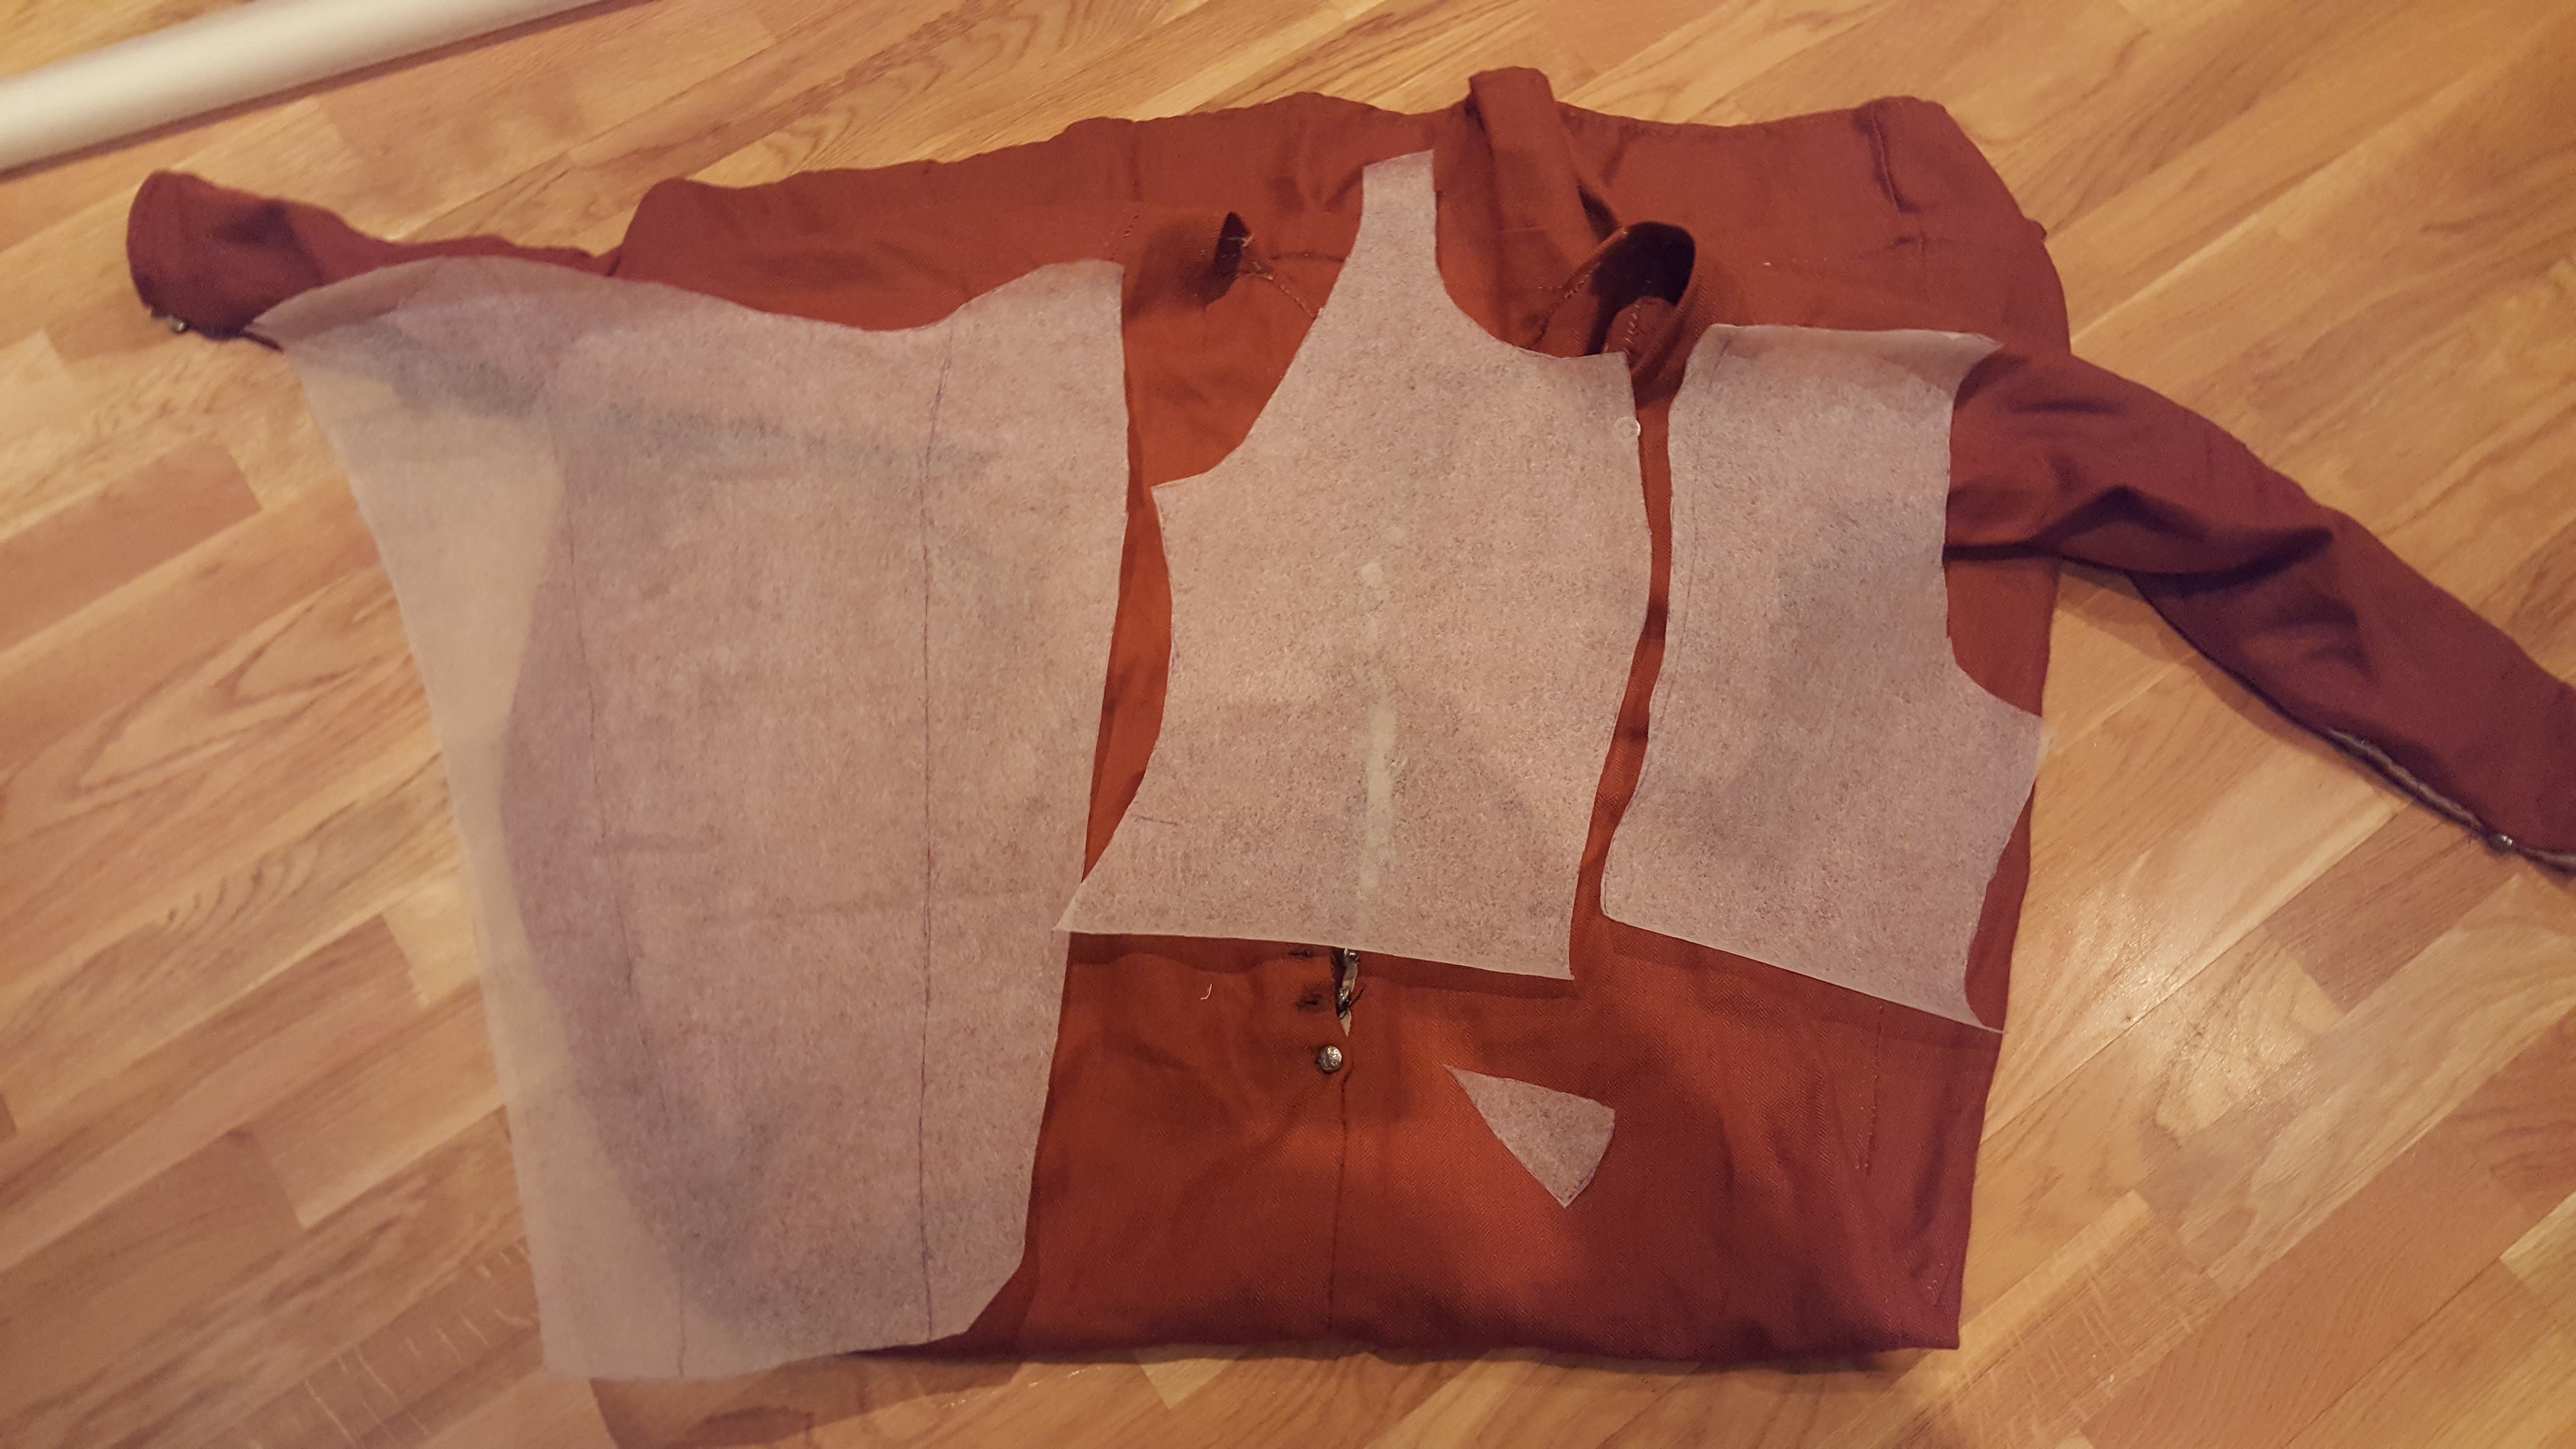
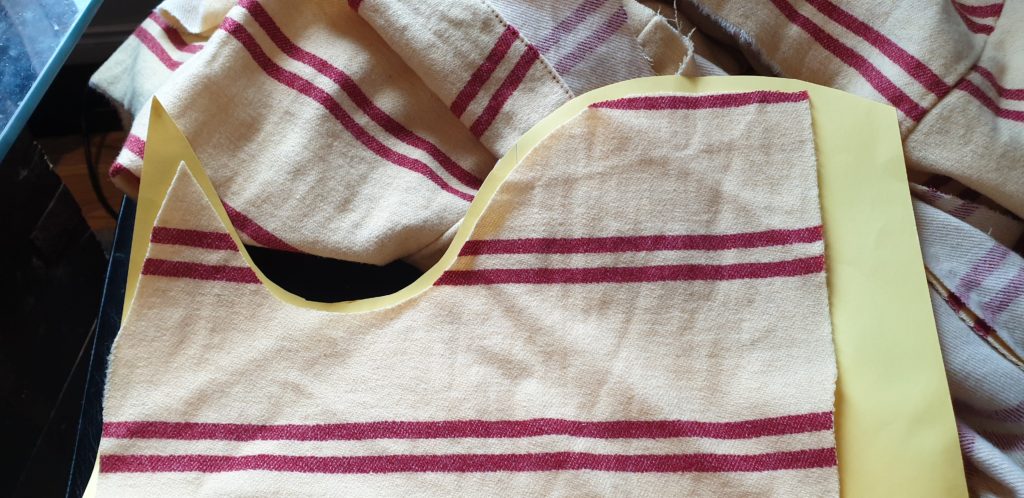
So, this is the cotehardie that is going to become the pattern for the new dress, and the ”yellowpaper” – nonwoven patternpaper.
* * * * * *
Här är alltså plagget som är utgångspunkten för det nya mönstret, samt det som kallas för ”yellowpaper” nonwoven mönsterpapper.

* * * * * * * * * * * * * * * * * *

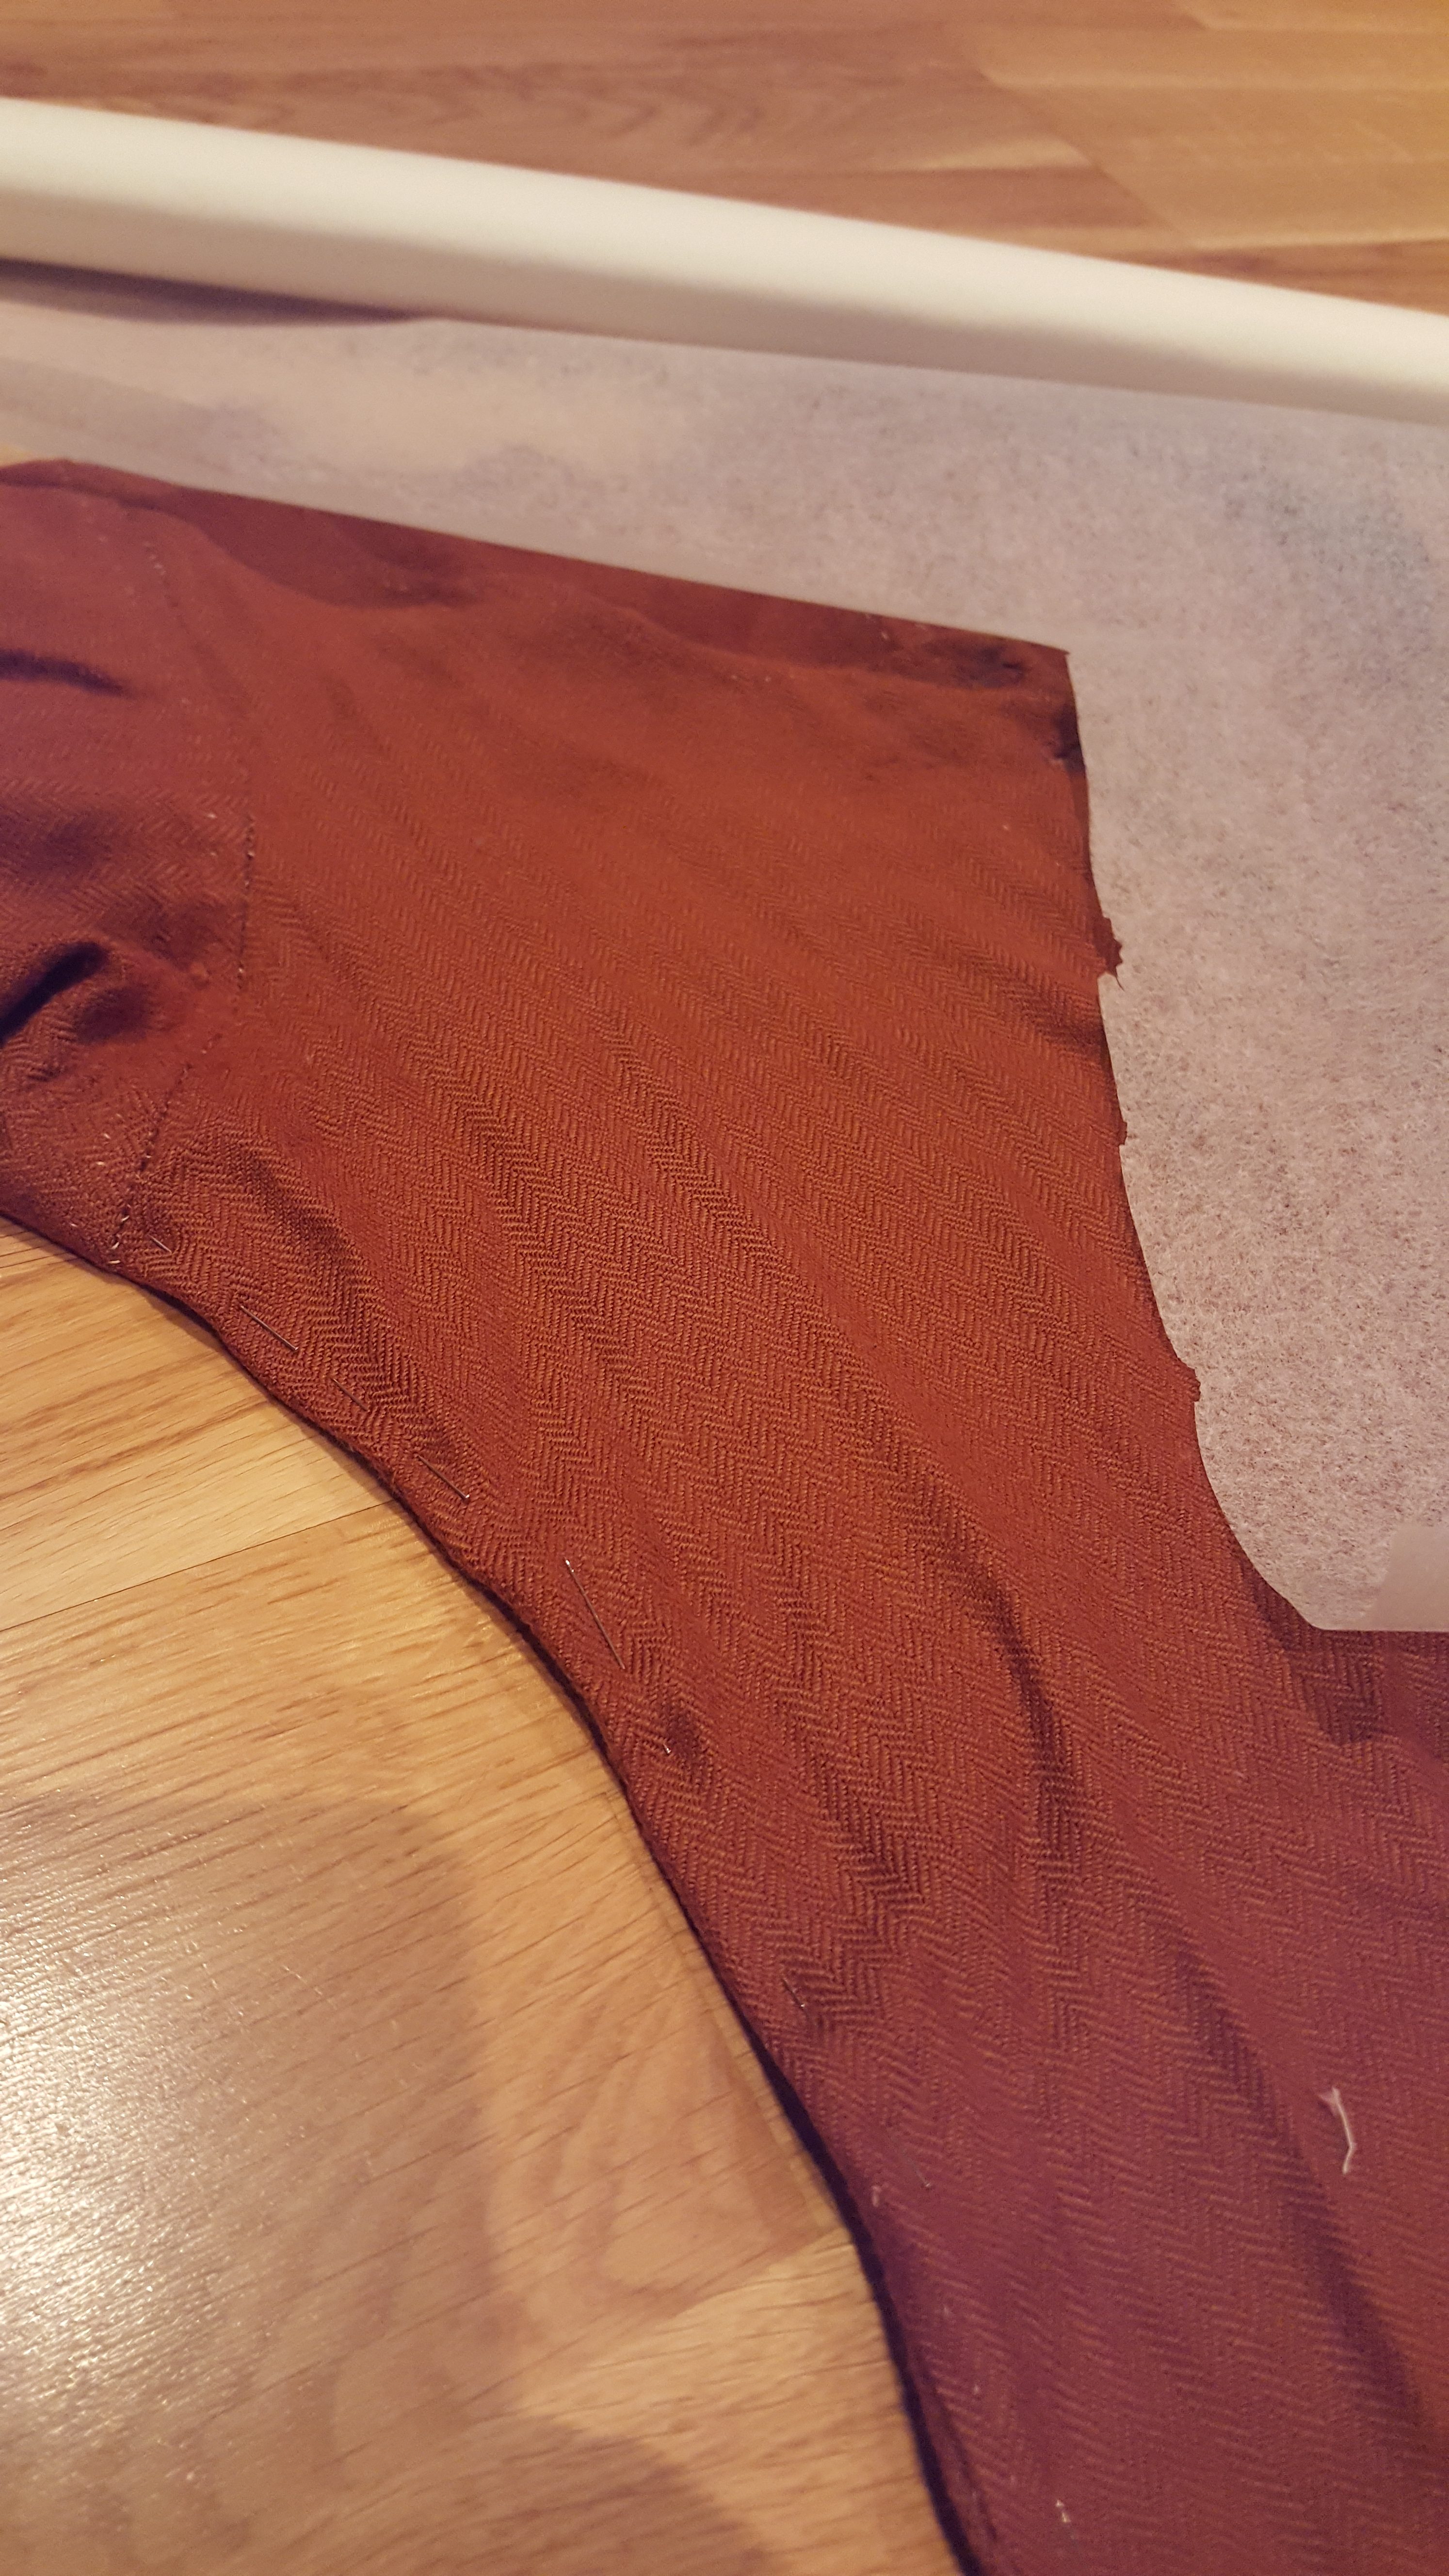
To make the clothing item lay flat and be more precise, I pin the fabric close to the seams and try to flatten it as much as possible. A clothing item that have been worn to small will have misshaped panels due to stress on the fabric, but you can only do your best to make it as flat and as precise as it was when it was new, sometimes you just have to accept a wrinkle in the fabric that doesn´smooth however you try to pull and fix the fabric.
* * * * * * * *
För att få plagget att ligga så platt och ”precist” som det går så nålar jag längst sömmarna. Ett plagg som använts när det varit för litet kommer att ha format sig lite efter bäraren där tyget har sträckts ut och töjts på ett sätt som inte var meningen. Du kan bara göra ditt bästa för att platta ut det, till slut får man liksom acceptera vissa veck av ”överflödigt” tyg och bara köra på.

* * * * * * * * * * * * * * * * * * * * * * * * * * *
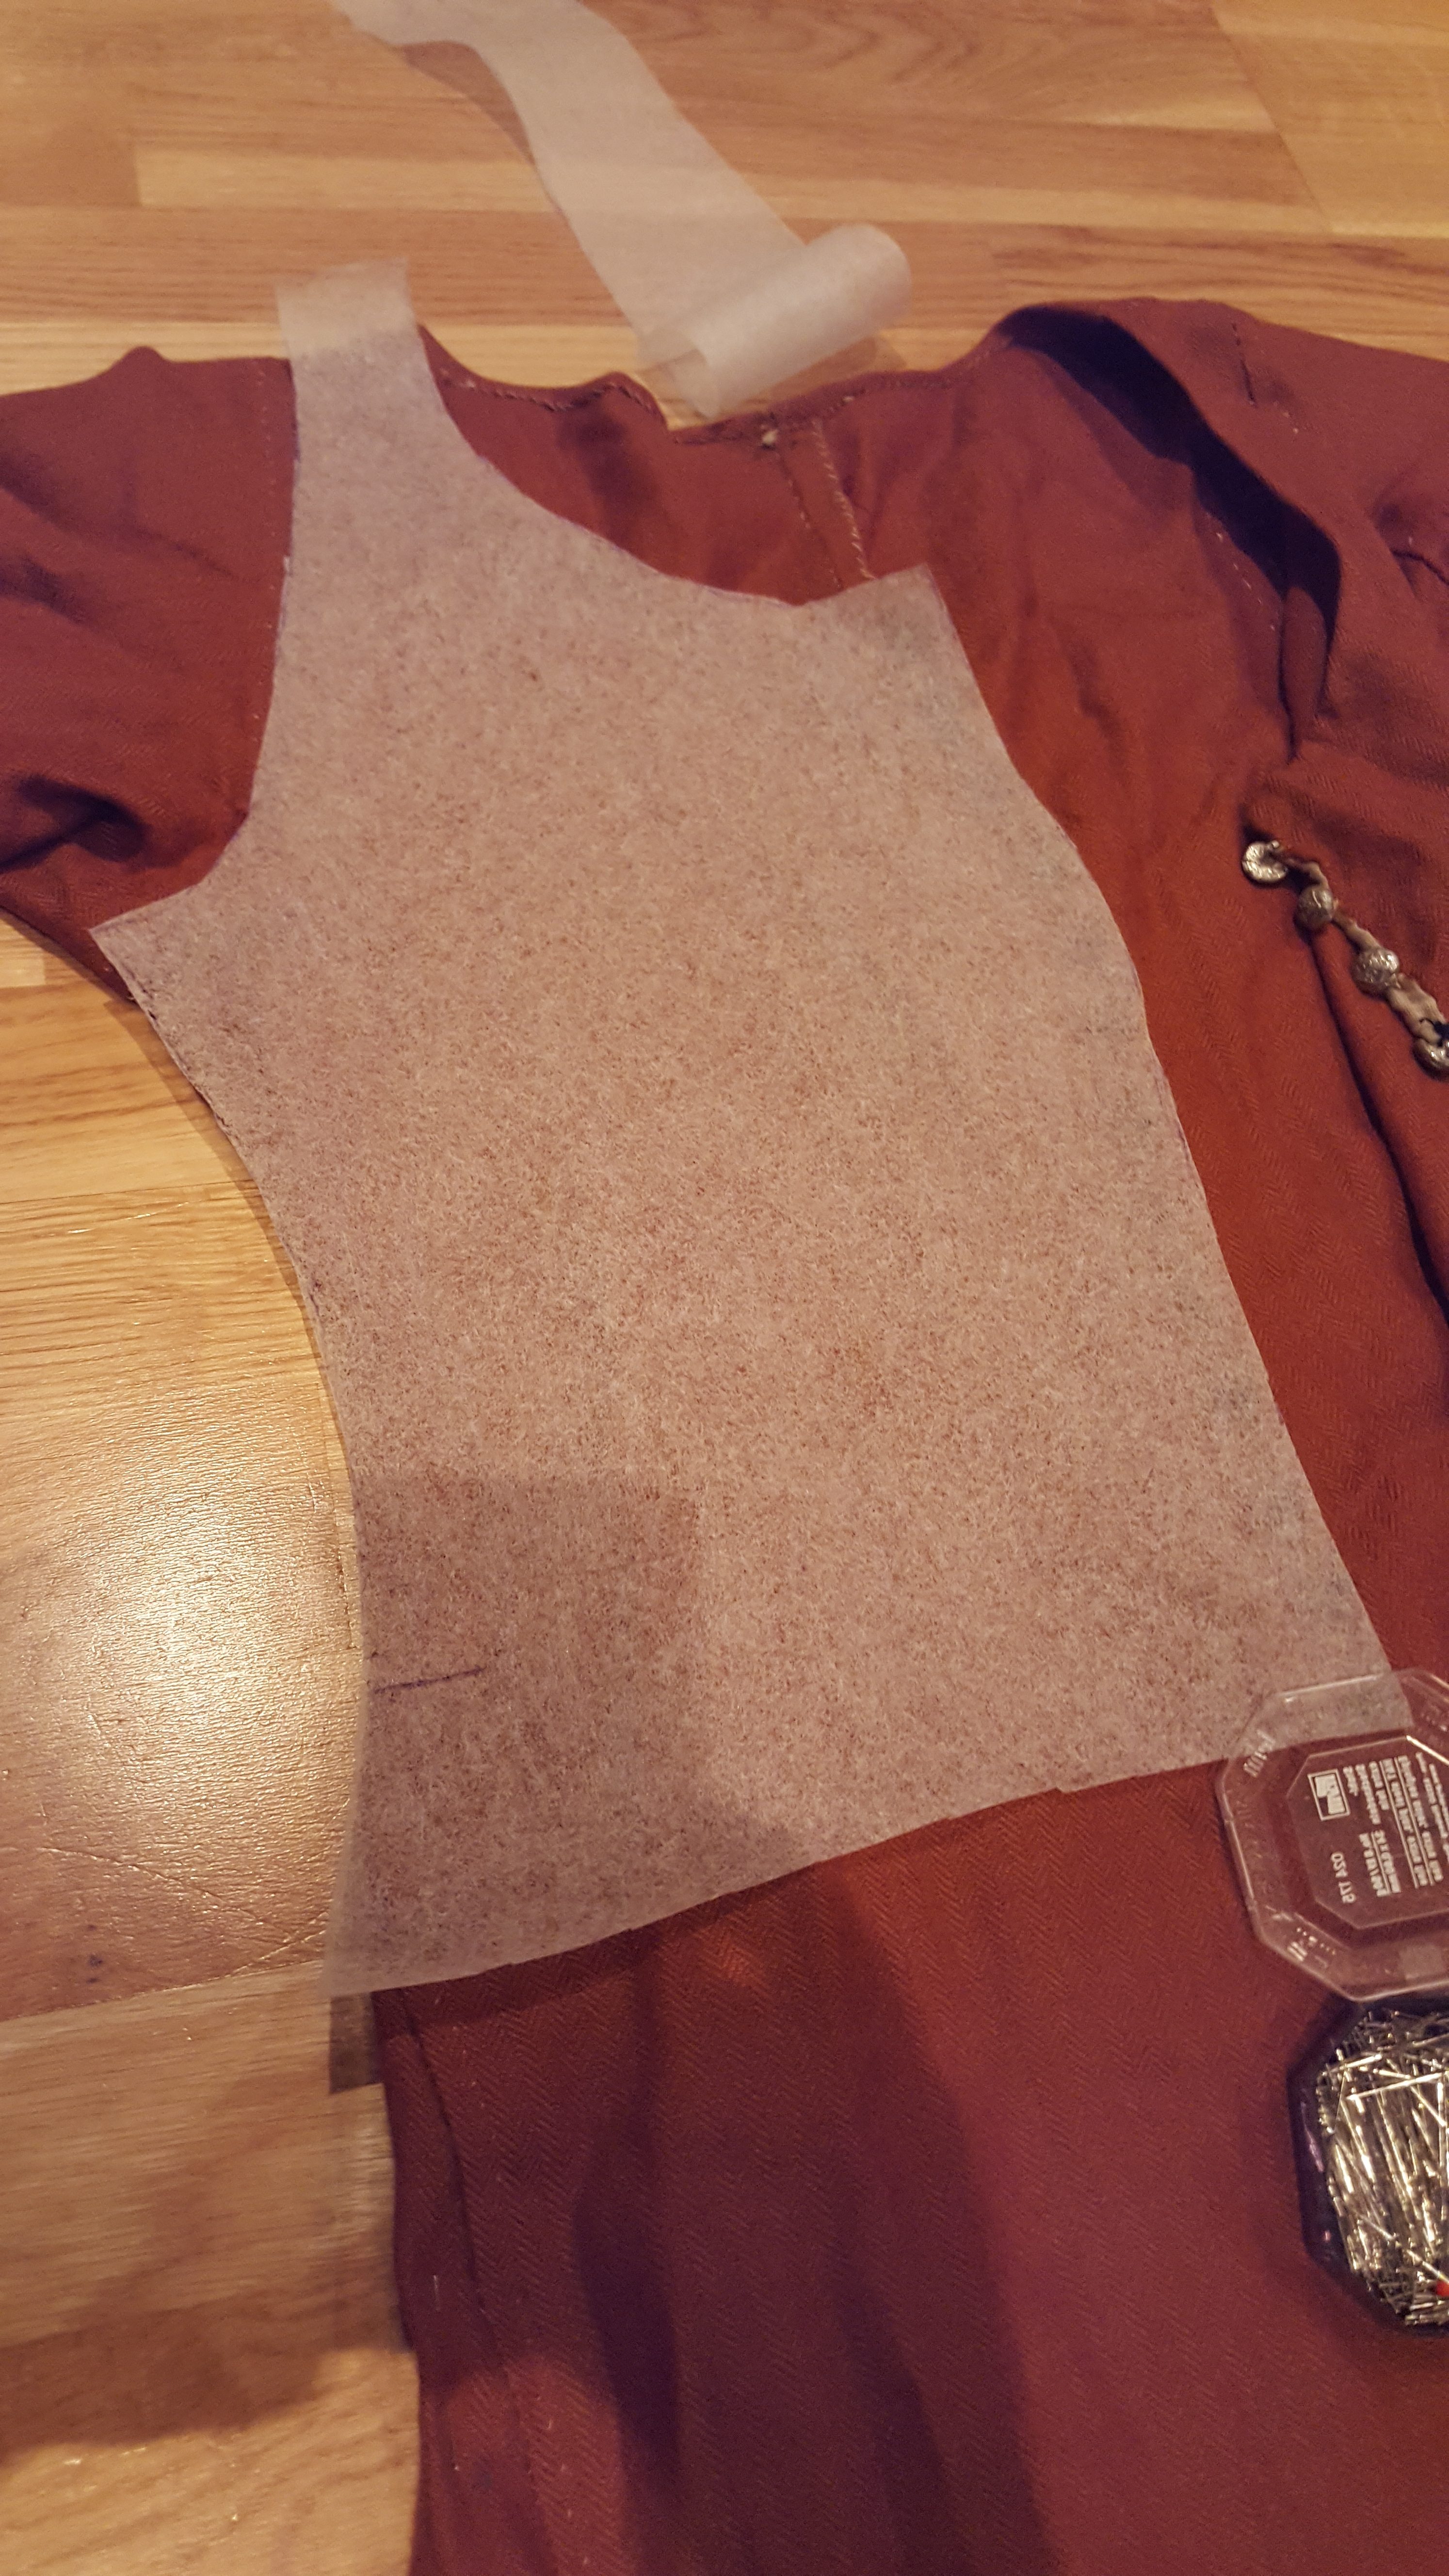
Put our patternpaper over the clothing item. You usually don’t have to draw further down than the waist, and that is usually where the gussets point is located. Put some weights on the paper so it doesn’t move when you trace the edges of the panel (removed here so they wouldn’t obstruct the view)
* * * * * * * *
Lägg mönsterpappret ovanpå plagget. Man brukar sällan behöva rita längre ner än till midjan, som oftast är där spetsen på kilarna slutar. Lägg gärna tyngder på mönsterpappret så det inte rör sig när du försöker följa kanten på panelen. (jag tog bort tyngderna på bilderna så att de inte ska skymma något)

* * * * * * * * * * * * * * * * * * * * * * * * * * * * * * * *
Just showing how the panel piece looks after beeing cut out.
* * * * * * *
Försöker visa hur mönsterbiten ser ut när den har blivit urklippt.

* * * * * * * * * * * * * * * * * * * * * * * * * * * * * * * * *
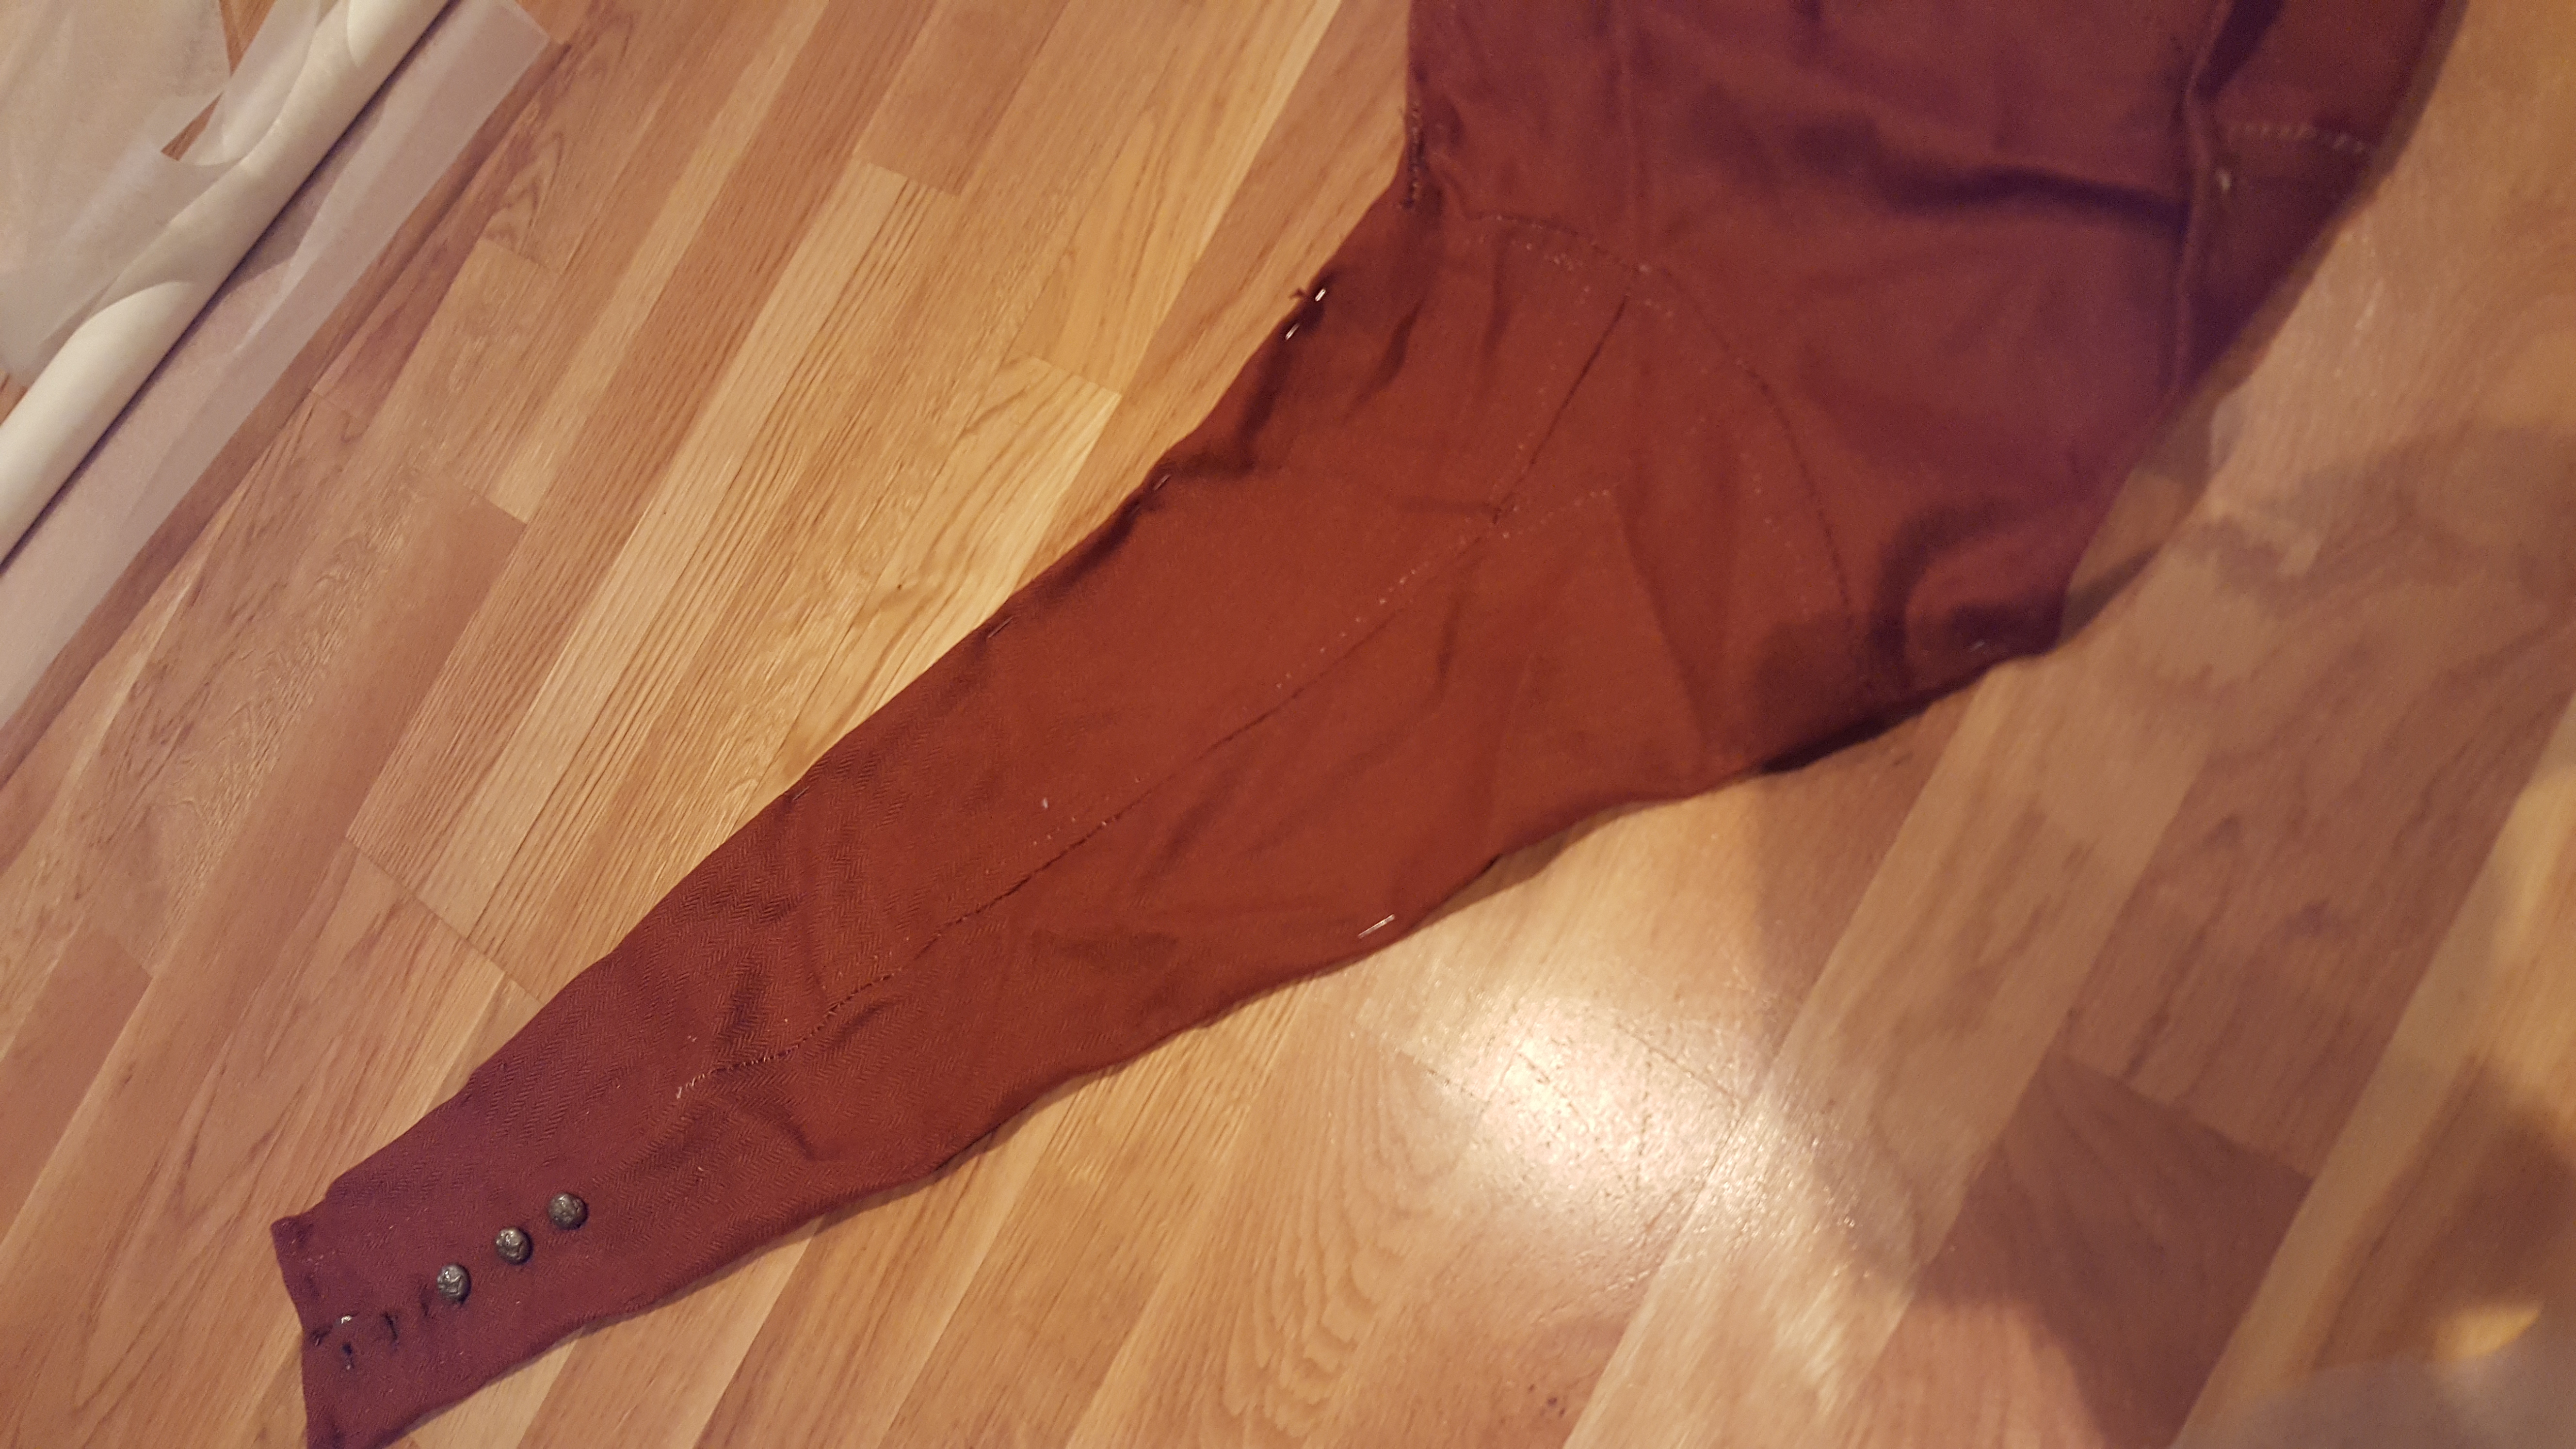
Pin the edges of the sleeve as well. It is important that it lays flat.
* * * * * *
Nåla kanten på ärmarna också, det är väldigt viktigt att den ligger platt.

* * * * * * * * * * * * * * * * * * * * * * * * * * * * * * * * * *
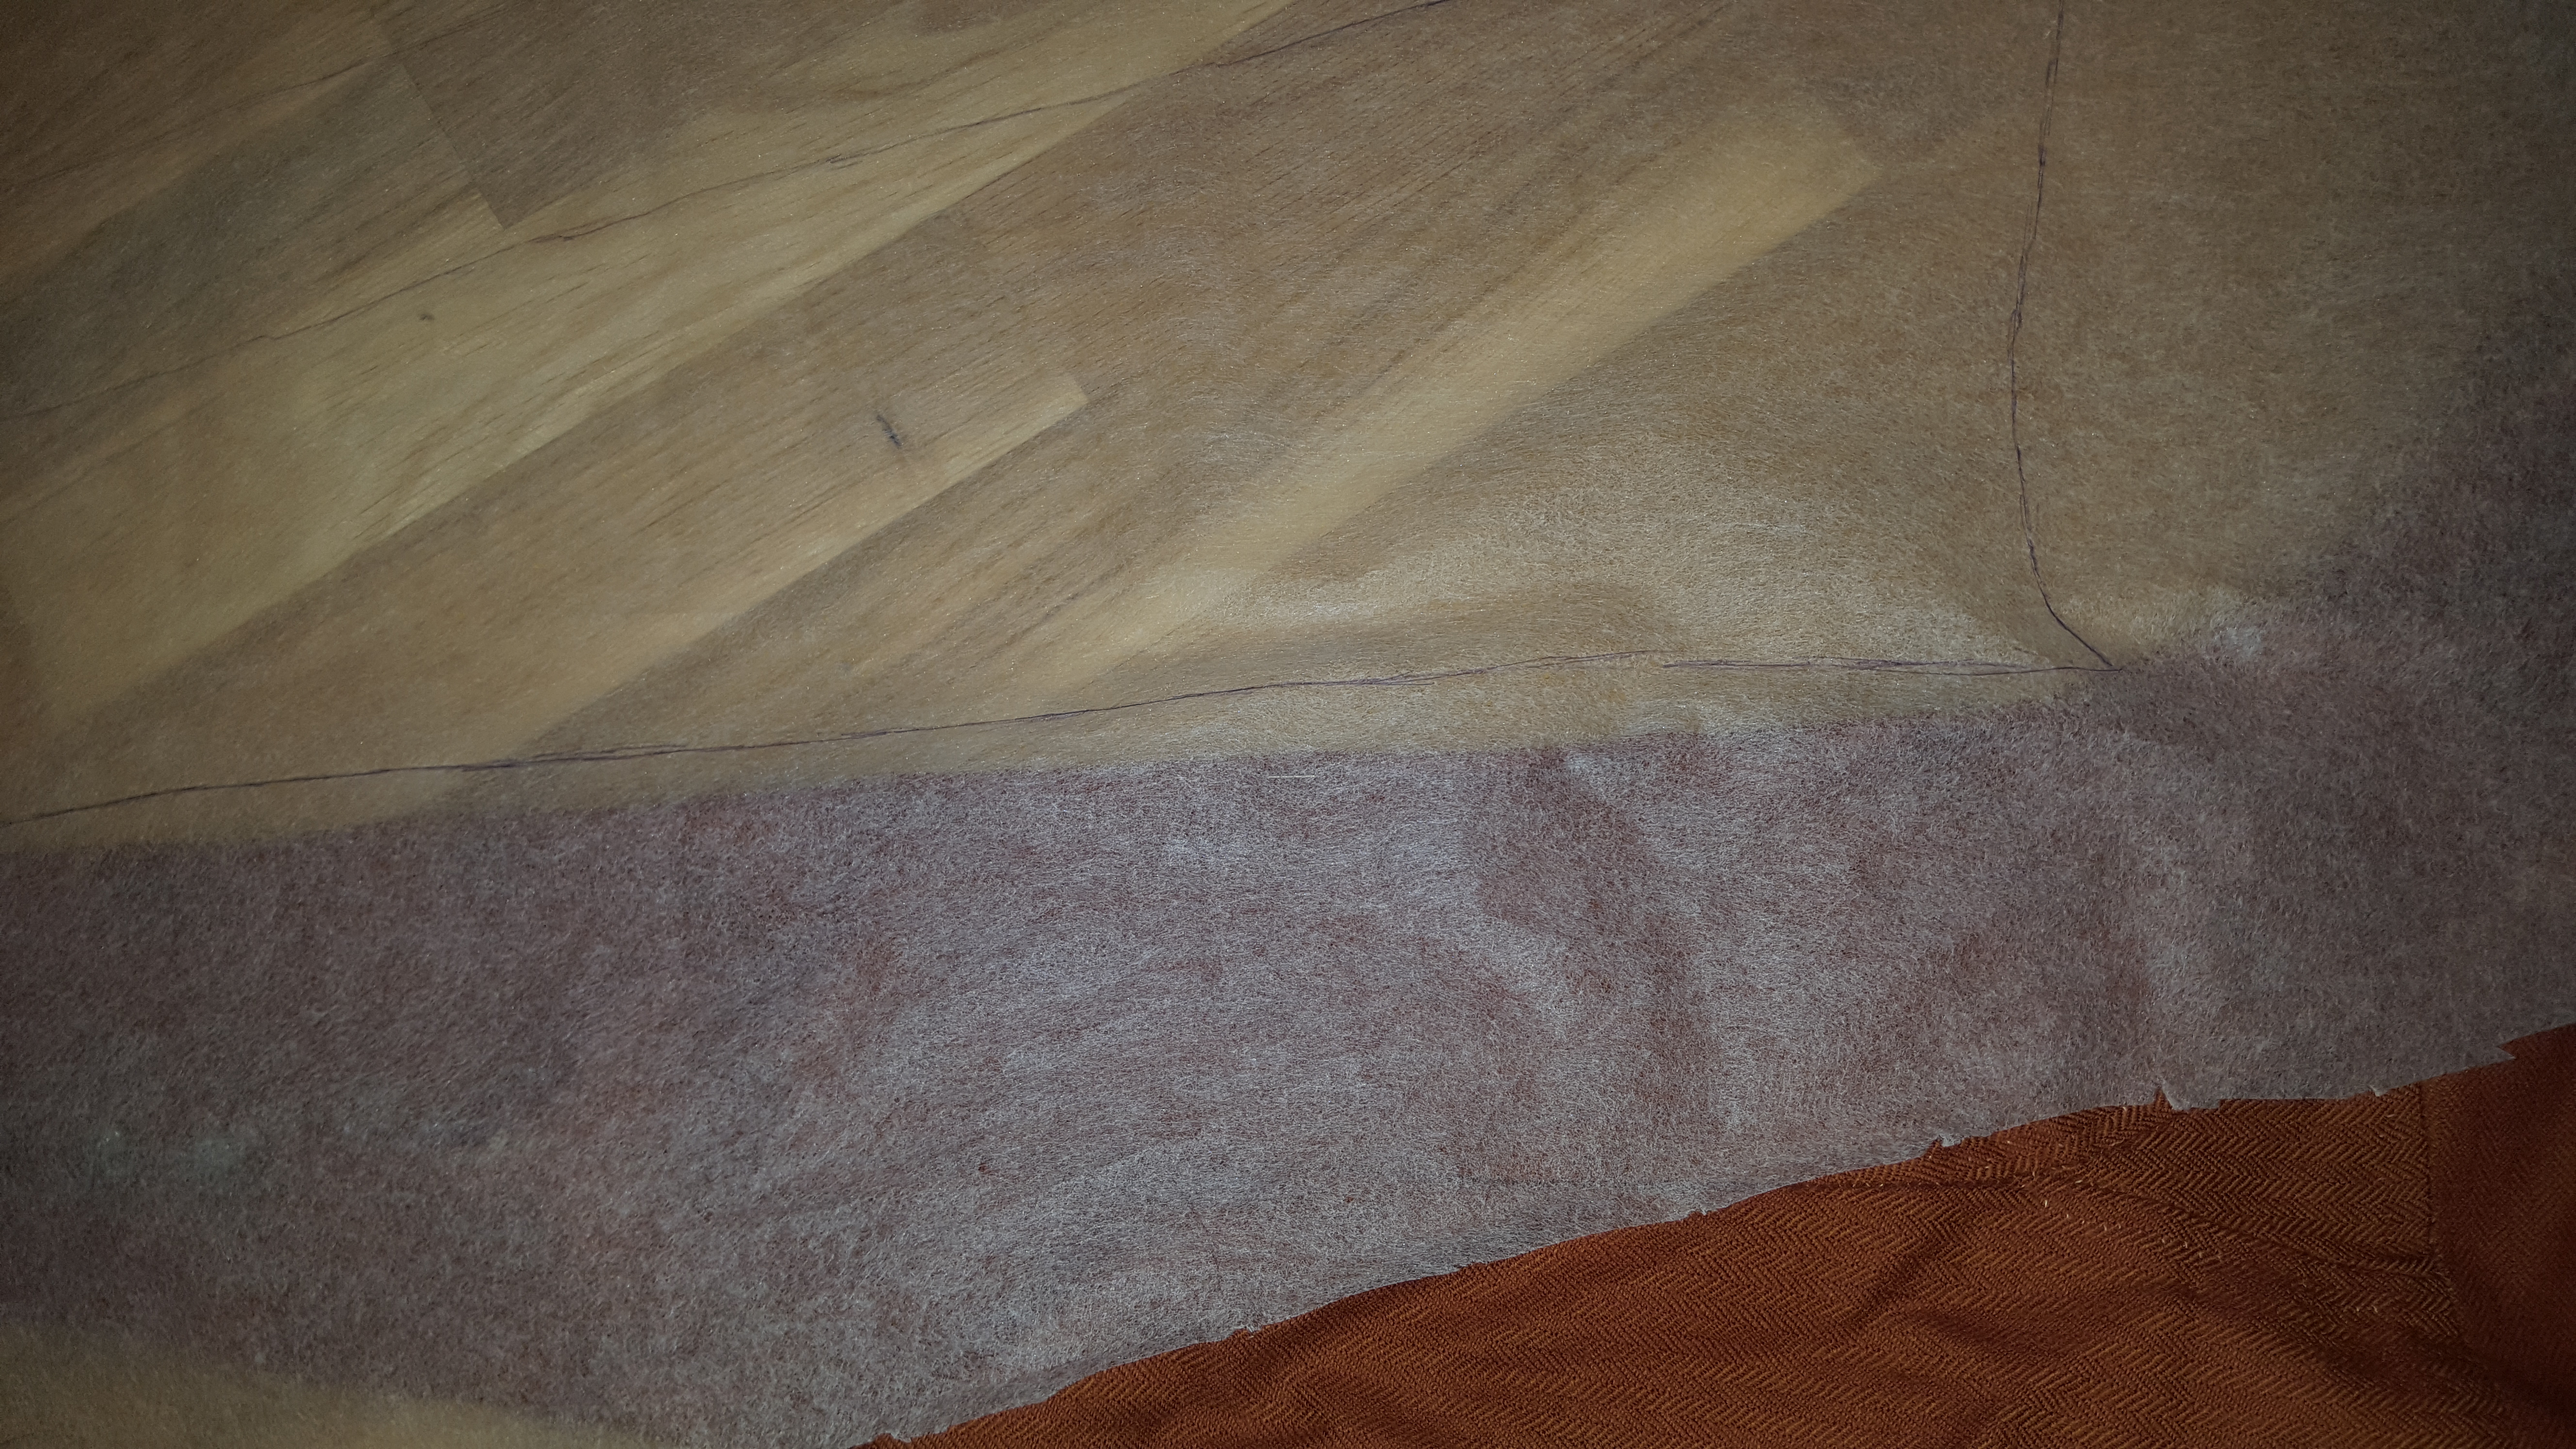
What you see above the sleeve is the traced edges of how the front side of the sleeve looks like, Now I am trying to place the edges of the drawing as close to the edge of the backside of the sleeve as I can, to trace them to each side of the ”front side”.
* * * * * *
Vad du ser ovanför ärmen är de utritade konturerna av ärmens framsida. Nu försöker jag placera kanterna på den utritade delen så nära kanten på baksidan av ärmen jag kan för att fylla på med resten av ärmen där på varje sida om den tidigare utritade delen.

* * * * * * * * * * * * * * * * * * * * * * * * * * * * * *
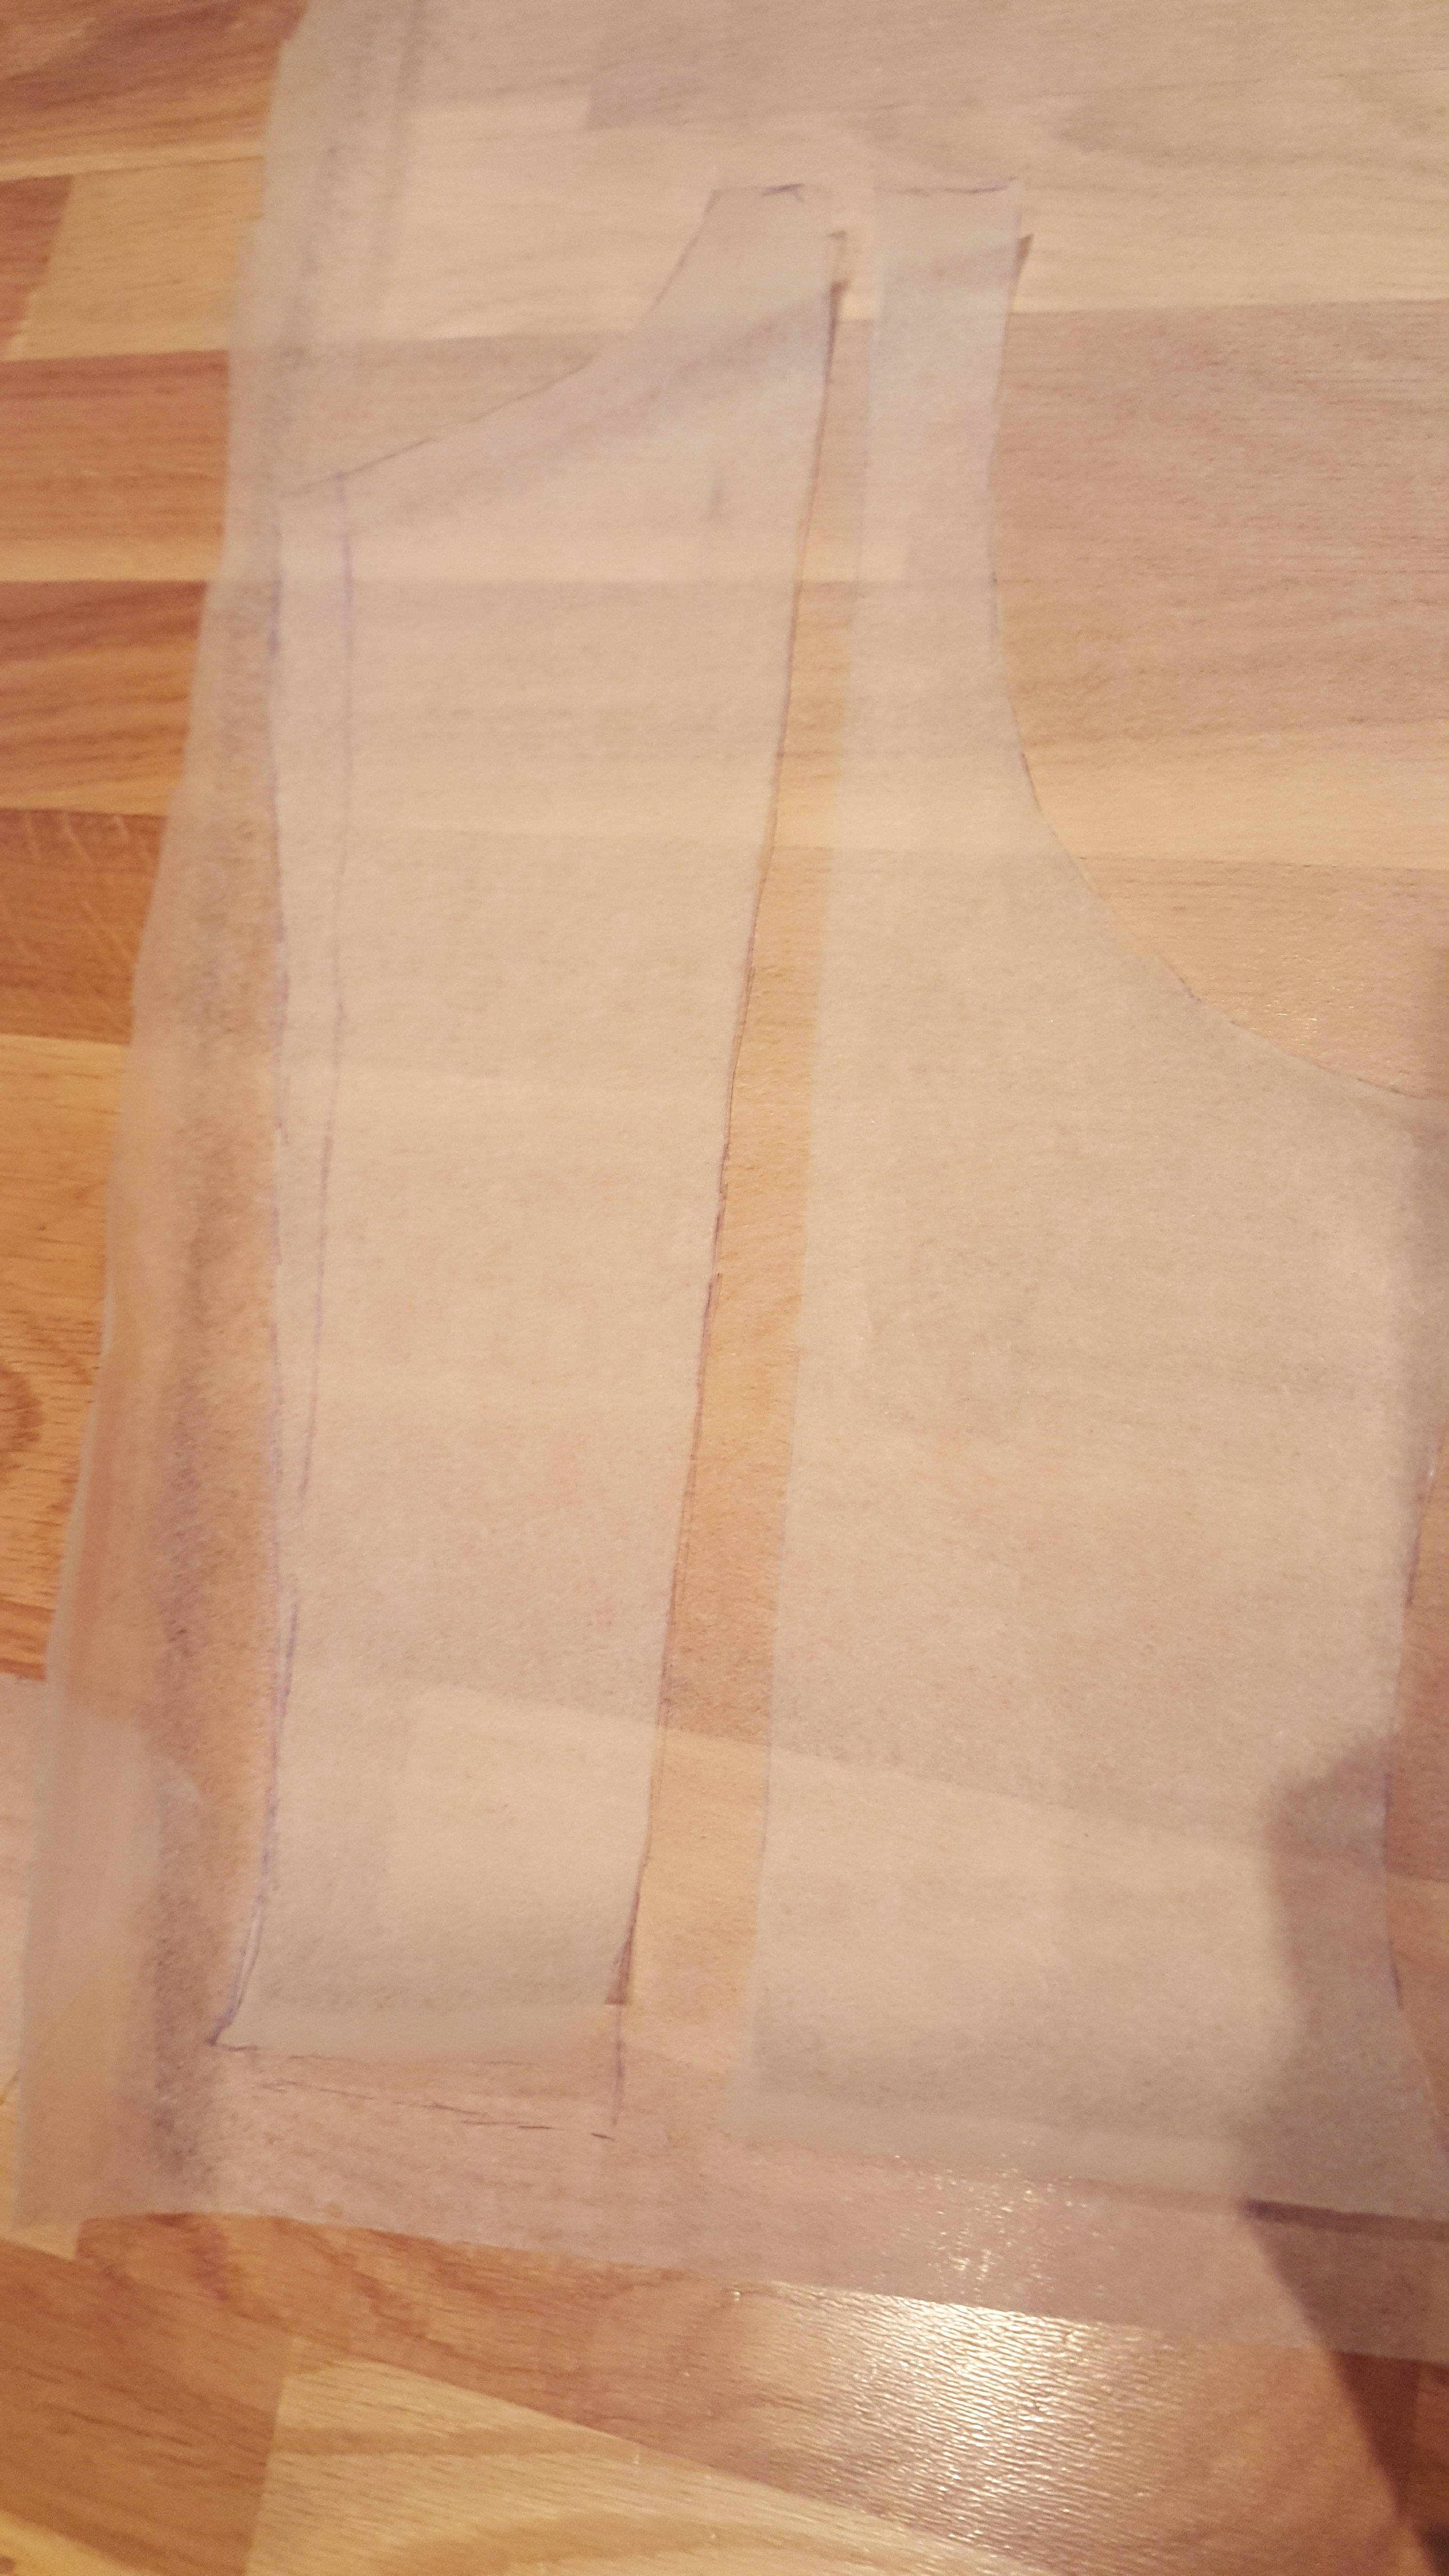
This is how the patternpieces are looking now. The sleeve have all parts drawn out and it makes an S-shaped curve at the top since the seam is on the back side of the sleeve and not underneath as on many modern clothes.
* * * * * *
Så här ser mönsterdelarna ut nu efter att ha ritats av. Ärmen har alla delar ditritade och har fått sin S-form eftersom den här modellen på ärm har sömmen bakpå ärmen och inte under, som många moderna plagg har.

* * * * * * * * * * * * * * * * * * * * * * * * * * * *
Now it is time to do the adjustments.
On this cotehardie I am not going to change the size of the sleeve or the armehole so it is quite straight forward. This is going to be about 5 cm wider. So I want to add 1 cm to each panel. And if you only add in the sides you will have to do a new sleevepattern from scratch.
So, draw and cut a straight line from the shoulder to the bottom of the pattern.
* * * * * *
Nu är det dags att börja justera mönstret.
På den här cotten så ska jag inte ändra storleken på ärm och ärmhål så det är rätt enkelt. Jag vill lägga till ca 5 cm i vidd runt kroppen så jag kommer lägga till 1 cm per mönsterdel.
Om man bara lägger till i sidorna så kommer ärmhålen att tappa sin form och då behöver man göra en helt ny ärm från grunden.
Så dra och klipp en rak linje från axel till nederkant helt enkelt.

* * * * * * * * * * * * * * * * * * * * * * * * *
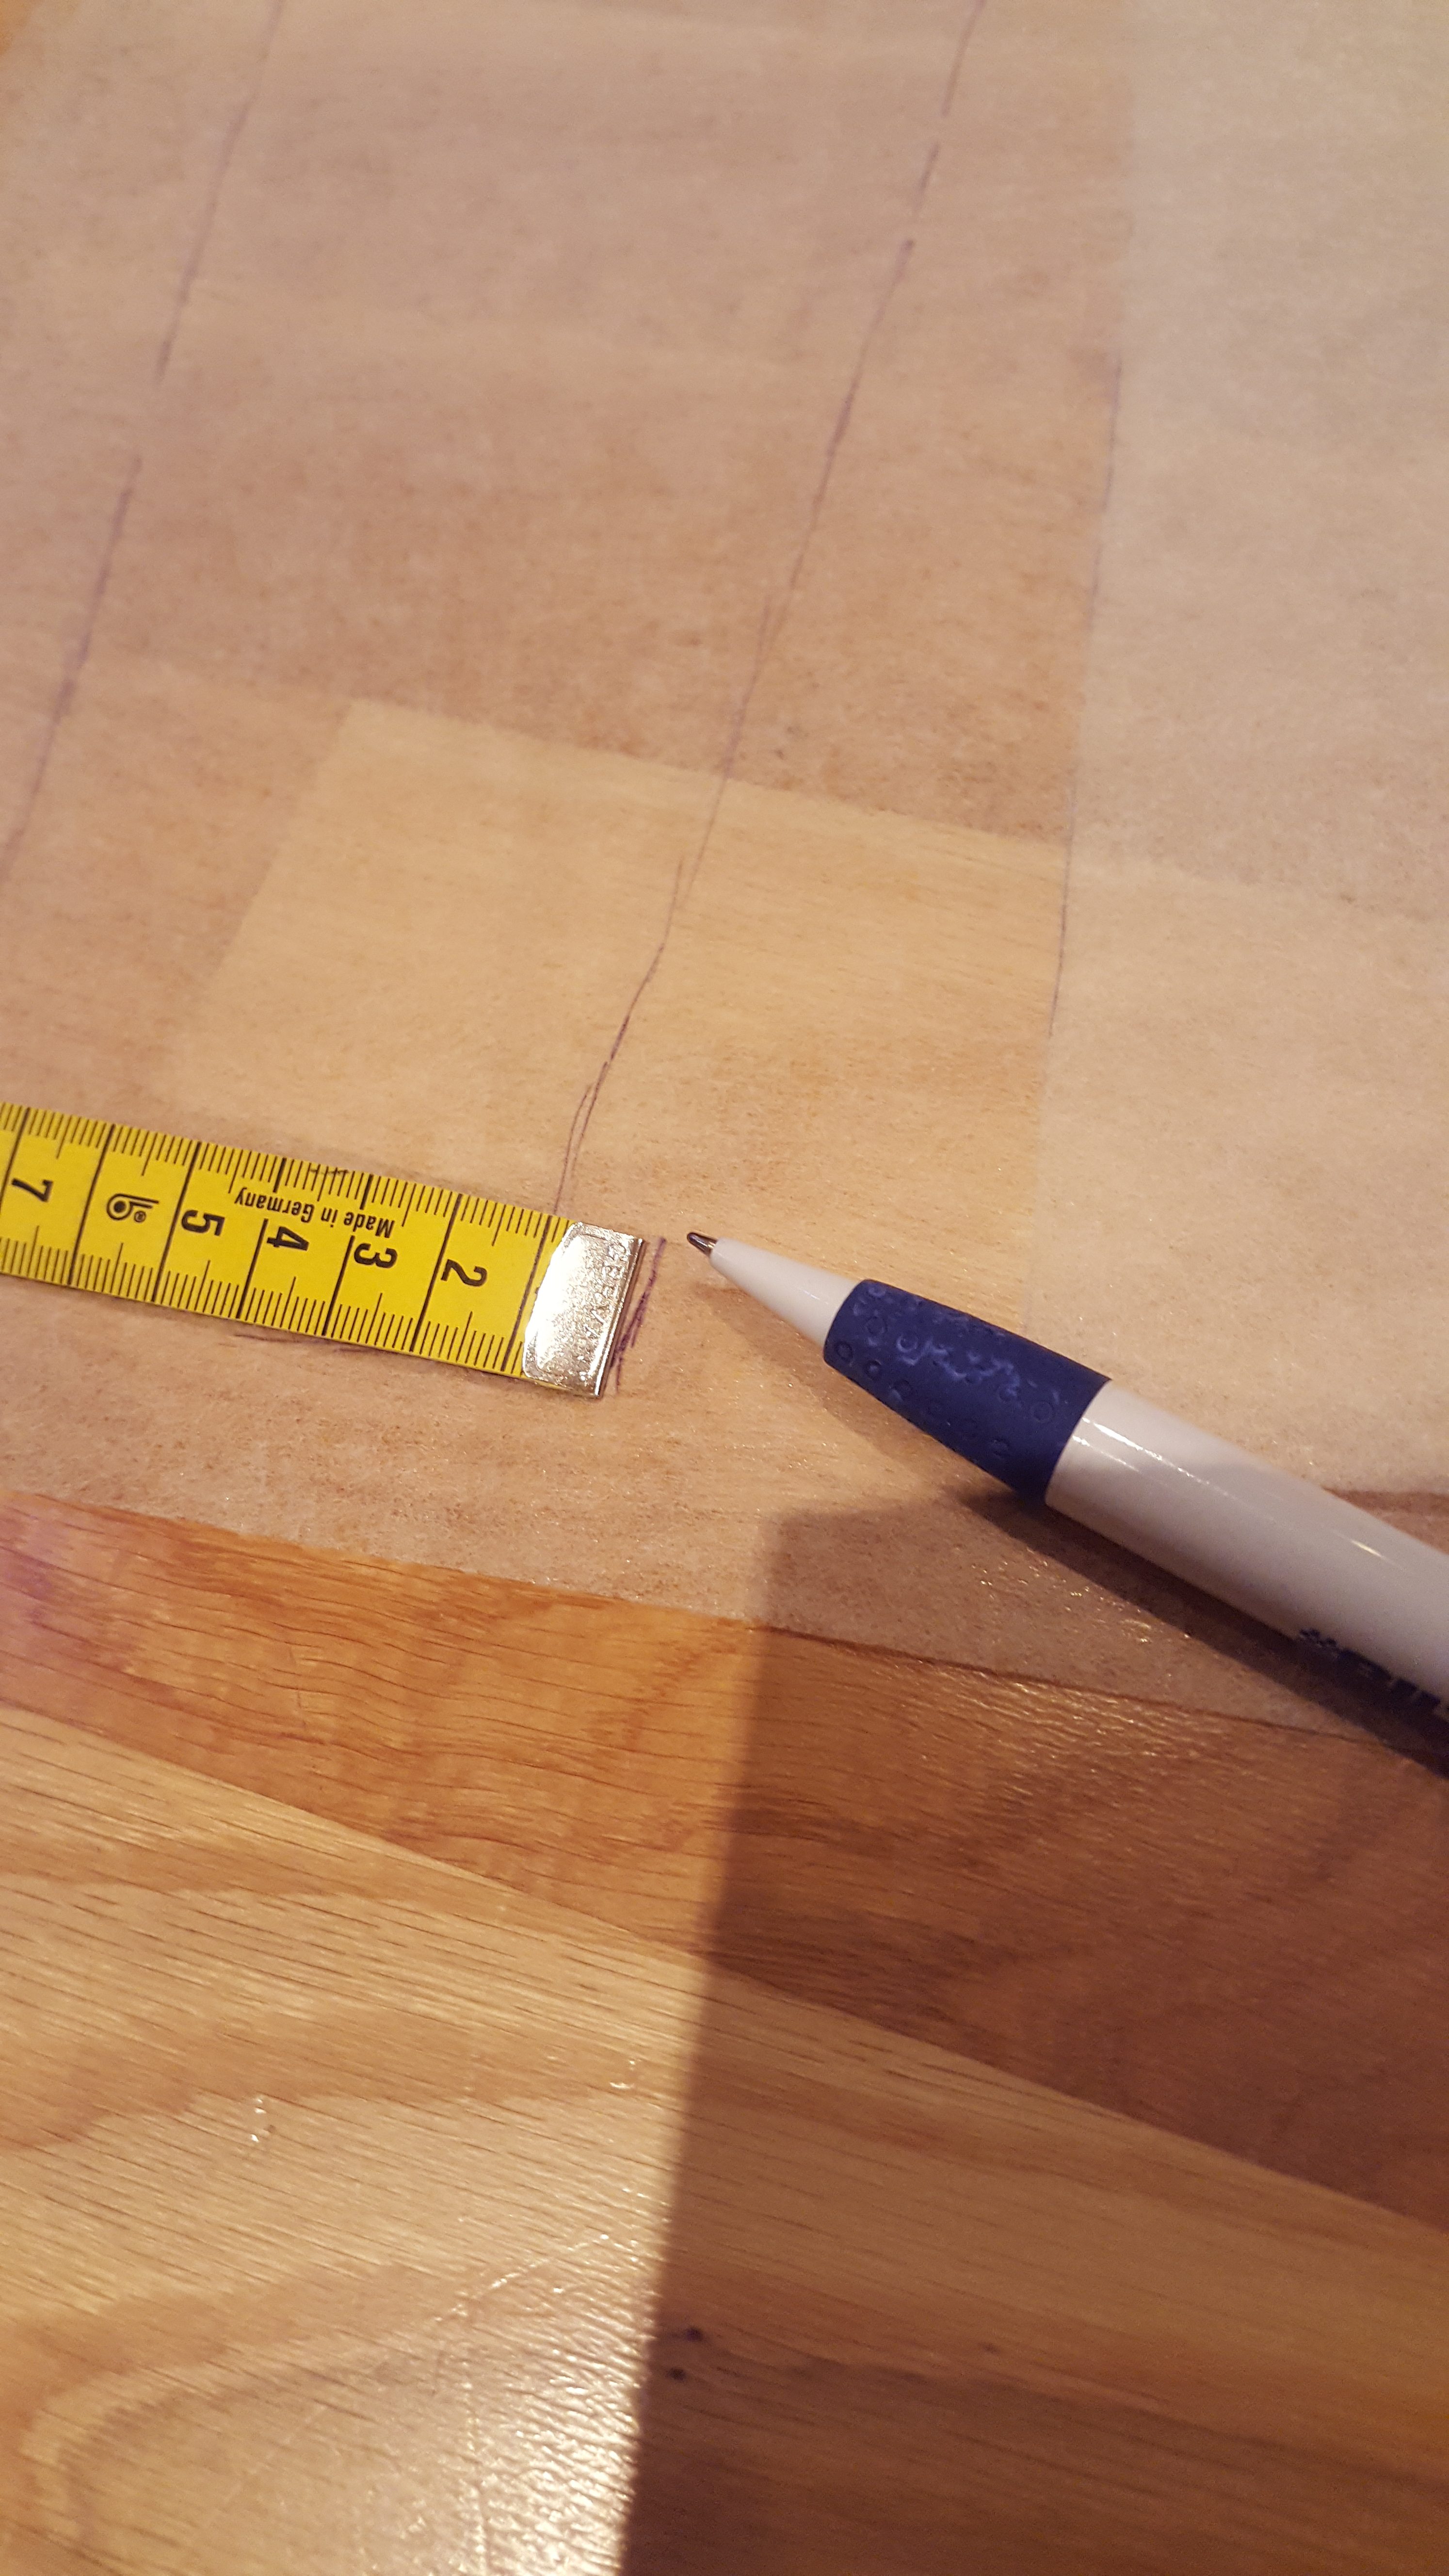
I have traced the left side of the cut up pattern piece as you can see above. Now I am adding a one cm space and then I will trace the other paternpiece to the other side of the space.
* * * * *
Som du kan se på bilden ovan så har jag ritat av den vänstra delen av det uppklippta mönstret på ett nytt mönsterpapper och nu mäter jag ut 1 cm längs den raka kanten innan jag lägger dit den andra mönsterdelen längs den utmätta nya linjen och ritar dit.

* * * * * * * * * * * * * * * * * * * * * * * * * * * * * * *
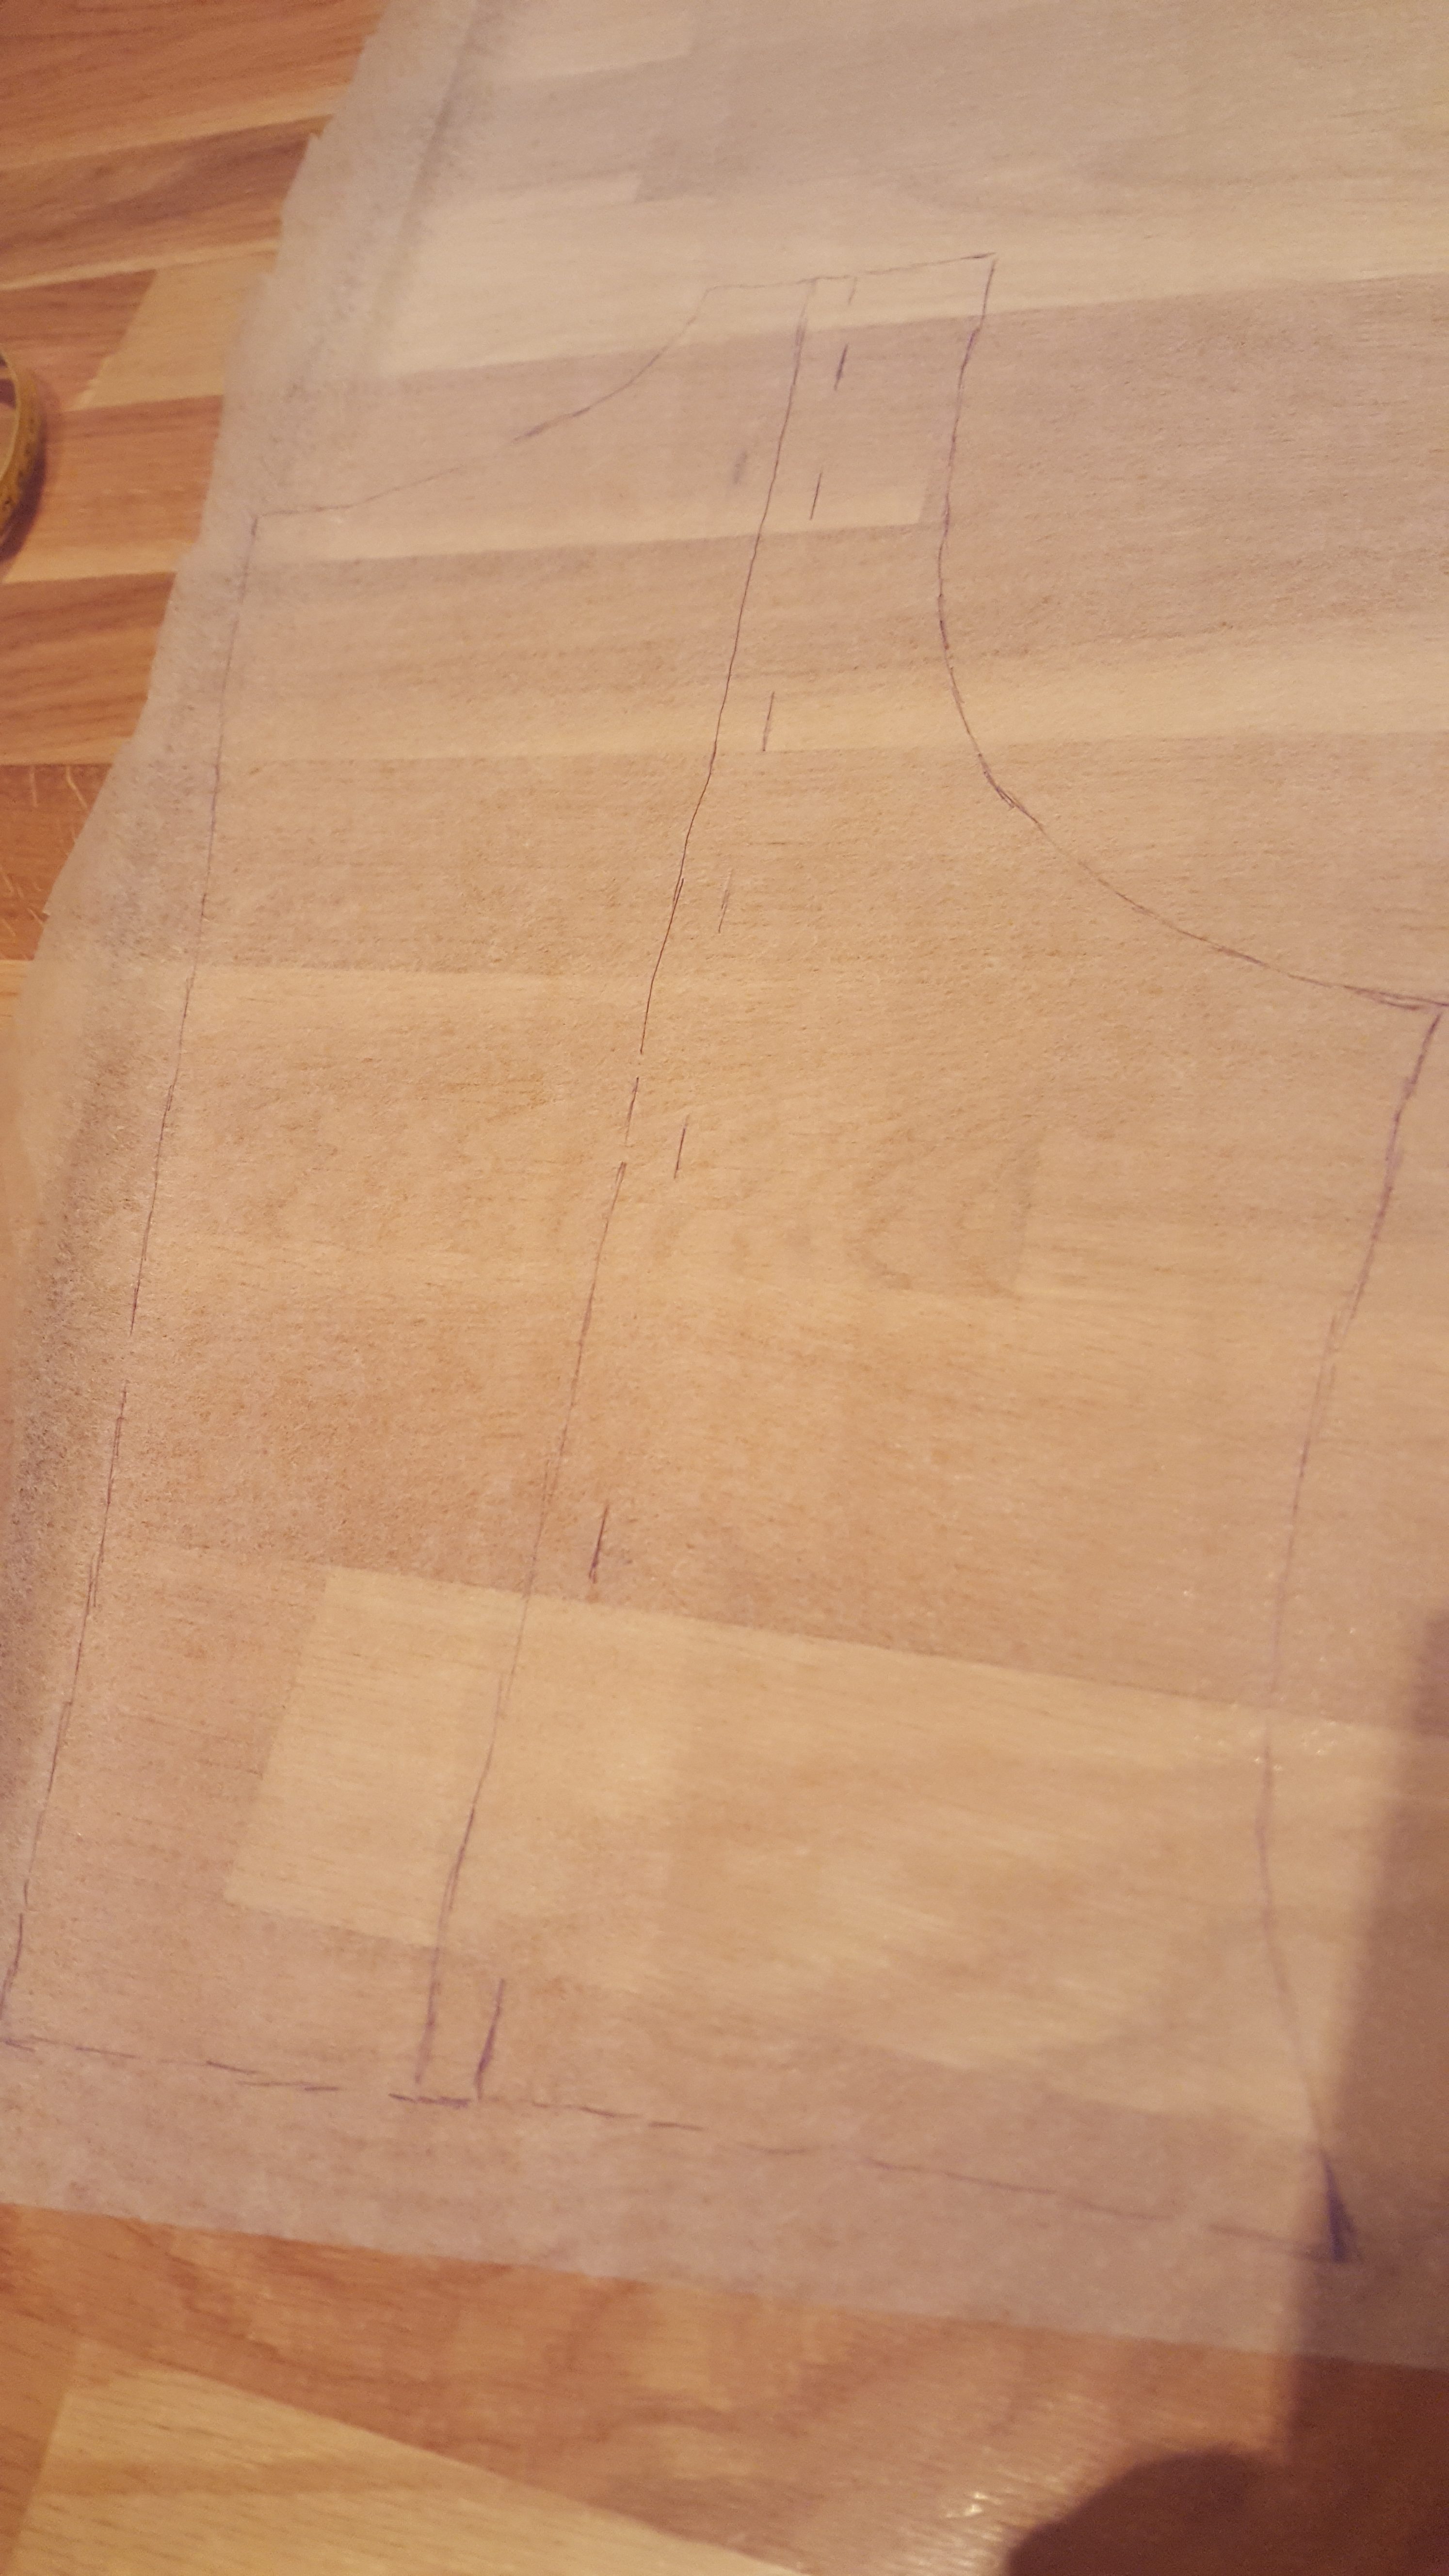
The other half of the pattern have been added on from the dotted line, so now the pattern is one cm wider then before.
* * * * *
Nu har andra halvan blivit tillagd från den streckade linjen, och mönsterdelen är alltså 1 cm bredare än tidigare.

* * * * * * * * * * * * * * * * * * * * * * * * * * * * *
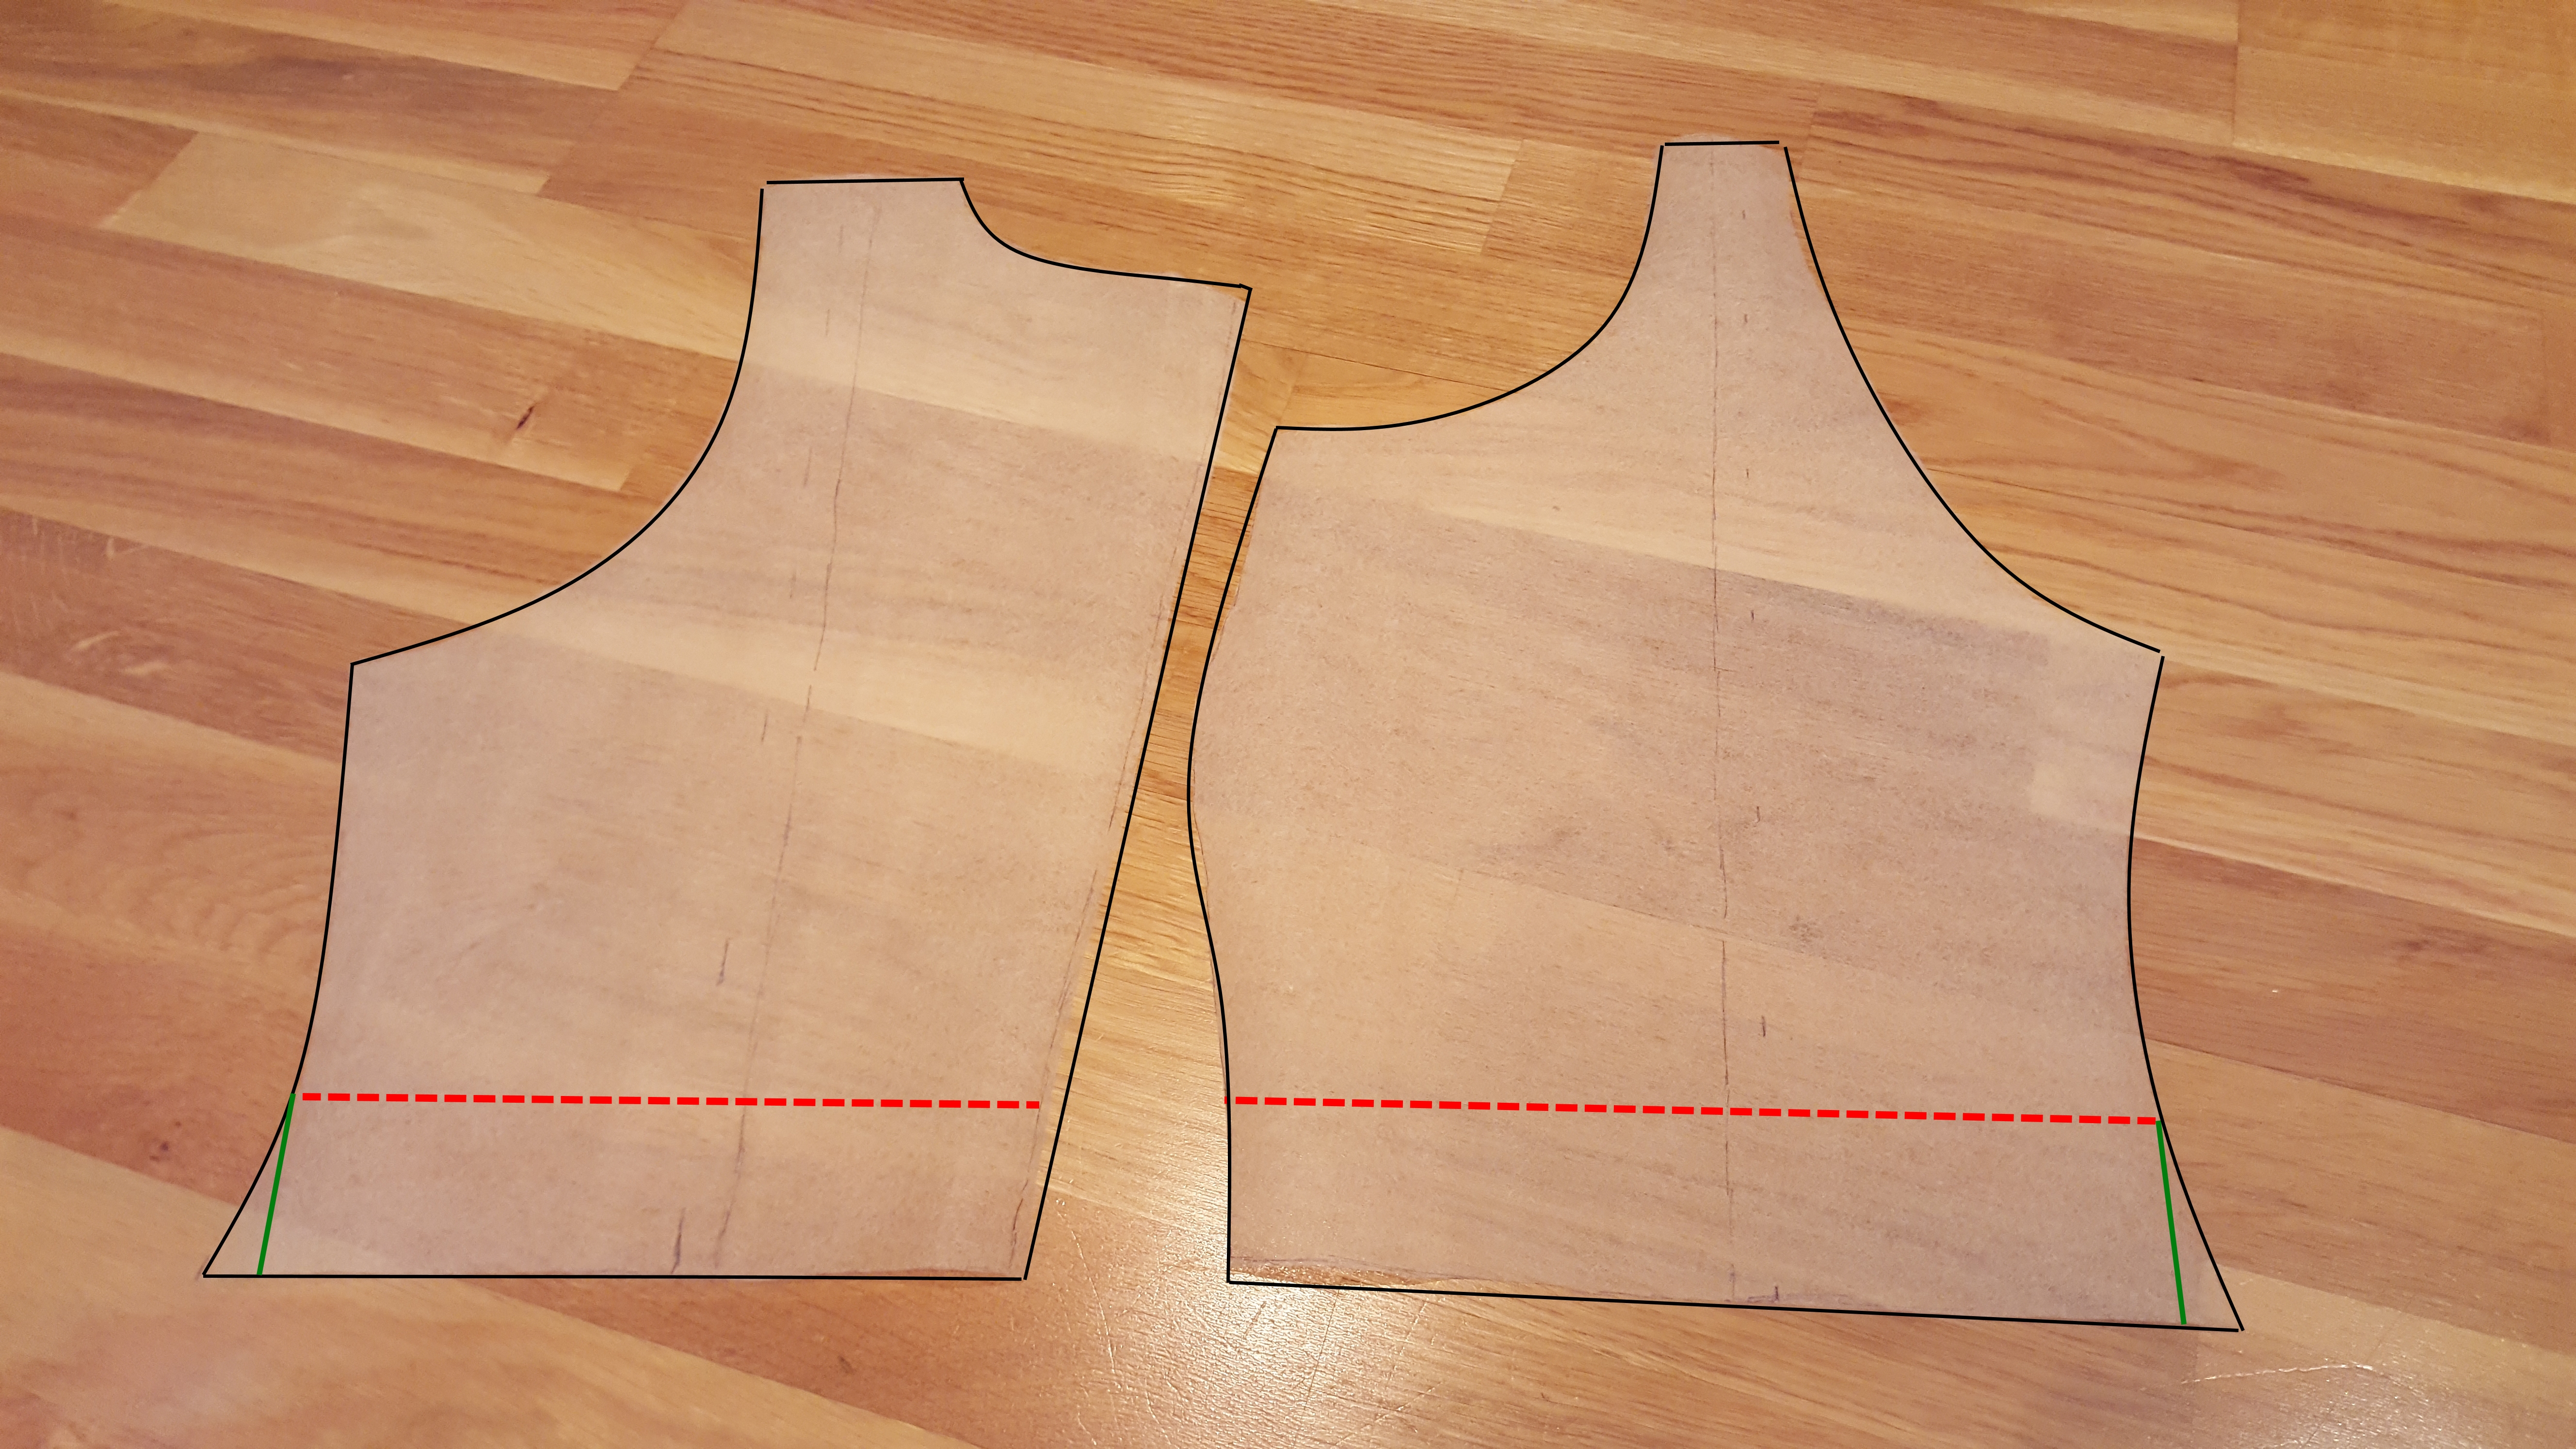
Here are the new patternpieces, I have outlined the edges so you can see them more clearly. It is a bad camera angle that makes the pattern look a bit askew, but they are straight, I guarantee that 😉
As I wrote in the beginning, you trace the panel down to the waist wich usually is where the point of the gusset is.
But now I can see that it is a very clear waist a couple cm above that. (The dotted red line) So I decided to cut the pattern straight from there (cutting at the green line) and put the gussets on the new dress from the ”real waist”.
* * * * *
Här är de nya mönsterdelarna, för att göra det enklare att se så har jag ritat ut kanterna åt er,  och nej delarna är inte sneda, det är en dålig kameravinkel.
Som jag skrev tidigare så räcker det att göra mönstret ner till midjan och den brukar vara där spetsen på kilen slutar. Men efter att ha ritat ut och klippt ut delarna så såg det ut att vara en tydlig midja några cm ovanför kilspetsarna. Så jag bestämde mig för att sätta kilarna högre på den nya klänningen och därför räta ut mönsterdelarna enligt de gröna linjerna.

So… now it is time to cut the fabric and sew the pieces together.
Since this is a more elaborate dress than I usually want to display here, I will just show you the result later on 🙂
* * * * * *
Nu är det bara att klippa till och sy.
Men eftersom det här är en lite mer avancerad modell än jag brukar vilja visa här på sidan så kommer jag bara visa själva resultatet längre fram 🙂

Making a bycocket / Att göra en Robin Hood-hatt

För ovanlighetens skull så inleder jag på Svenska.
Detta för att jag redan har skrivit om denna hatt och delat mönster och instruktioner på Medeltidsveckan på Gotlands facebooksida 🙂
https://www.facebook.com/Medeltidsveckan/posts/1580277431983074

—————————————————————————————–

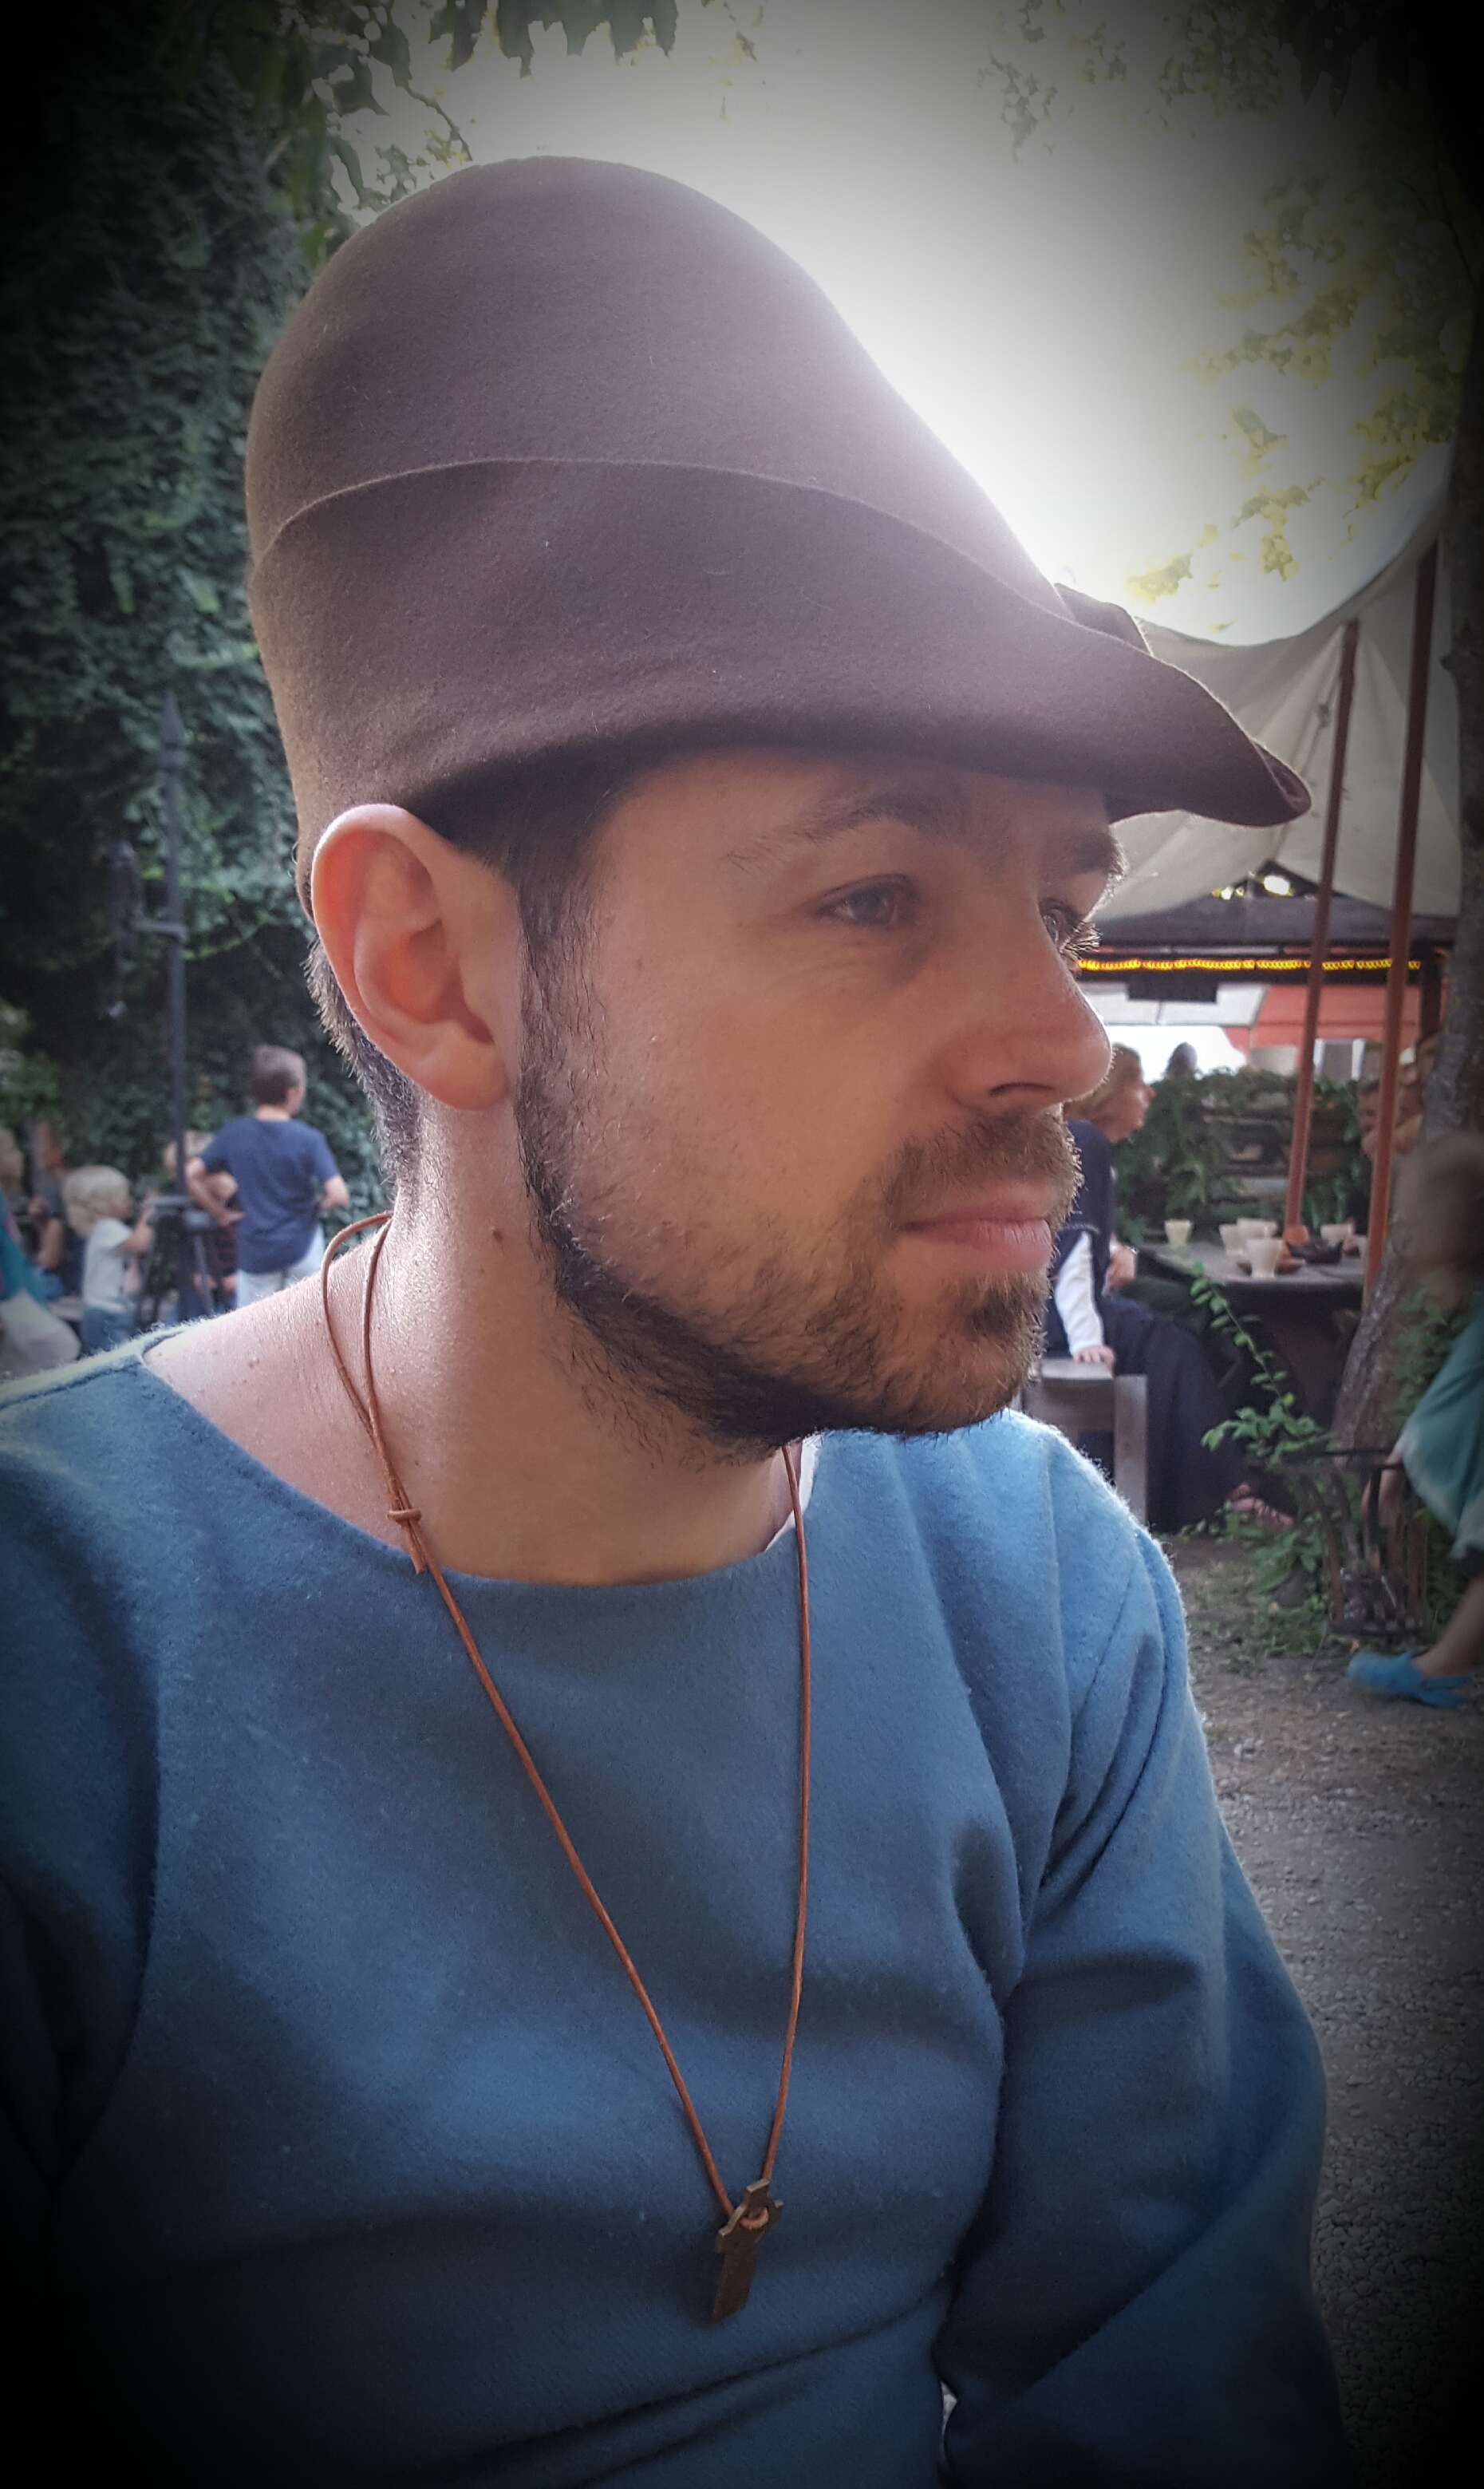
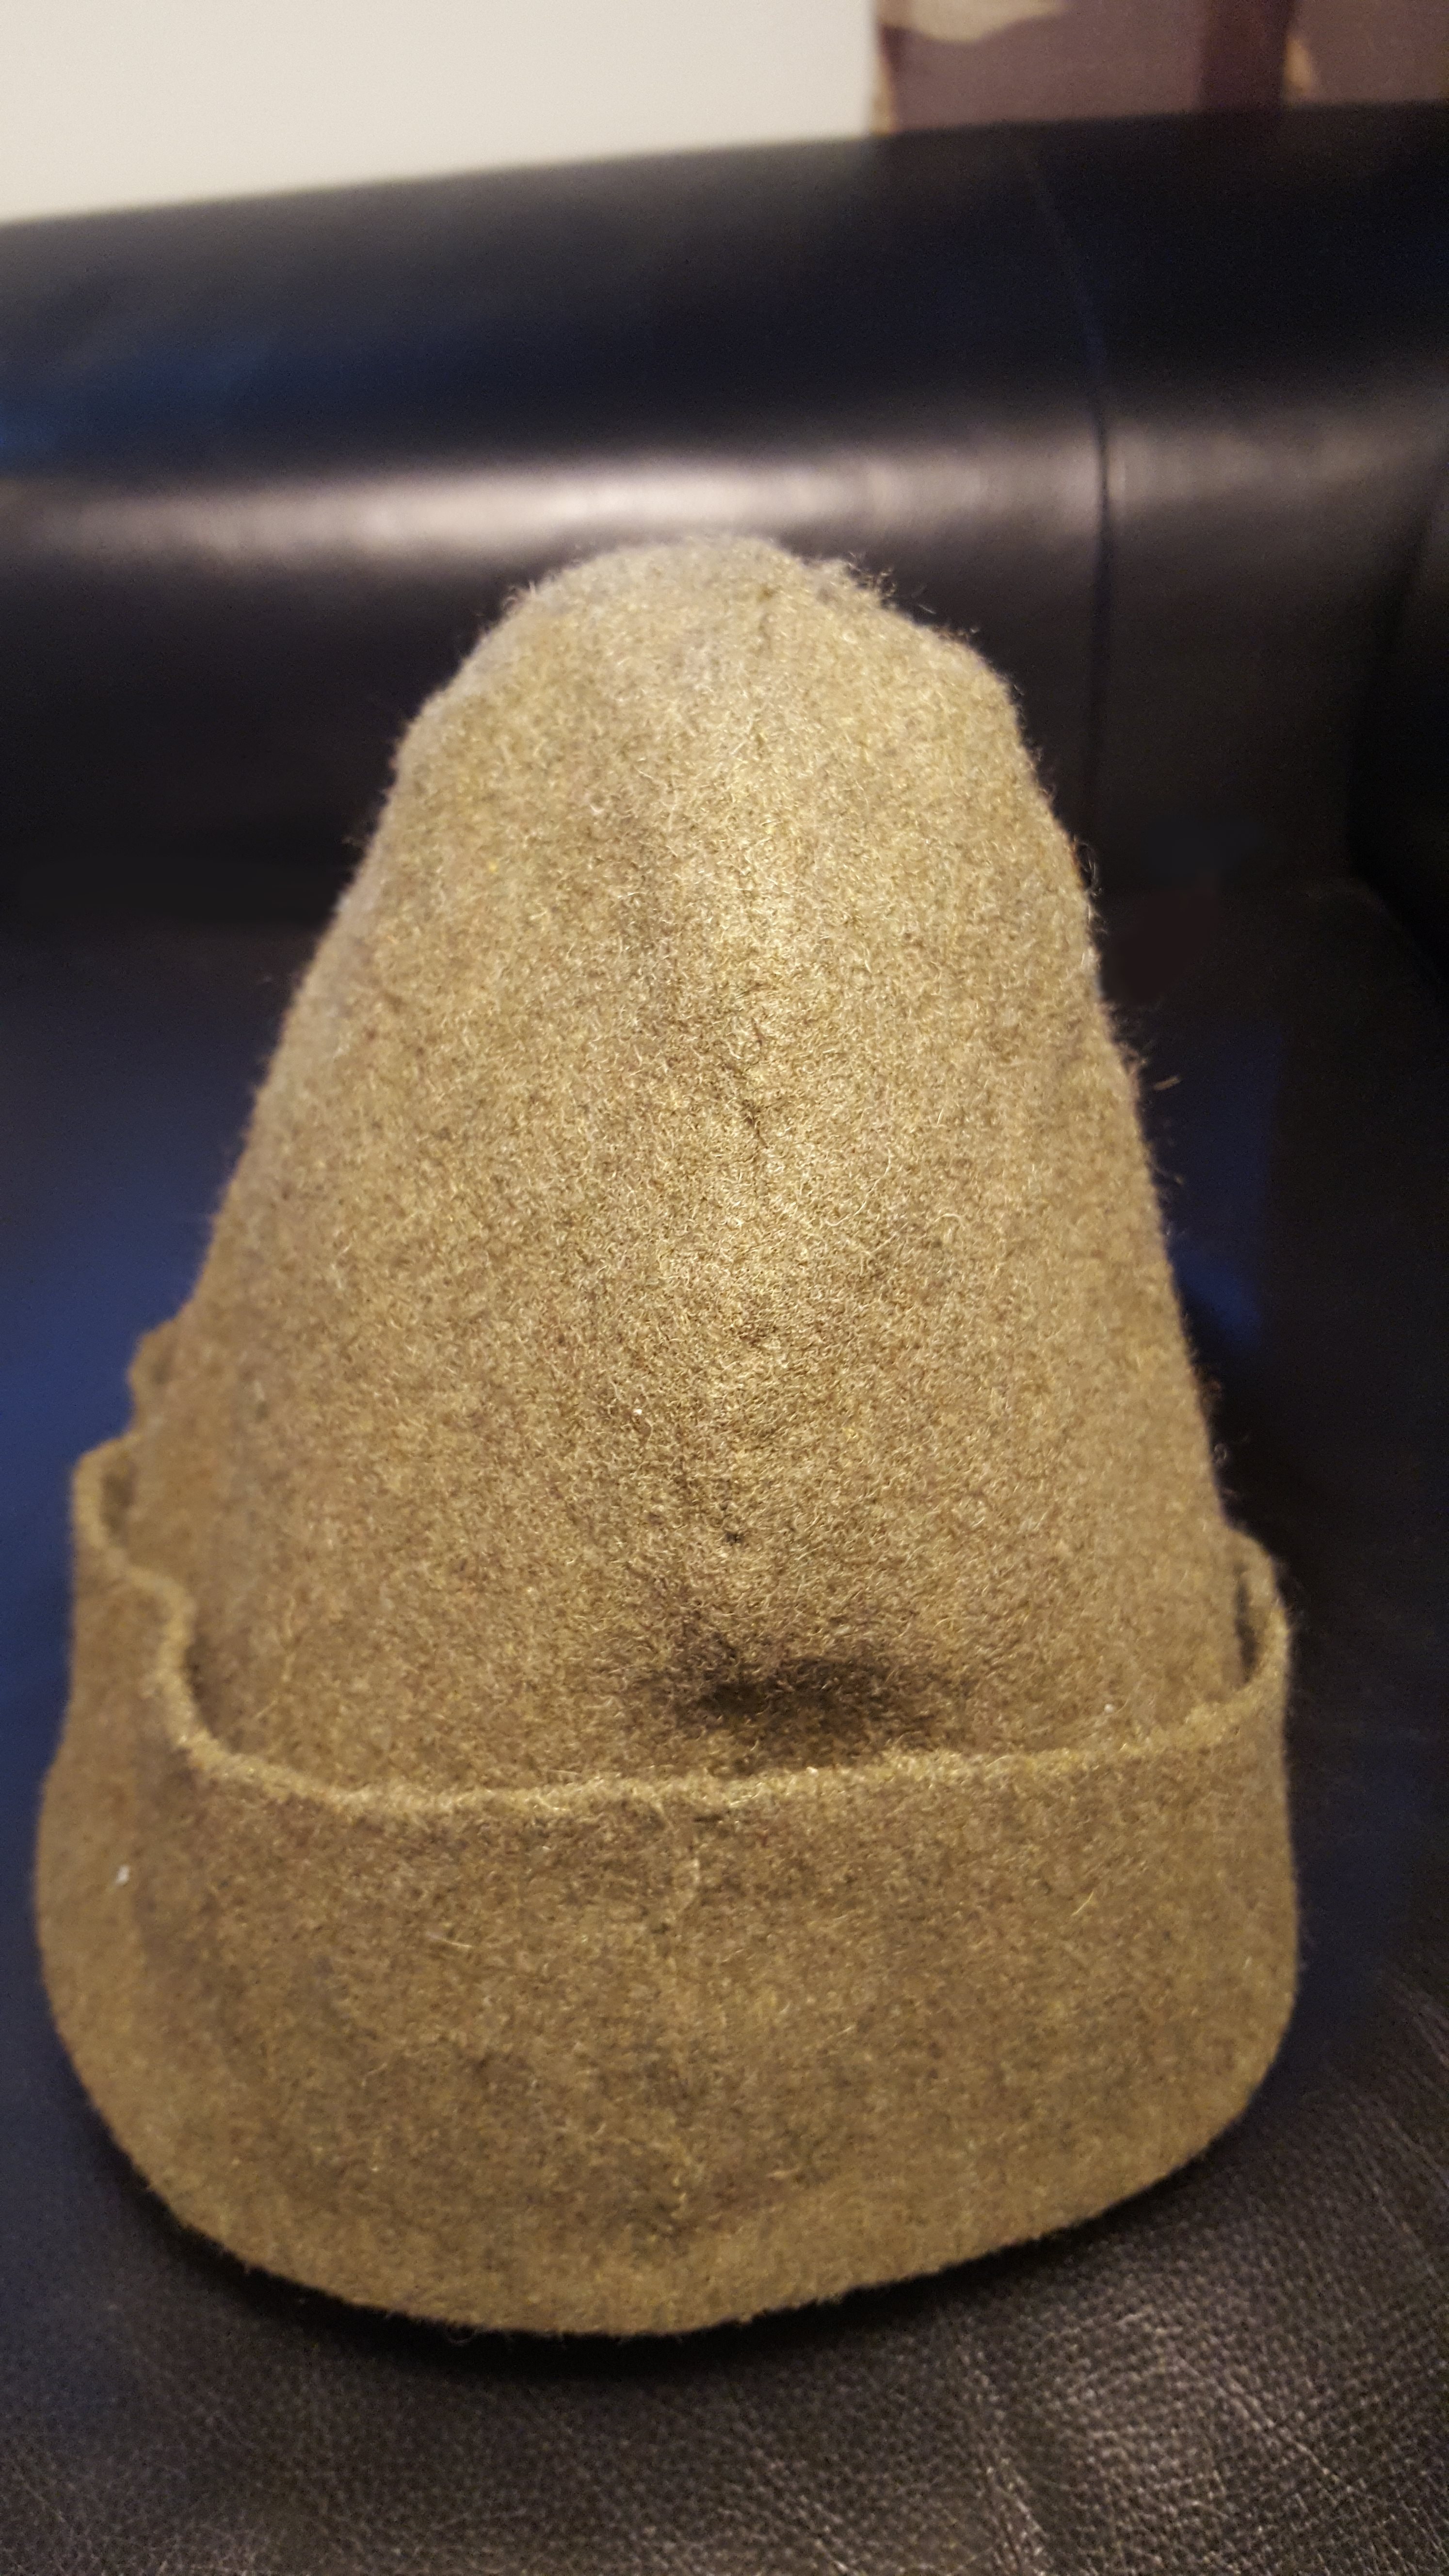
Everybody is familiar with the classic bycocket, the hat that Robin Hood is wearing. The ”hunting hat” that you can find in many manuscripts with images about hunting.

I do agree with those that says that it is a hat made out of a felted fabric that is steemed and pulled over a mold to get it’s bellshape and then the brim is folded upp on just one side, which create the pointed shape.
Like this one that my husband is wearing here.
It is made by Amica Sundström from Historical Textiles

But – It is quite easy to sew one and get the same shape.

I have made two – but in different ways.
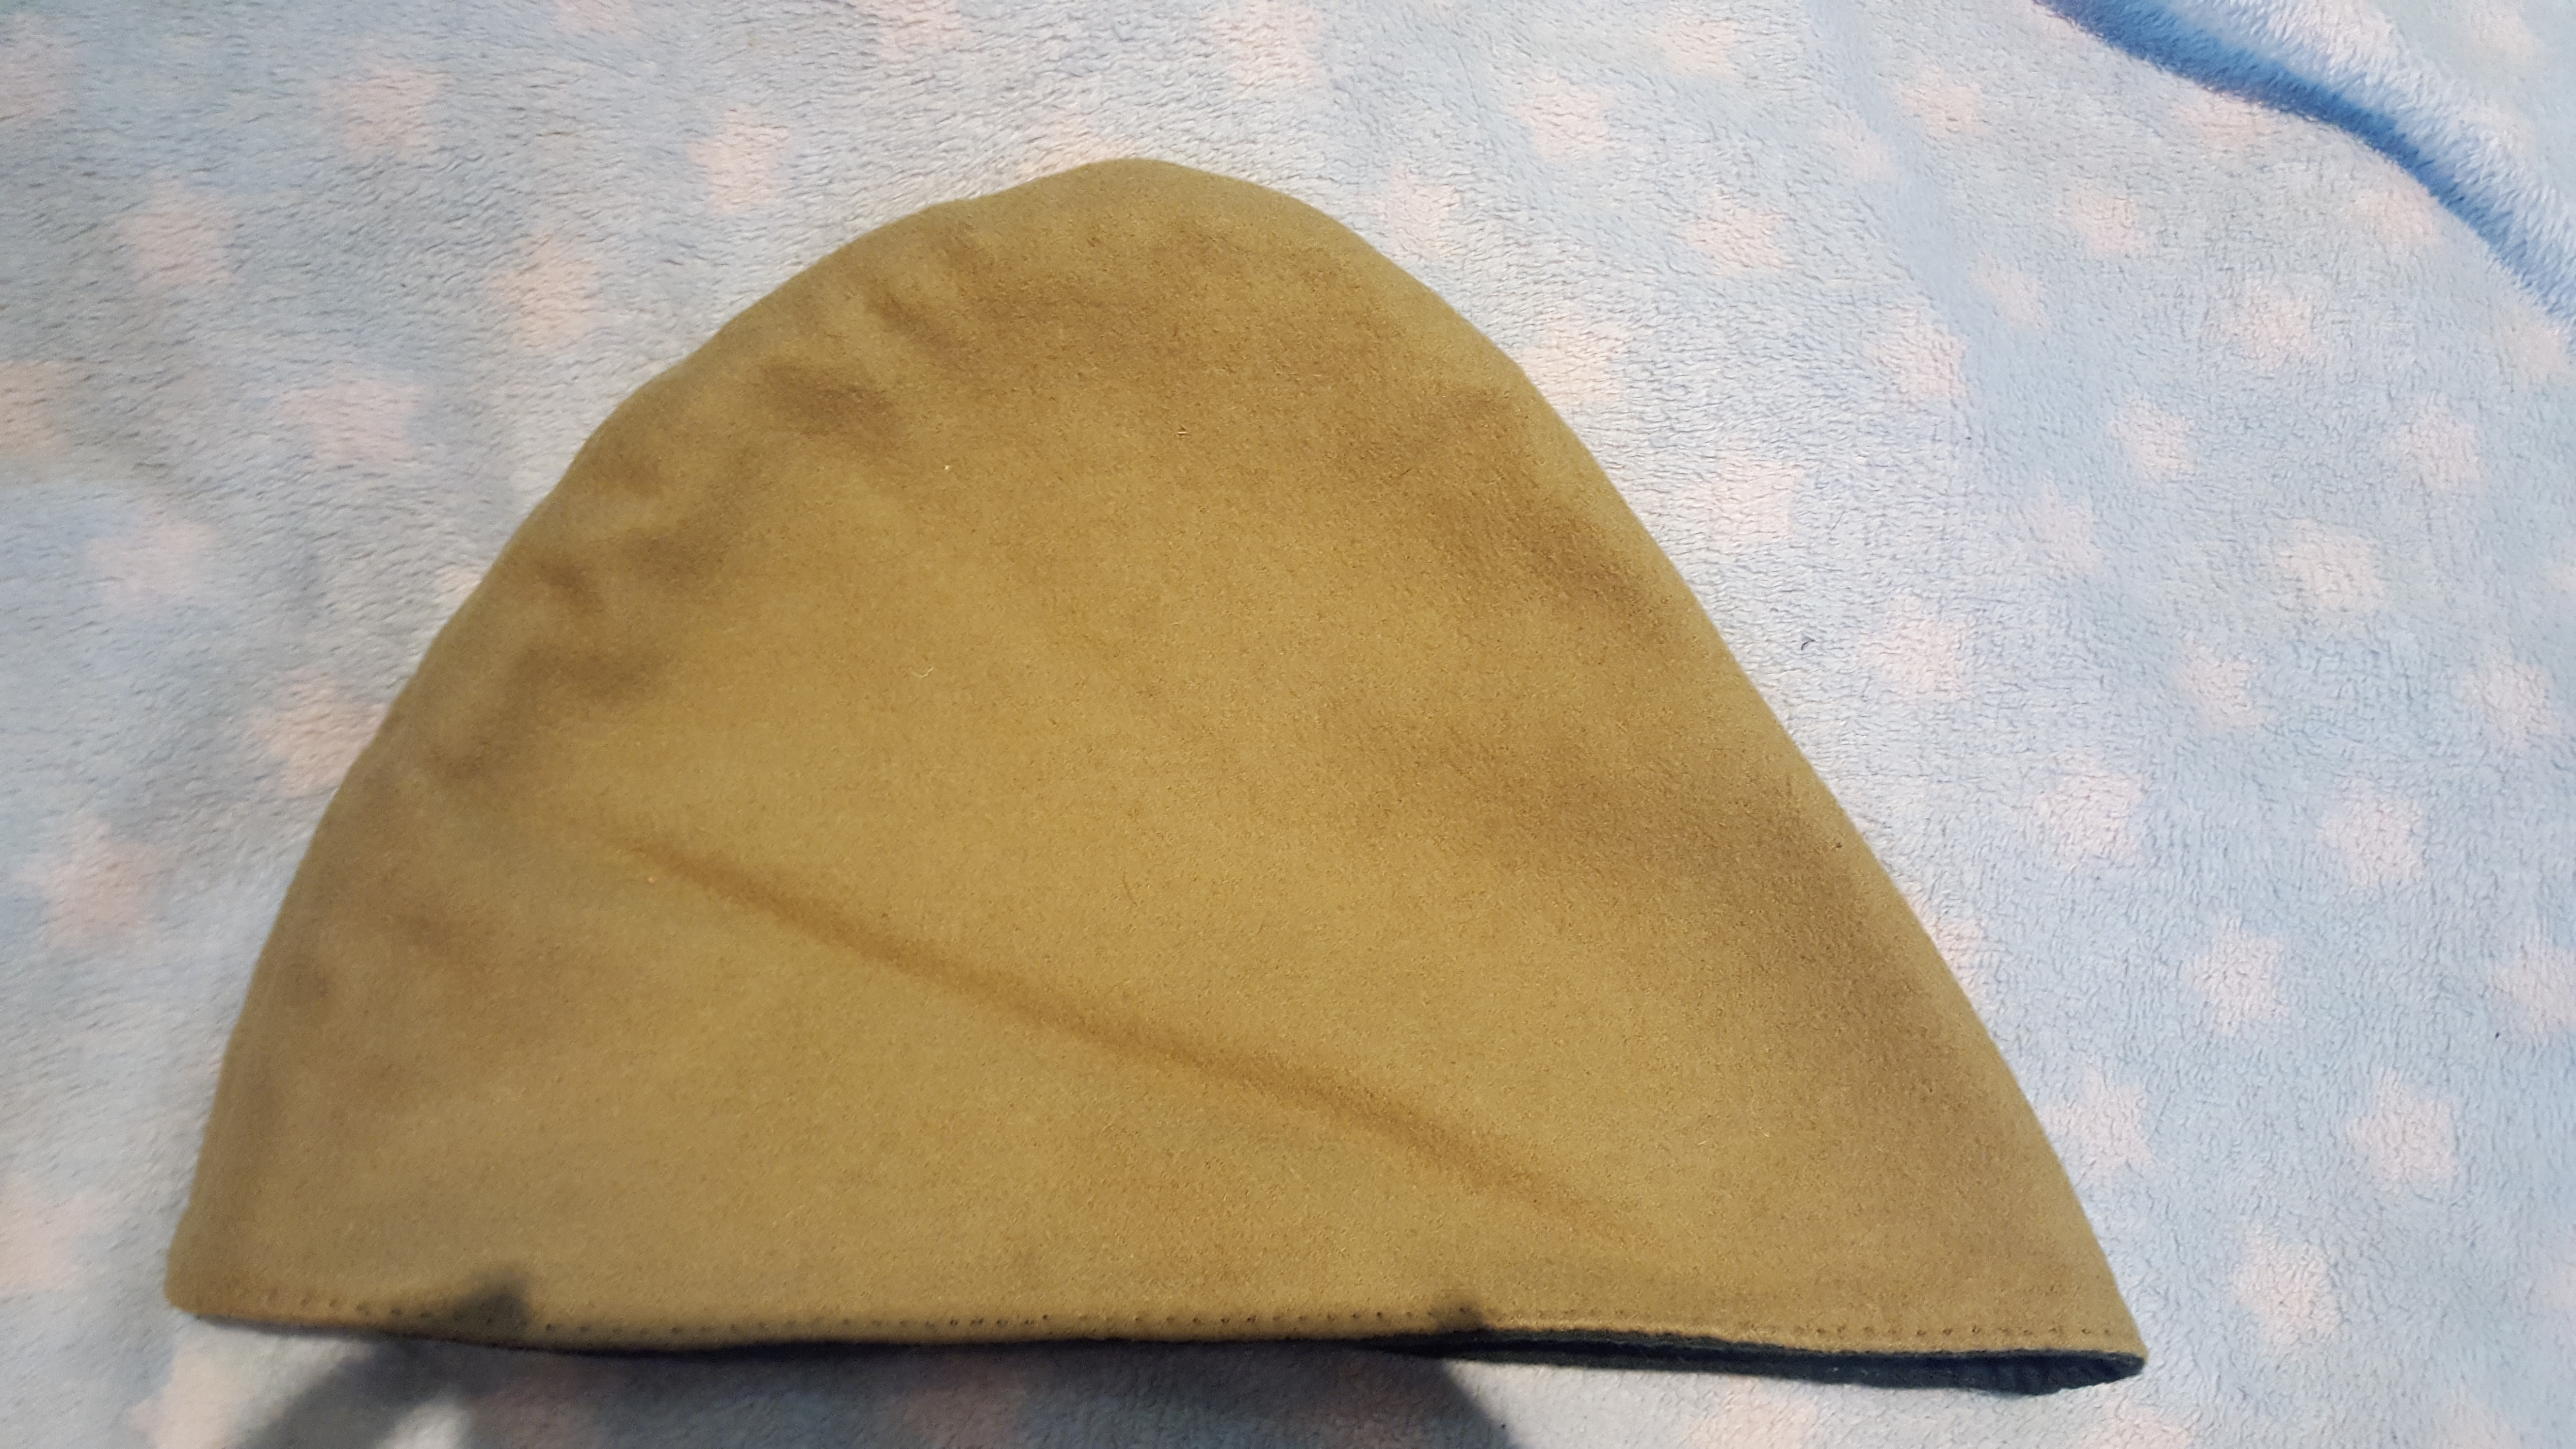
The first was just two pieces of fabric stitched together on the curved part.
Like this:

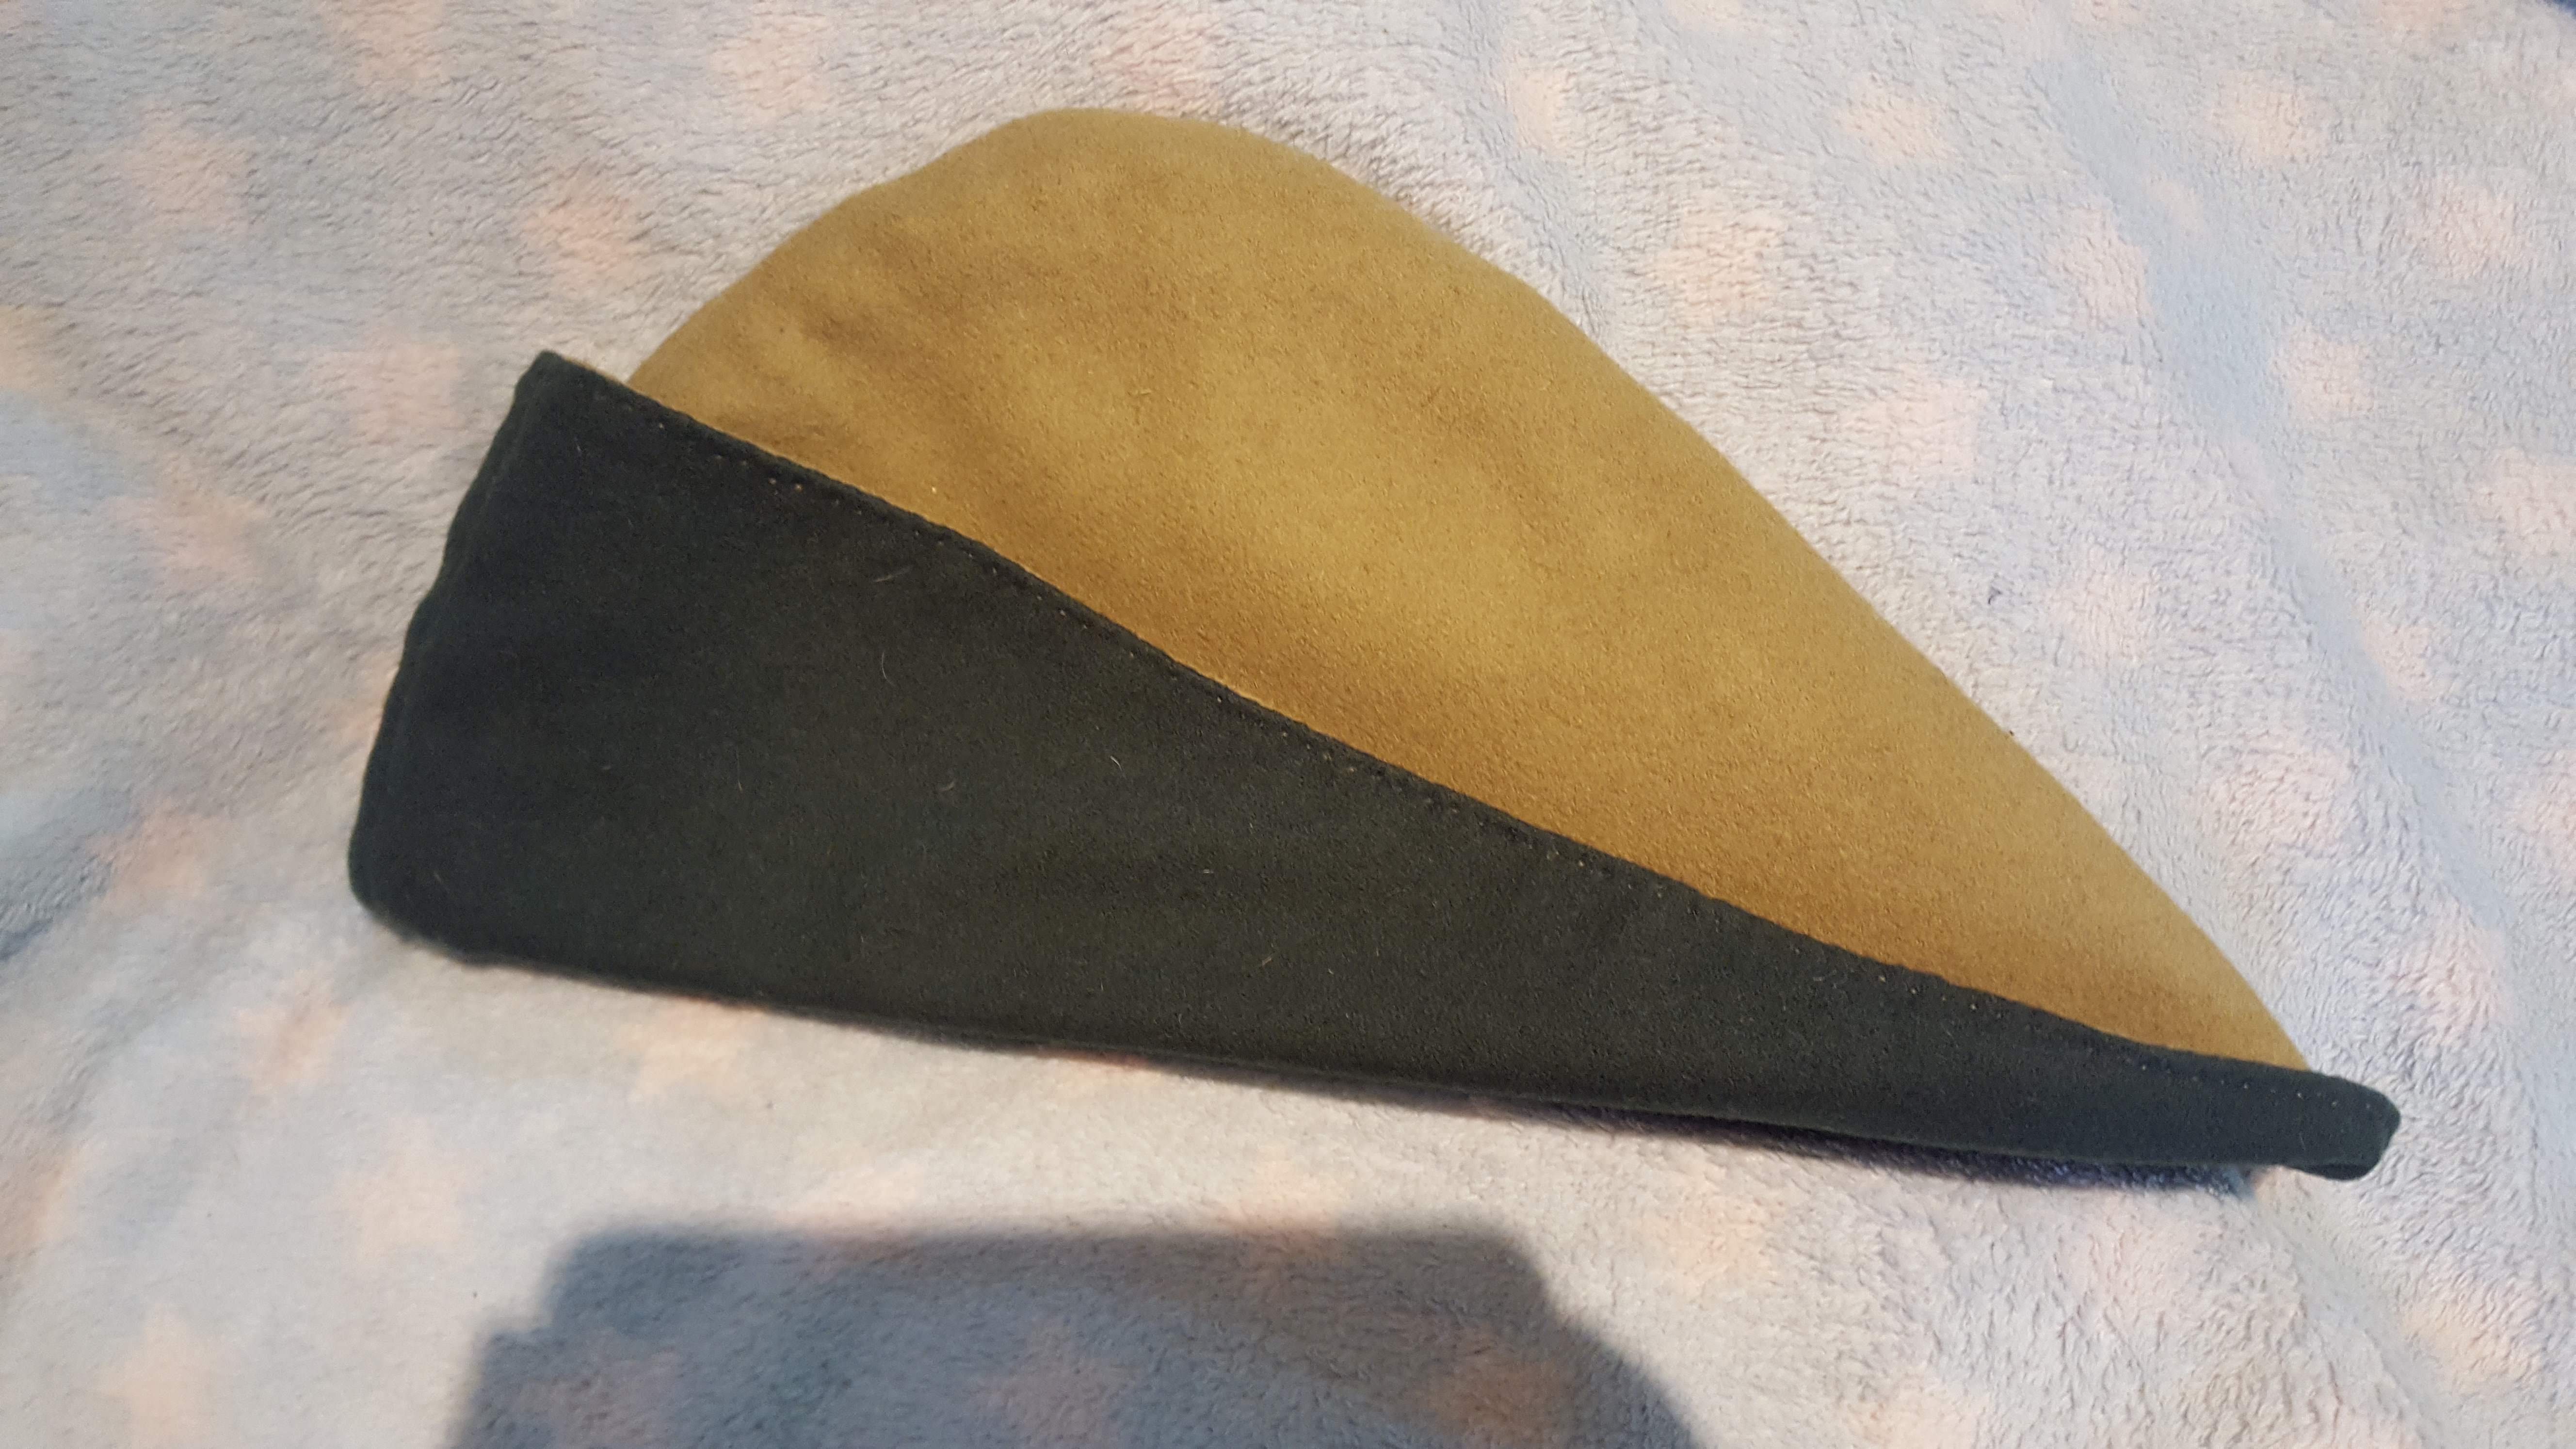
Well… to be honest, I did this twice and then stitched those two different hats together to achieve this:

If you look closely, you can se that the part on the right is a bit straighter than the part on the left and the peak is shifted a little bit back (to the left in the picture) thats just to achieve balance and get a longer ”nose” on the hat when you have it on. 

But I made a pattern that I believe is a good crossover betwen the two.

This…

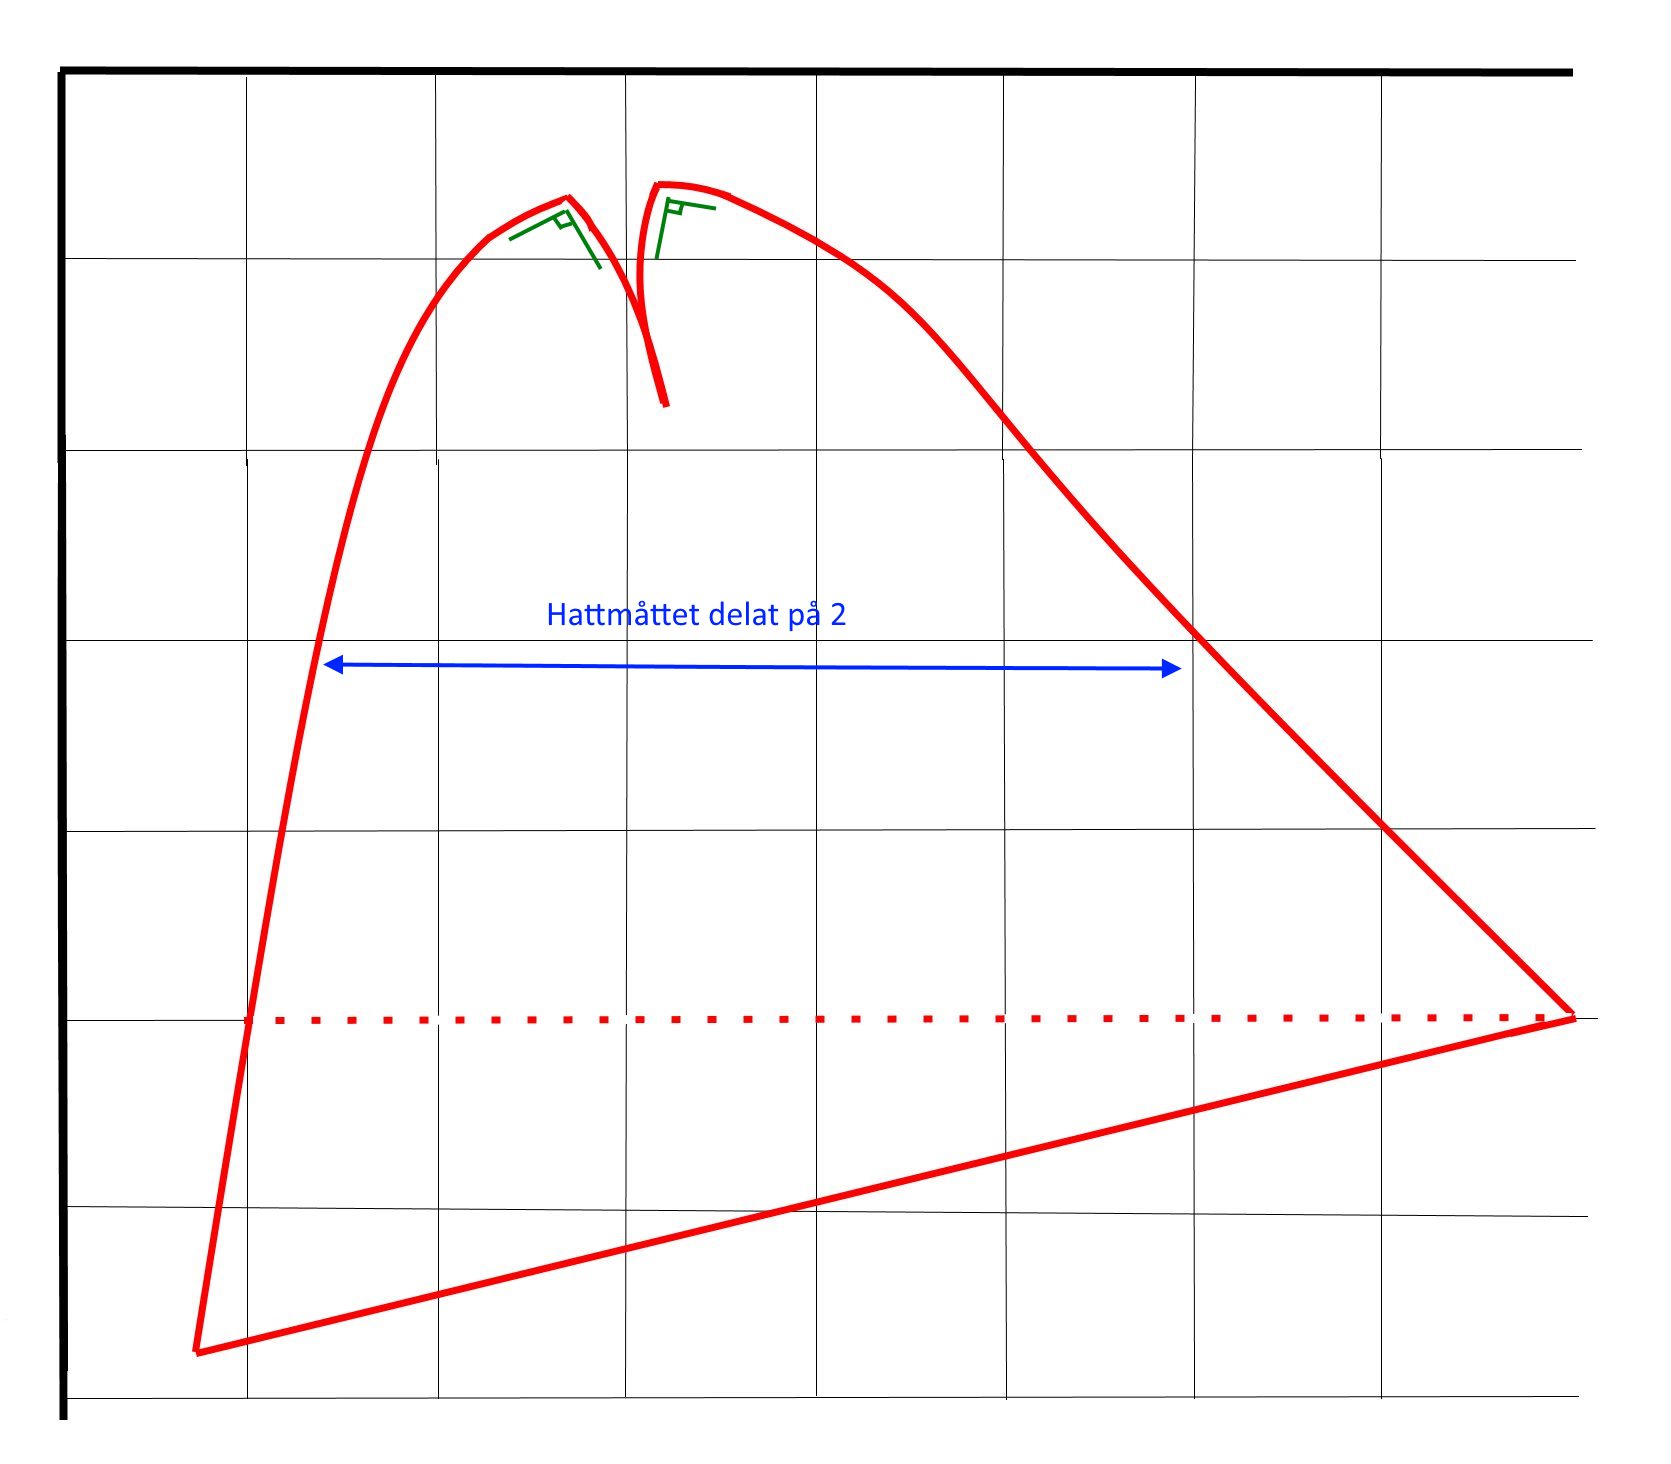
The blue arrow say ”your hat-measurement divided in two”.
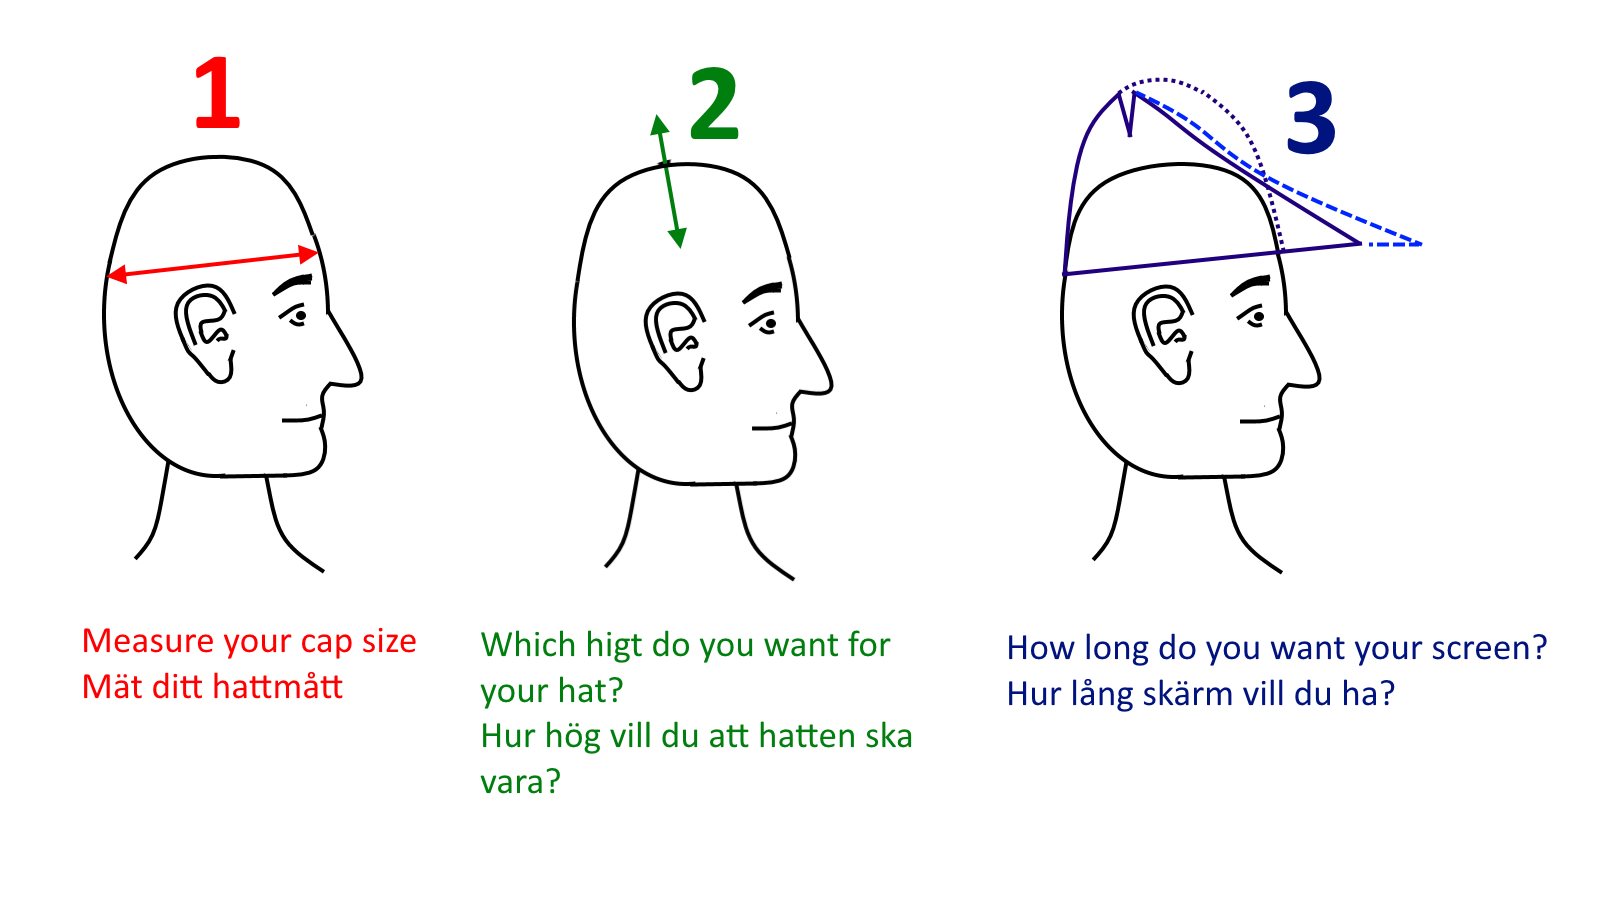
And this is how I’m thinking when I am measuring for the pattern.:

The pattern above is made for one with about hatsize 56 cm. Every square measures 5 cm. Notice that the blue line is a bit above where you actually measures your hatsize. Therfore it is a bit smaller. Do a mocup before cutting in to your expensive fabric though 😉

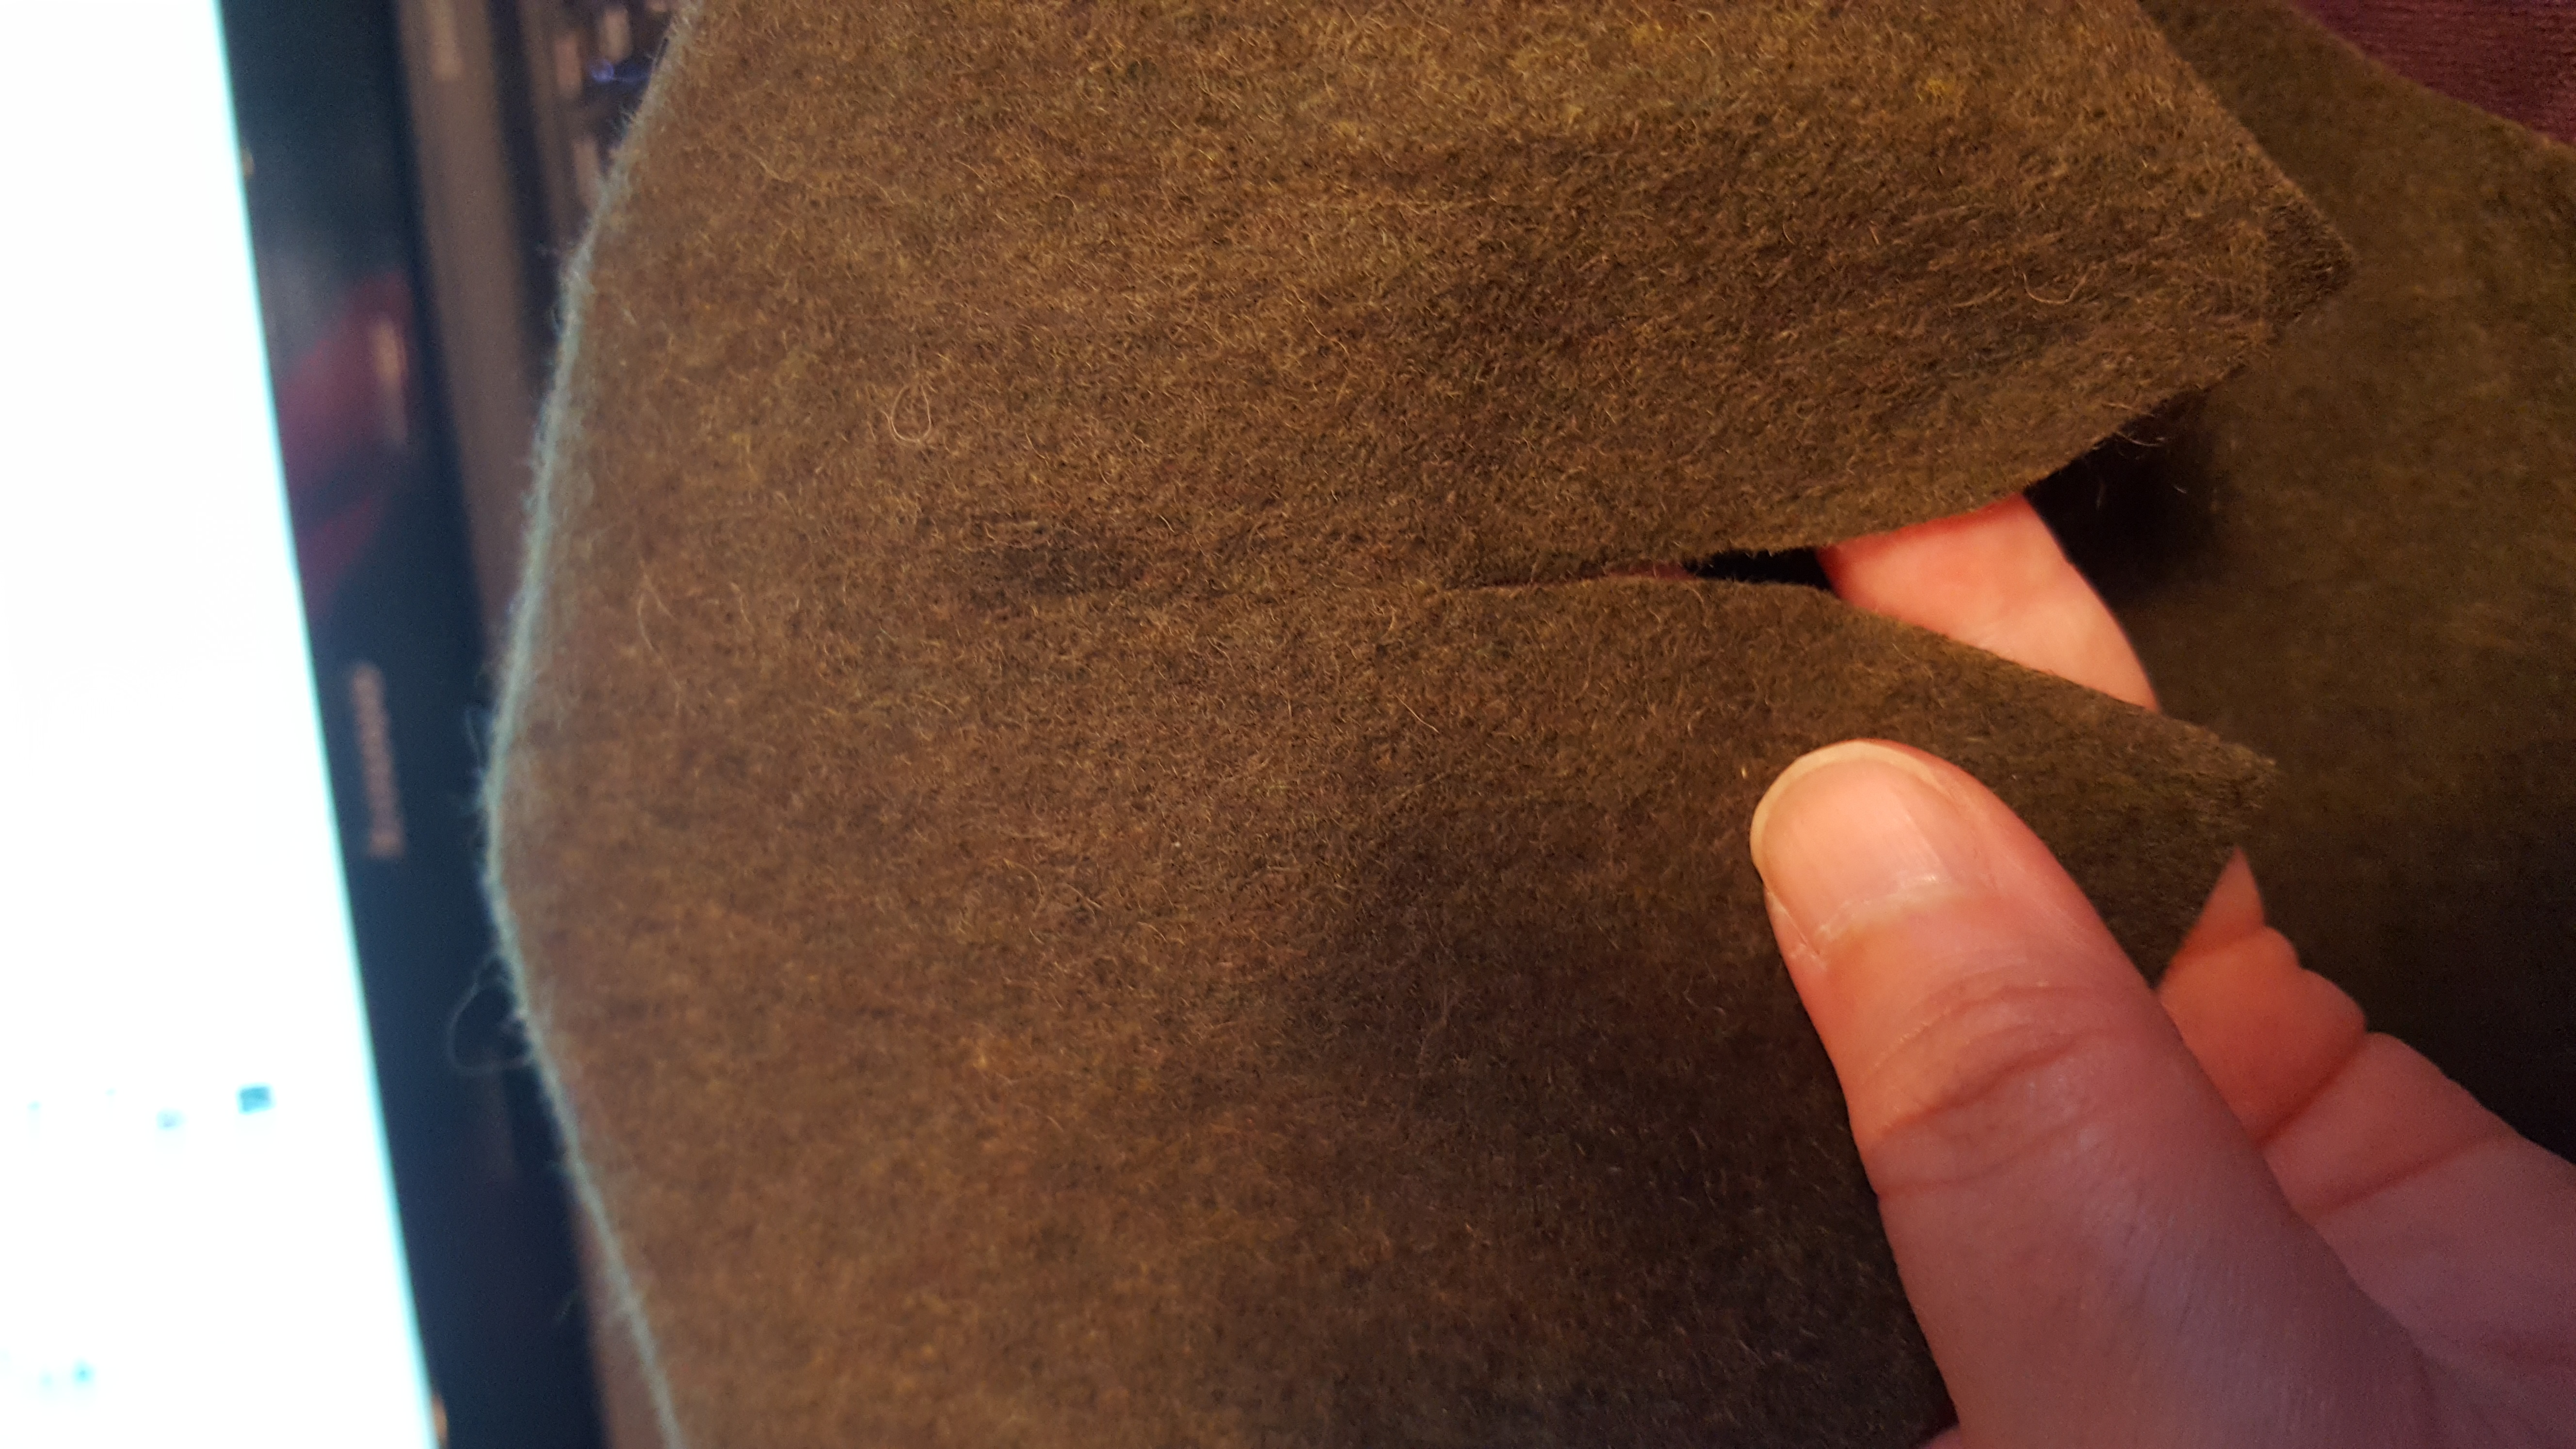
About that – fabric. If you use a thick felted fabric, like something suitable for a cloak. Then you can sew with almost invisible stitches.
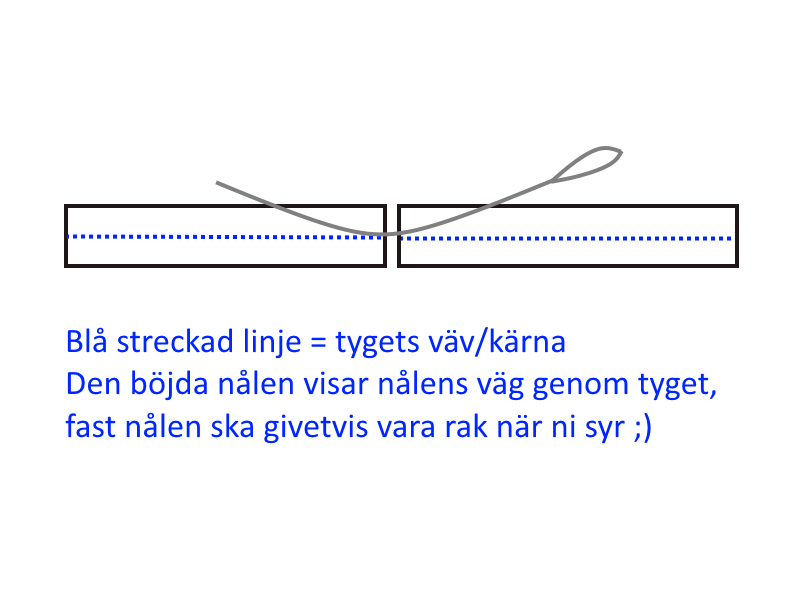
Like this:

The text says:
Blue dotted line = the fabrics core/weft.
The bended needle shows the way that the needle should take trough the fabric, but the needle is of course supposed to be straight when you are sewing 😉

Start by closing the small V-shapes on the crown, and then line up and sew the two halfs together.
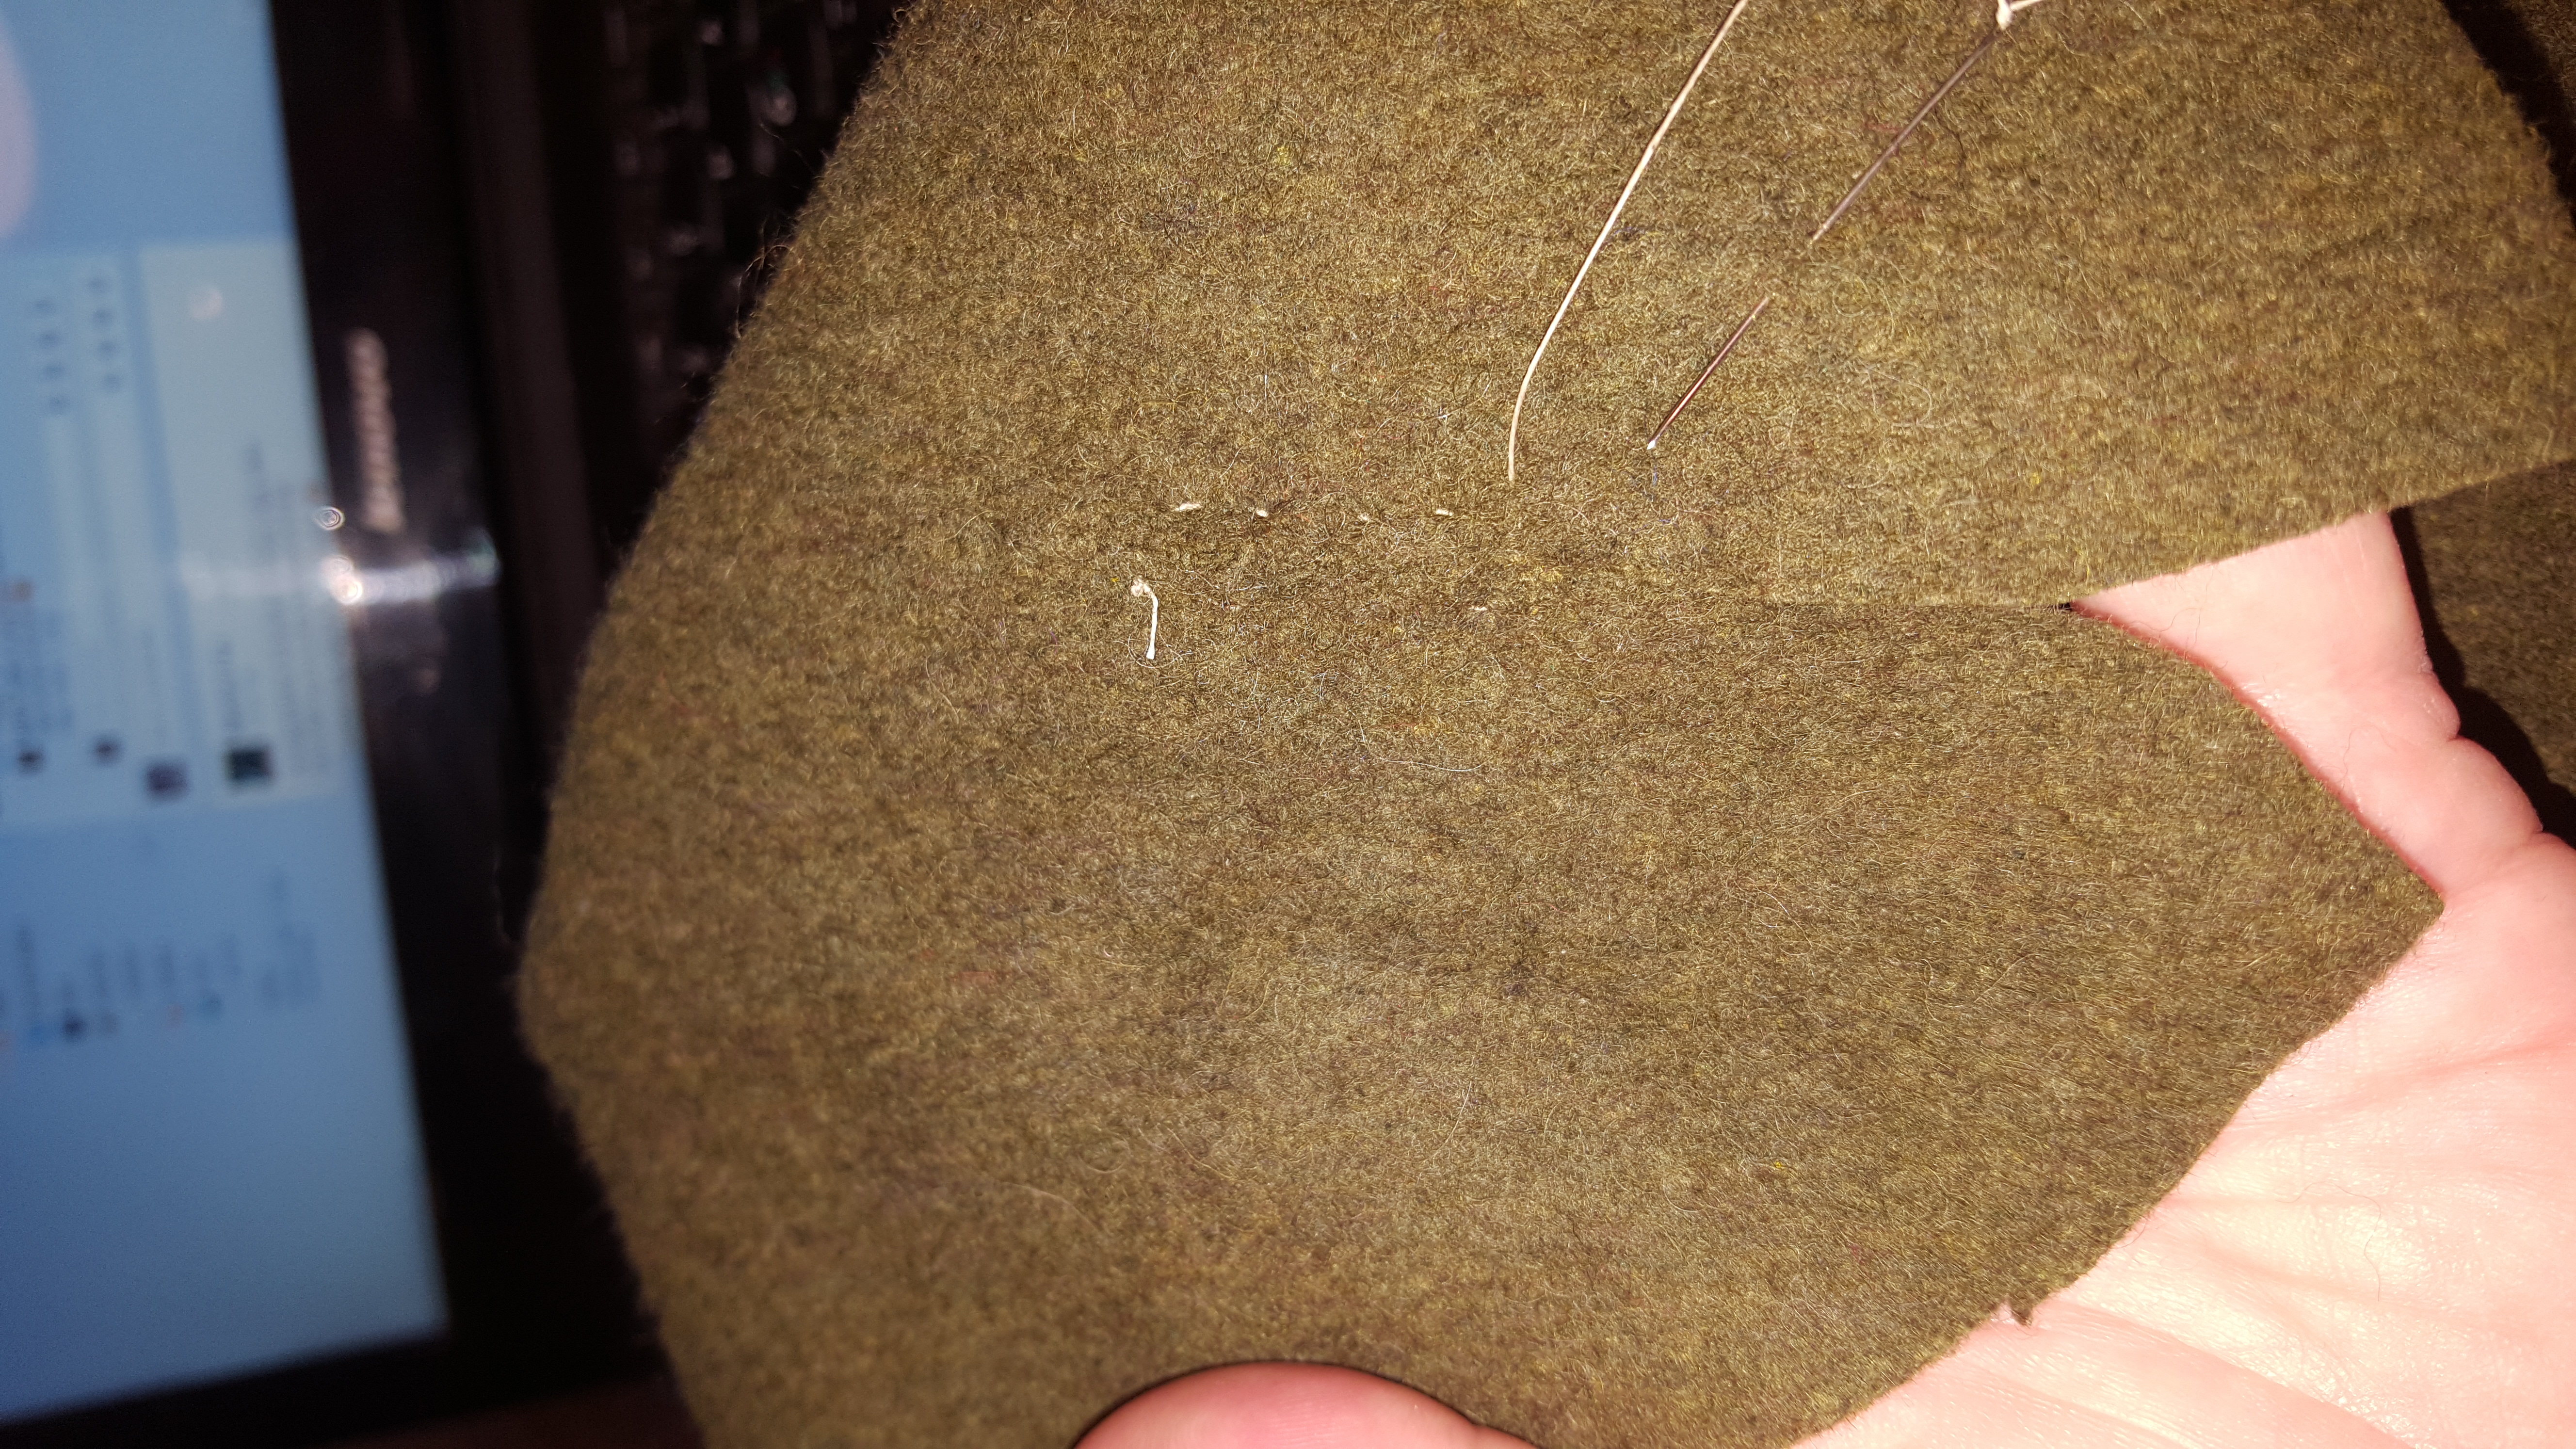
I noticed that the underside got better than the side that I have up when I sew like this. You have to put the needle in just about where you got out to take the next stitch. You will go over the gap like a zigzag almost.
Here is some pictures of me sewing in this way so you perhaps can see for yourselves


And this is the back of the hat, you can se how it is curving in on top and giving you that round three-dimensional shape that you get from the pulled felted hat.

Unfortunately, I don’t have any pictures of it beeing worn. I had deleted the one where I tested it out. And it was a trade-of to a friends husband so I haven’t any pictures of him wearing it. I will ask for one if he is ok with me posting it here on the blog 🙂

If you want to make the hat taller or pointier on top or… well any changes on the crown. Just make certain that you leave the corners at 90 degrees so they will go together flat.

If you try this out – please show the resaults here in the comments 🙂

Sewing buttons / Sy knappar

This video will be uppdated some day. But for now this will have to do. Sorry for only speaking Swedish, but I think that the images speaks for itself.
I maked this video with my phone tucked under my chin and taped to a measuringtape. So I know that the image isn’t centered and well… not that good either.
But I hope that you will get some help from it if you want to make buttons 🙂

—————————————————————————————

Den här videon kommer att uppdateras någon dag. Men den får duga så länge.
Jag låter lite tillknäppt (pun intended 😉 ) och videon är inte centrerad. Det beror på att jag har klämt fast telefonen under hakan när jag filmade och stöttat den med ett måttband som sitter fasttejpat på telefonen 😉
Slit den med hälsan så länge i alla fall.

Sleeves – theoretical / Ärmar – teoretiskt

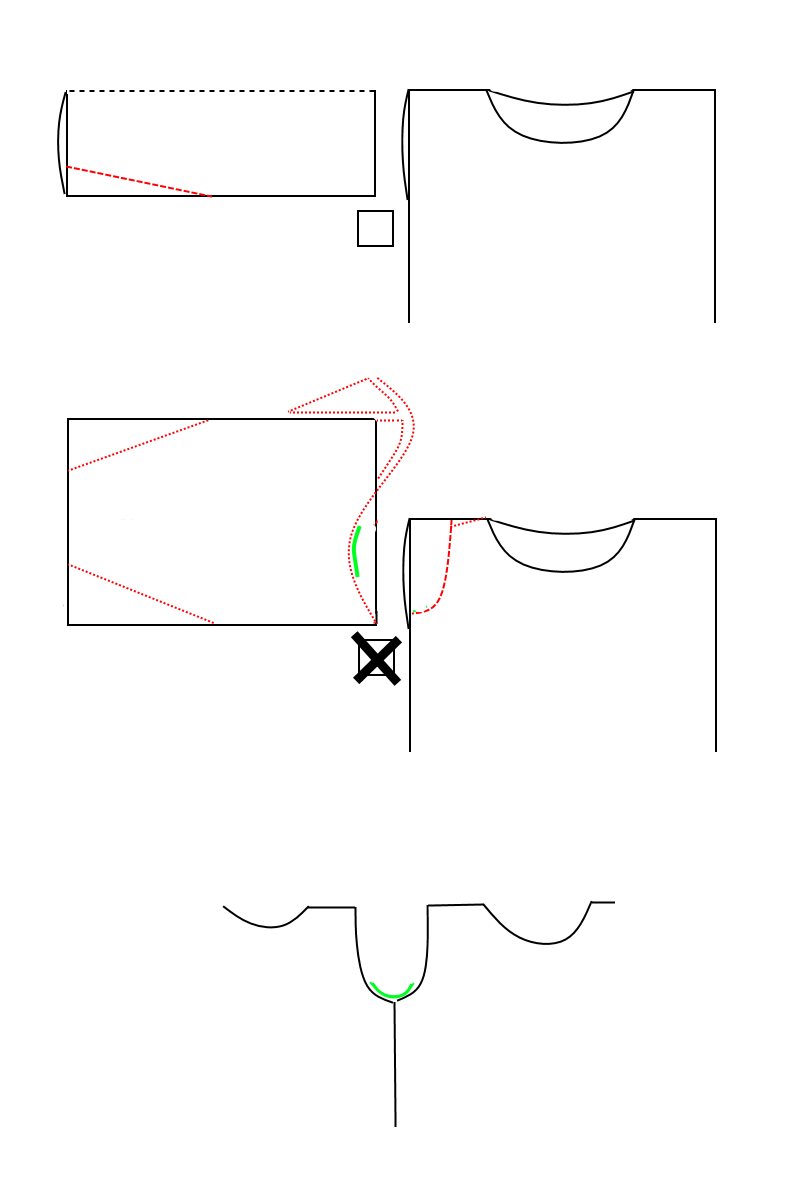
This is a simple picture that I made to try to adress the differences between a straight square and triangle-based kirtle (straight pieces with gussets). And a kirtle with a set in sleeve with a S curve.

To describe the picture…
1/ The top part is the simple straight pieces with gussets. This is praktically speaking the base for all kirtles.

2/ The middle drawing is to describe the difference between the S-sleeve and a straight one and the difference between the armhole.
The red dotted lines is the difference.

3/ The lowest drawing + the green line in the middle one is where the S-sleeeve must have the exact same shape to fit properly.

———————————————————————

Den här enkla bilden gjorde jag för att förklara skillnaden mellan en vanlig rak isättning av ärm och en S-ärm.

1/ Det översta är raka stycken och kilar-principen, du behöver inte sy särken (linneunderkläderna) på något annat sätt än så här.  Det här är i princip grundkonstruktionen för alla överdelar. Man kan utgå ifrån detta när man ska bygga en annan typ av mönster.

2/ Den mittersta ska illustrera skillnaden mellan S-ärm med format ärmhål (alla röda streckade delar är ändringar)

3/ Den nedersta bilden, samt den gröna markeringen på både den och mellersta bilden ska visa vilka delar på ärm och ärmhål som måste ha precis samma form.

The partial Herjolfsnes finding / Det icke kompletta Herjolfsnesfyndet.

I have had my eyes on this finding for quite a while now.  I have looked at many people recreating the Uvdal kirtle (Norway) and a fragment from Turku (Finland) that is similar when it comes to that those also is pleated. But I haven’t seen anyone try the Herjolfsnes nr 58.

I started as I often do, at Marc Carlssons page and turned to this page.
Then I put my fabric in the washing machine with a small amount of dye (enough to colour 500g of fabric dark brown, but i had 4 kg of fabric).  This was just to change the surface of the fabric and get it a little tint of colour as I knew that several of my friends had the same fabric in the same colour and I didn’t want us to look like we had a uniform on if we ended up next to eachother. 

After the fabric had dried, I brought my dressform down and started draping the fabric.
I ended up using the full with of the fabric for the front of the dress, and then i divided one full length of fabric in 2 so i got 1/2 with of fabric in each side.
Here I deviated from the finding and did one bigger gusset instead of 2 that was sewn togeather as I had a bit of a timecrunch and 2 long seams less to do was a good idea 

After pleating the front and sides to fit the dressform loosely I had to try to get the rest of the fabric to be enough for both arms, the back piece and the gusset in the back. To achieve this I had to make the sleeves in multiple pieces. So I looked at how the Herjolfsnes 63 had its sleeves constructed and pulled inspiration from that.
With a lot of puzzling in the computor I finally was ready to make the cut.
I ended up with about two or three pieces the size of a palm as scrap when I was finished with the entire dress.

Below you will find the pictures. I don’t yet have any picture of me wearing it, but when I get it I will update this with that picture.

Since I deviated from the finding and I learned that this fabric wasn’t optimal, I will try to do this kirtle again someday. But for now it is a fabolous winter kirtle 
* * * * * * * * * * * * * * * * * * * * * *

Jag har haft ögonen på det här fyndet länge nu. Jag har sett flera som har rekonstruerat Uvdalskjorteln från Norge och fyndfragmenten från Åbo i Finland. Båda dessa har samma sorts plisseringar, men kjorteln från Herjolfsnes har jag inte sett återskapad än.

Jag började som vanligt på Marc Carlssons sida och gick direkt till denna bild.
Sen var det dags att förbereda tyget. Eftersom vi var flera som har köpt samma tyg och jag inte ville att det skulle se ut som om vi hade uniform om vi hamnade bredvid varandra så slängde jag in tyget i tvättmaskinen på 60 grader med lite färg. Färgen skulle ha färgat 500g mörkbrunt, men med dom 4 kilo tyg som jag hade i maskinen så visste jag att det bara skulle bli en svag färgskiftning. Precis vad jag var ute efter 

Efter att tyget hade torkat så plockade jag ner min provdocka och började drapera tyg.
Jag använde fullbredd på tyget till biten fram och delade en fullbreddsdel på två för sidorna.
Sidorna på bilden (fyndet) är egentligen delade, men jag valde att göra en större bit i varje sida eftersom jag hade lite tidspress och att slippa två långa sömmar kändes som en bra idé då 

Efter att jag hade plisserat framstycket och sidorna löst så var det dags att försöka få resten av tyget att räcka till ärmar, bakstycke och bakre kil.
Så här fick jag vända mig till fyndet av Herjolfsnes nr 63 och dess delade ärmar. Med inspiration därifrån kunde jag pussla runt med delarna i datorn och få ut det jag behövde.
Det blev ca 2-3 spillbitar över i storlek av en handflata när jag var klar med hela klänningen. Snacka om tygeffektivt 🙂

Här nedan hittar du bilderna från processen.
Jag har inga bilder på mig i den färdiga kjorteln än, men jag kommer uppdatera med det så snart jag får bilder 

Eftersom jag har avvikit från originalet så kommer jag göra en till version av denna längre fram. Men just nu är jag bara glad över att ha min härliga varma vinterkjortel klar 

* * * * * * * * * * * * * * * * * *


A recap about the hose / Uppföljning av hosorna

A good friend did a tutorial on hosemaking and we do these the same way.
So if something is unclear in my sew-along, perhaps you can find the answer here 

* * * * * * * * * * * * * * * * * * * * *

En god vän har också gjort en tutorial angående att sy hosor, och vi syr våra på samma sätt.
Så om ni tyckte att något var oklart i min sew-along så kanske ni kan hitta svaret här 


A quick tutorial on hose making 


* * * * * * * * * * * * * * * * * * * * * * *

I also got a question about how the seams looks and where they sit under the foot.
I’ve tried to take a photo, but I can’t get a good image of the seams, so I made a drawing instead…
The red outline is supposed to be the edge of the hose as seen from the sole of the foot.
The blue dotted lines is the seams.

* * * * * * * * * * * * * * * * * * * * * * *

Jag har också fått en fråga om hur sömmarna ser ut och hamnar under foten.
Jag har försökt att fota, men jag får inte till någon bra bild på sömmarna, så nu har jag ritat istället…
Den röda linjen ska försöka visa hur hosan ser ut, sett från undersidan av foten.
De blåa prickade linjerna är sömmarna

Heads up / Det är huvudsaken

This will be a short tutorial. I won’t show so much of the actual sewing this time, but you can find the techqniques in the earlier sew-alongs.

You already know wich stitches to use (and if you have missed that, find the kirtle sew-along and the post that is named ”time to sew”) so let us get on with this 

This time I will make a very simple headgear. It is basically a upside down bag, a bit cone shaped.

This is my inspiration, but the measurements is off, if you compares the inch and cm measurements – they don’t add up. So rather use the picture for guidance and do your own pattern based on your measurements 

I’ve started with measuring my husbands head since it is he who will wear it   and I decided to make the gore a bit wider then what the picture on the inspiration-side suggest, and I also will make the gusset on the bias so it will stretch (making it possible to have a snug fit but not riskt it to be to small or press on the skull).
Note that my husband holds the measuringtape a bit to high.
Take a couple of measurements around the head and settle for the larger one.

* * * * * * * * * * * * * * * * * * * * * * *

Det här kommer bli en kort tutorial. Jag kommer inte visa så mycket av själva sömnaden denna gång, men du kan hitta teknikerna jag använt i tidigare sew-alongs.
Du känner redan till vilka stygn du ska använda när du syr (om du har missat det så leta på min sew-along för kjorteln och posten som heter ”dags att sy” ) så vi kör på direkt 

Denna gång kommer jag göra en väldigt enkel huvudbonad. Det är i princip en upp och nervänd konformad påse.

Det här är min inspiration för detta. Men måtten är inte att lita på. Om du jämför inch med cm så stämmer dom inte. Så använd snarare bilden för inspiration och guide till hur ditt mönster bör se ut i slutänden och använd mått som passar för ditt huvud. 

Jag började med att mäta min makes huvud eftersom det är han som ska använda denna   och jag bestämde mig för att göra kilen bredare än vad det ser ut att vara på bilden på inspirationssidan och den är också klippt på skrå för att bli lite stretchig.  (vilket gör det möjligt att ha en snäv passform men utan att klämma eller riskera att bli för liten.)
Notera att min make håller måttbandet lite högt också. Ta gärna flera mått och välj det som blev störst.


Since it says on the linked page that the crown (or rather ”the bottom of the bag” as I think of it) is made of two pieces, I did sew 2 pieces of fabric together before I made the circular shape. But you can use a single piece if you wish.
If you are good at math you can calculate the measurements of the bottom piece and the smallest with of the bands so they fit when you are going to sew everything together.
But you can also take the band and measure the narrowest part against something circular (a bowl perhaps) and then trace the shape of the bowl that fits the best. Dont forget to add seam allowance 

Then I sew the top and bottom bands together, and then sewing down the seam allowances so I have a nice size piece of fabric.
Don´t forget to press the seams as it makes it easier to sew down the seamallowances as well as making it flatter and nicer to watch.

Fold the big piece of fabric that you just made and sew the sides together so you get a kind of tunnel. Press and sew down the seam allowance here as well.

* * * * * * * * * * * * * * * * * * * * * * *

Eftersom det står på den länkade sidan att toppen / ”the crown” (eller snarare ”botten på påsen” som jag ser det) är gjord av två delar så sydde jag ihop 2 bitar tyg innan jag klippte ut cirkelformen. Men vill du hellre ha en hel bit så funkar det lika bra.
Om du är bra på matte så kan du helt enkelt räkna ut vilken diameter på cirkeln (botten) du behöver. Eller så kan du göra som mig och mäta med den smalaste delen på bandet för att hitta rätt omkrets på en skål eller liknande och sen rita av skålen. Glöm inte att lägga till sömsmån bara 

Sen sydde jag ihop dom två banden och sydde ner sömsmånerna så jag har en platt stor bit av tyg att jobba med.
Glöm inte att pressa sömmarna eftersom det gör det lättare när du fäller sömsmånerna och det blir dessutom mycket plattare och snyggare resultat.

Vik ihop den stora tygbiten som du just tillverkat och sy ihop sidorna så du får en sorts tunnel. Pressa och sy ner sömsmånerna här också.


When you have sewn it together and sewn down the seam allowance, then it is time to fit the bottom (crown) on it.
I start by measuring out 4 points on both the bottom and the narrow end of the tunnel.
On the bottom-piece you can fold it 2 times in half and put a pin or a chalkline in each fold (just the outer edge) so you end up with it marked out in quarters.
Then you do the same with the end of the tunnel.
Now you have 4 evenly marked out places to pin the bottom to the end of the tunnel. Check the fit. You should have a little bulk, but not so much that it will form folds.
You can tack it in place now and really test the fit.
When you are satisfied that it will work, just sew it in place and sew down the seam allowanse as always 

* * * * * * * * * * * * * * * * * * * * * * *

När du har sytt ihop det och sytt ner sömsmånen så är det dags att sätta på botten (eller locket, hur du vill se det).
Jag börjar med att dela in både botten och den smala delen av tunneln i 4 delar.
På bottendelen så viker jag helt enkelt den på mitten och sen mitten igen och sätter en nål eller ett kritstreck i varje veck så den blir indelad i 4 kvartar.
Sen gör jag likadant med änden på tunneln.
Nu har du 4 lika stora delar mellan markeringarna. Nåla ihop markering mot markering. Kolla av passformen. Det ska vara lite extra tyg mellan nålarna, men väldigt lite, det ska inte bildas veck när du syr ihop.
För att verkligen kolla passformen så kan du tråckla fast delen.
När du är nöjd med passformen så syr du fast den och fäller sömmarna som vanligt 


Now it is time for the gusset.
I chose to make the slit for the gusset about 13-14 cm from the side seam.
Then I pressed the edges of the slit so I can sew in the gusset from the outside as shown in the sew along for the kirtle.
To make sure that the cap will fit I just pinned the gusset in place and then my husband could try it on for size.

* * * * * * * * * * * * * * * * * * * * * * *

Nu är det dags för kilen.
Jag valde att göra slitsen för kilen ungefär 13-14 cm från sidosömmen.
Sen pressade jag kanterna på slitsen så jag kan sy kilen från rätsidan på det sätt jag visar i min sew-along för kjorteln.
För att vara säker på att mössan kommer att passa så nålade jag fast kilen och sen fick maken testa storleken.


Sew the gusset in place and sew down the seam allowance, then hem the cap and you are finished.

* * * * * * * * * * * * * * * * * * * * * * *


Sy fast kilen, fäll sömmarna på den och fålla mössan så är du klar sen.

Finishing touches / Avslutande detaljer

Today I were at a sew-date at another medievalist and finished the last hose.
I’ve gotten a cry for help a couple of days ago, so I ’m sewing a complete outfit for a friend now and this blogpost has been kept on ice for a while because of that.

* * * * * * * * * * * * * * * * * * * * * *

I dag var jag på en sydejt hos en annan medeltidare och sydde klart sista hosan.
Eftersom jag fick ett rop på hjälp för ett par dagar sedan och nu håller på att sy en komplett outfit till en vän så har den här bloggposten fått ligga på is ett tag.
* * * * * * * * * * * * * * * * * * * * * *
* * * * * * * * * * * * * * * * * * * * * *

I decided to line the hose with a strip of linnen fabric, just to make them a bit sturdier as the last ones I made stretched out a bit and is now a bit loose around the thigh.
And since I wanted to strengthen the hose at the front tip, i decided to make the linnen strips overlap there.
You can either use one long strip or two shorter and join them in the back of the hose (in line with the back seam). I used to shorter strips.

So first, start by cutting or tearing the strips in the with and length you want. Then fold the seam allowance in and make it flat by running your nails along the fold.
Press down the edge of the wollen hose so it will be easier to sew them together.
Then start to pin it in place if you feel that you need to do that, and just sew it in place with a seam of your choice. I used an overcasting seam.

* * * * * * * * * * * * * * * * * * * * * *


Jag bestämde mig för att stärka upp hosorna med en remsa av linnetyg denna gången för att göra dom lite stadigare. Dom förra jag gjorde sträcktes ut lite runt låren och är nu lite lösa där.
Och eftersom jag också ville stärka upp runt den främre spetsen så valde jag att lägga remsorna omlott där.
Du kan göra en lång remsa som går hela vägen runt eller två kortare och skarva mitt bak.
Jag använde två kortare.

Så, börja med att klippa eller riva linneremsorna till den bredd och längd du önskar. Sen viker du in sömsmånen och drar med nageln över den vikta kanten tills du har plattat till det.
Pressa ner kanten / fållen på yllehosan så blir det lättare att sy ihop delarna.
Sen nålar du fast remsan om du känner att du behöver det, och sy ihop dom med valfri söm. Jag har valt en överkastande söm här.


When you sewn all around the edge of the hose, you can do the same with the inner edge of the linnen strip.

* * * * * * * * * * * * * * * * * * * * * *

När du har sytt hela vägen runt ytterkanten så gör du samma sak på andra sidan av linneremsan.


This stitch have I used several times before, so you should know it by now 

* * * * * * * * * * * * * * * * * * * * * *

Det här stygnet har jag använt flera gånger tidigare, så du borde känna igen det nu 

* * * * * * * * * * * * * * * * * * * * * *

When you have sewn the linnen strip in place, you now have to make two lacing holes to be able to tie the hose to your linnen braies.
I use one of these, i don’t know the word for it in English, but if you don’t have one or cant find one, you can use an knitting needle or anything else with this shape.
Because if you pry apart the threads in the fabric to do the lacing holes, it will be a lot stronger than if you cut a hole.

* * * * * * * * * * * * * * * * * * * * * *

När du har sytt fast linneremsan så är det dags att göra två snörhål i varje hosa så att du kan knyta fast dom i brokorna.
Jag använder en sån här (en pryl) men man kan även använda en strumpsticka eller något annat med liknande form. Anledningen är för att om du bänder isär trådarna i tyget så får du ett mycket starkare snörhål än om du klipper upp ett hål.


Prey the threads apart until you have a big enough hole, you will have to repeat this a couple of times while sewing the lacing hole as it will shrink otherwise.

* * * * * * * * * * * * * * * * * * * * * *

Bänd isär trådarna tills du har ett tillräckligt stort hål, detta kommer du behöva upprepa några gånger medan du syr också eftersom det annars kommer att krympa ihop igen.


Use buttonhole stitches to sew around the hole.
There is quite a lot of tutorials on buttonhole stitches. You can explain these in several ways, and I will explain my way here. But if you don’t understand my way, try some one elses 
The important thing is to get kind of a knot on the thread that will end up at the edge of the hole. This will make it more durable.

* * * * * * * * * * * * * * * * * * * * * *

Använd knapphålsstygn för att sy runt hålet.
Det finns en hel del tutorials på knapphålsstygn. Man kan förklara dom på flera olika sätt, och jag kommer försöka förklara på mitt sätt här. Men om du inte förstår mitt sätt, så prova någon annans 
Det viktigaste är att få en sorts knut på tråden i kanten av hålet. Det gör sömmen mer motståndskraftig mot slitage.

* * * * * * * * * * * * * * * * * * * * * *

* * * * * * * * * * * * * * * * * * * * * *

I sew my button holes and lacing holes from the backside. They usually gets prettier that way.
So put the needle trough the fabric, then up in the hole at the left of where the thread last came trough the fabric (the left of the last stitch).
Then put the thread in front of the needle in a loop that then goes on the back of the needle.

* * * * * * * * * * * * * * * * * * * * * *

Jag syr mina knapphål och snörhål från baksidan, dom brukar bli finare på så sätt.
Så nålen ska gå genom tyget och sen upp genom hålet. Du syr åt vänster så att du alltså tar nästa stygn till vänster om senaste stygnet.
Sen låter du tråden gå framför nålen och i en båge runt och bakom nålen.


When you pull the needle trough, you should get a loop that looks like this.

* * * * * * * * * * * * * * * * * * * * * *

När du drar igenom nålen nu så bör du få en ögla som ser ut såhär.

See how it twists around the thread?
That will make a knot. Try to place the knot on the inner edge of the hole.
Don’t forget to use your tool to keep the size of the hole.

* * * * * * * * * * * * * * * * * * * * * *


Ser du hur den vrider sig runt tråden?
Det kommer bilda en knut. Försök placera knuten på innerkanten av hålet.
Glöm inte att använda prylen för att se till att du håller storleken på hålet.

* * * * * * * * * * * * * * * * * * * * * *

* * * * * * * * * * * * * * * * * * * * * *


This is how a finished hole should look like from the inside and outside.

* * * * * * * * * * * * * * * * * * * * * *

Så här ska ett färdigt hål se ut från både fram och baksida.


And here is the finished result 
* * * * * * * * * * * * * * * * * * * * * *

Och så här blev resultatet 

Making it nice and flat / Att få det platt och fint

A seam under the foot? That sounds quite inconvenient – right?

Well, it can be. And it can be quite nice.
I found that a wider seam allowance makes it nicer, since you almost get the feeling of having a nice felted sole under the foot.

So how do you make it flat? You are going to have a ”crossing” under the foot were the seams meet.

* * * * * * * * * * * * * * * * * * * * * *

En söm under foten? Det låter rätt obkevämt – eller hur?

Tja, det kan det vara. Och det kan vara rätt trevligt också.
Jag har märkt att om jag använder en bredare sömsmån så blir det skönare eftersom du nästan får känslan av att ha en filtad sula under foten.

Så hur får du det platt? Du kommer ju att ha en ”korsning” under foten där sömmarna möts.


* * * * * * * * * * * * * * * * * * * * * *
* * * * * * * * * * * * * * * * * * * * * *

I basically just trim off access fabric, leaving as little as the fabric can handle.
If the fabric freys – I leave more…
So, cut of the corners where the seams meet, fold them in and sew them down with narrow stitching.

* * * * * * * * * * * * * * * * * * * * * *

Praktiskt taget så trimmar jag bara bort överflödigt tyg och lämnar så lite det bara går för tygets räkning.
Om tyget fransar sig – så lämnar jag mer…
Så, klipp bort hörnen där sömmarna möts, vik in dom och sy ner dom med täta stygn.


This is an old picture of my first hose – not so nice stitching 
But you can see the finished crossing better here.

* * * * * * * * * * * * * * * * * * * * * *

Det här är en gammal bild på min första hosa – så inte så snygga stygn 
Men du kan se det slutgiltiga resultatet bättre här.


So, that is under the foot. How about on the top?
Just cut straight to the seam on the foot-part, but not all the way in, leave a couple mm.

* * * * * * * * * * * * * * * * * * * * * *

Så, det är under foten. Hur gör man ovanpå då?
Klipp rakt mot sömmen på fot-delen, men inte hela vägen in, lämna några mm.

Then just spread the edges apart when you sew the seam allowance down.

* * * * * * * * * * * * * * * * * * * * * *

Sen delar du bara på snittet när du syr ner sömsmånen.

I like cookies. Have a few while you are browsing my page.